C2249
C2250
1-24
C2265
Disassembly / Repair 175
(cont’d)
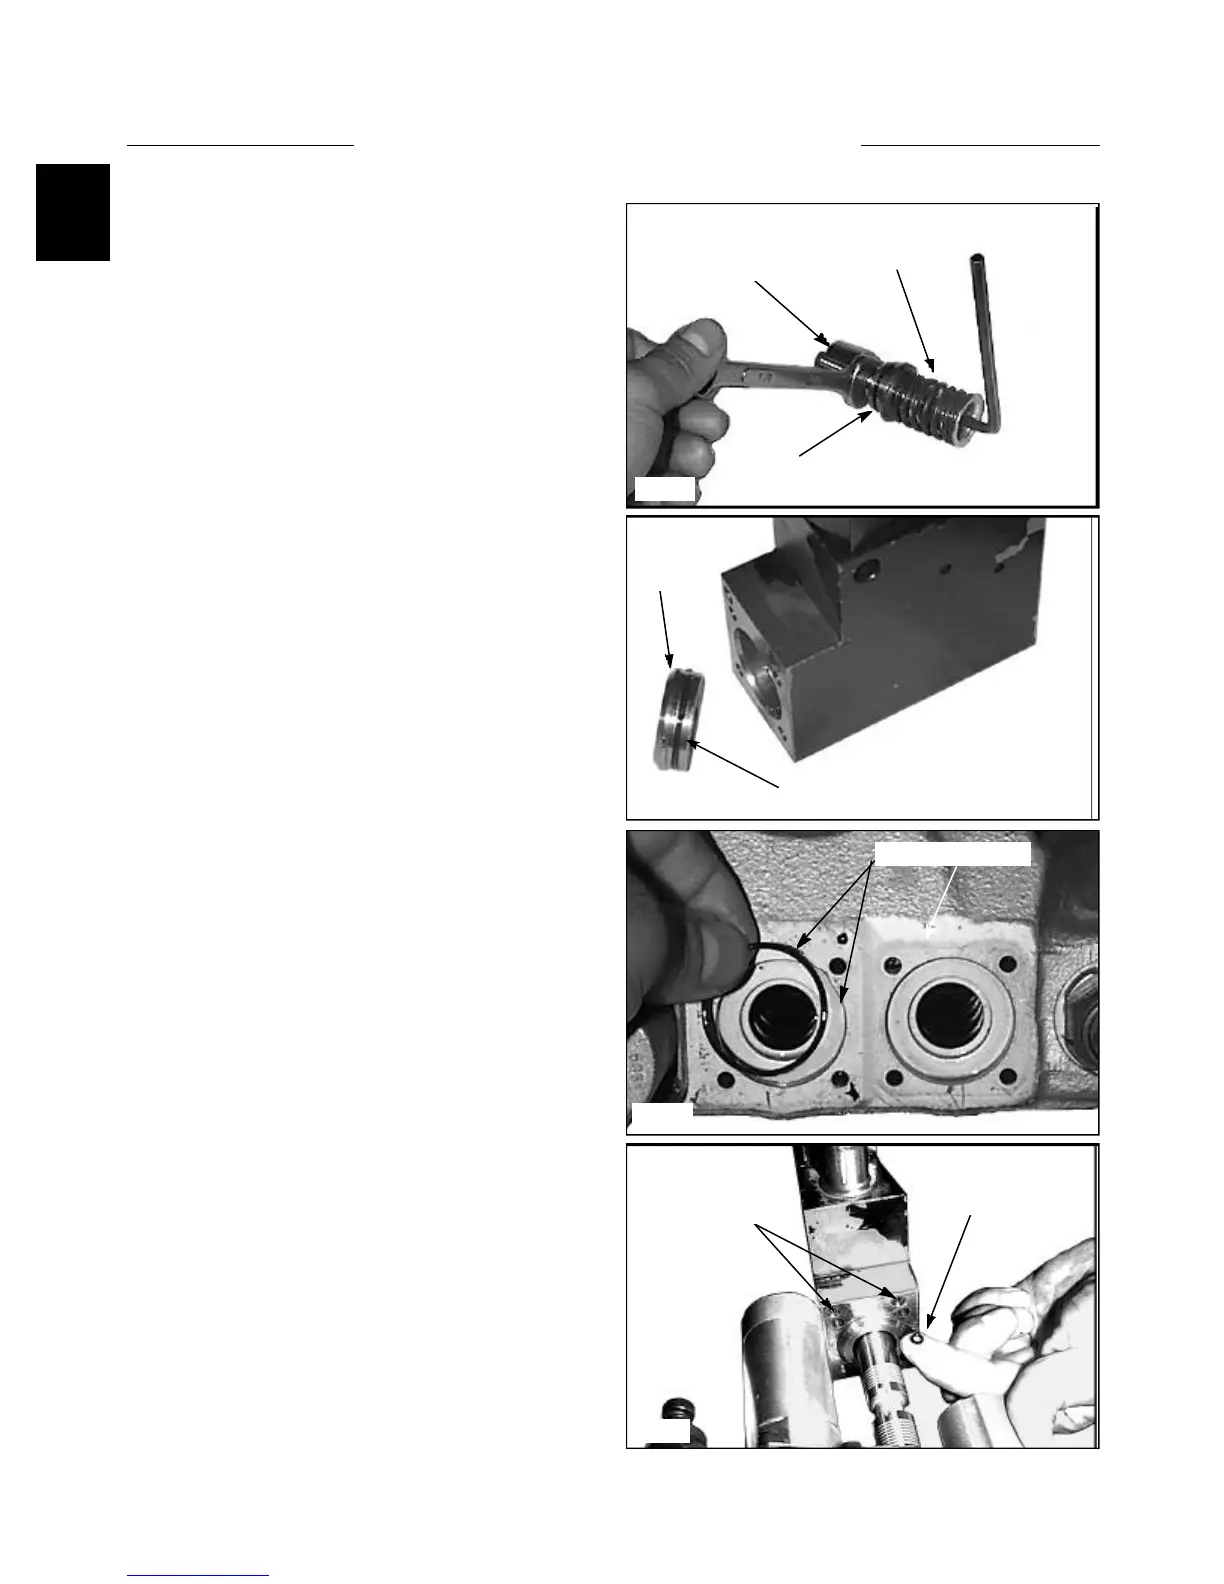
8 Pull the flange and O-ring seal back toward the
spring to expose the machined hex of the piston. Hold the
hex with a wrench while removing the spring and spring
bushings from the piston assembly. (fig. 2265) When
installing the spring assembly to the piston, apply Loctite
542 to the threads and tighten the screw to 24 Nm (17.7
lbs / ft).
NOTE: The rest of the parts in the cylinder assembly are
deemed non serviceable, replacement only.
9 The O-ring in the front part of the cylinder, next to
the valve body, is mounted to a flange and is removed by
inserting a brass punch through the rear of the cylinder
and gently tapping it out. (fig. C2280)
10 Upon assembly, use new O-ring seals. (fig. C3718)
Don’t over look the small O-ring seal between the
cylinder and valve body. (fig. C2250) Lubricate the spool
O-ring seals with system oil. Apply Castrol “Spheerol”
grease to the inside of the spring covers.
C2280
CONTROL VALVE 1.3
Piston
Spring
Flange
Flange
O-Ring
O-Ring and Seat
O-Ring Seat
O-Ring