1-23
C3723
C3763
Disassembly / Repair 175
(cont’d)
C2263
C2264
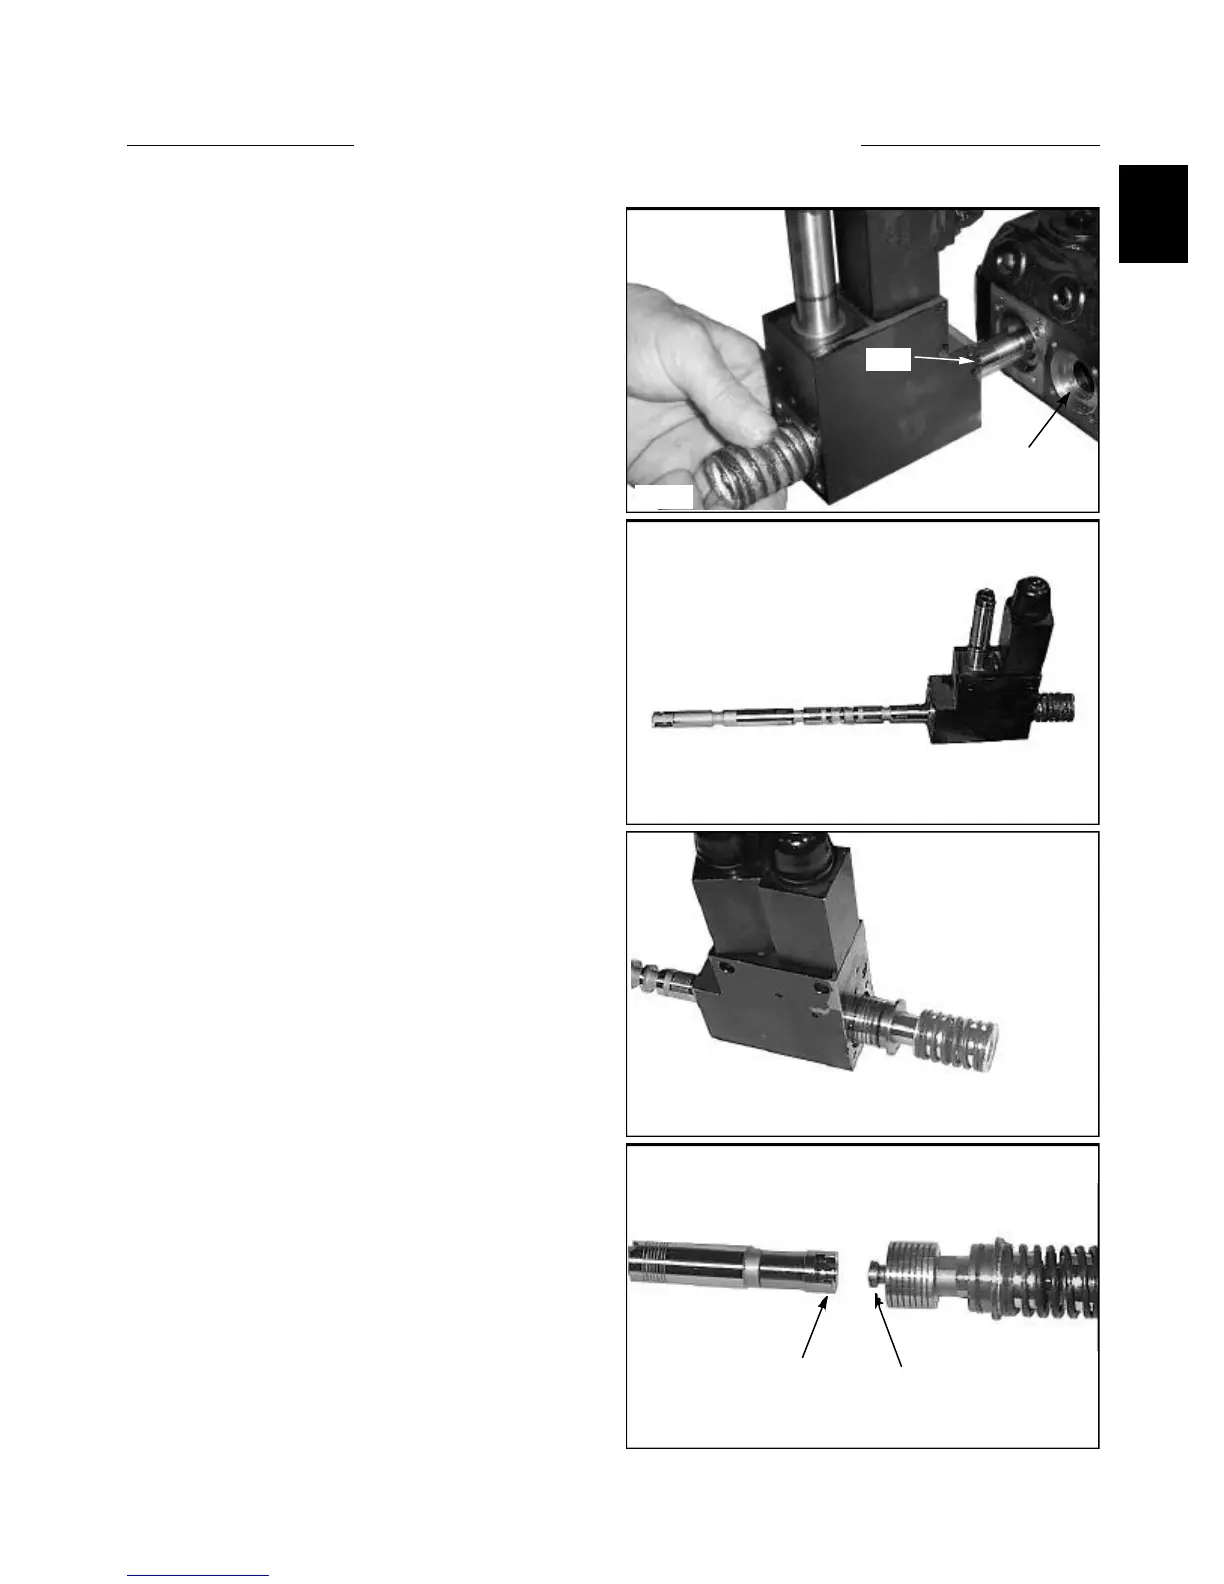
4 Remove the solenoid spool assembly from the
control valve. (fig. C3723) Note the effort required to
remove the spool from the spool bore. It should come out
smoothly without binding or “snagging” throughout it’s
travel.
7 The piston part is machined with a nail head type pin
that fits to a machined notch in the spool. (fig. C2264)
Separate the spool from the piston and spring assembly.
6 Remove the spool from the cylinder assembly by
pushing the spool rearward through the cylinder. (fig.
C2263) The spool will not pull through the front.
5 Inspect the spool and spool bore for abnormal wear.
(fig. C3763) Replace the spool and / or the control valve
if large scratches or indentations are present in the spool
or spool bore. Minor scratches can be removed from the
spool with extra fine emery cloth.
CONTROL VALVE 1.3
Remove spool assembly
Inspect spool and bore
Remove spool from cylinder
Spool connection
Spool
Spool Bore
Notch
Pin