Removal
1 Remove any attachment and lower the boom arms.
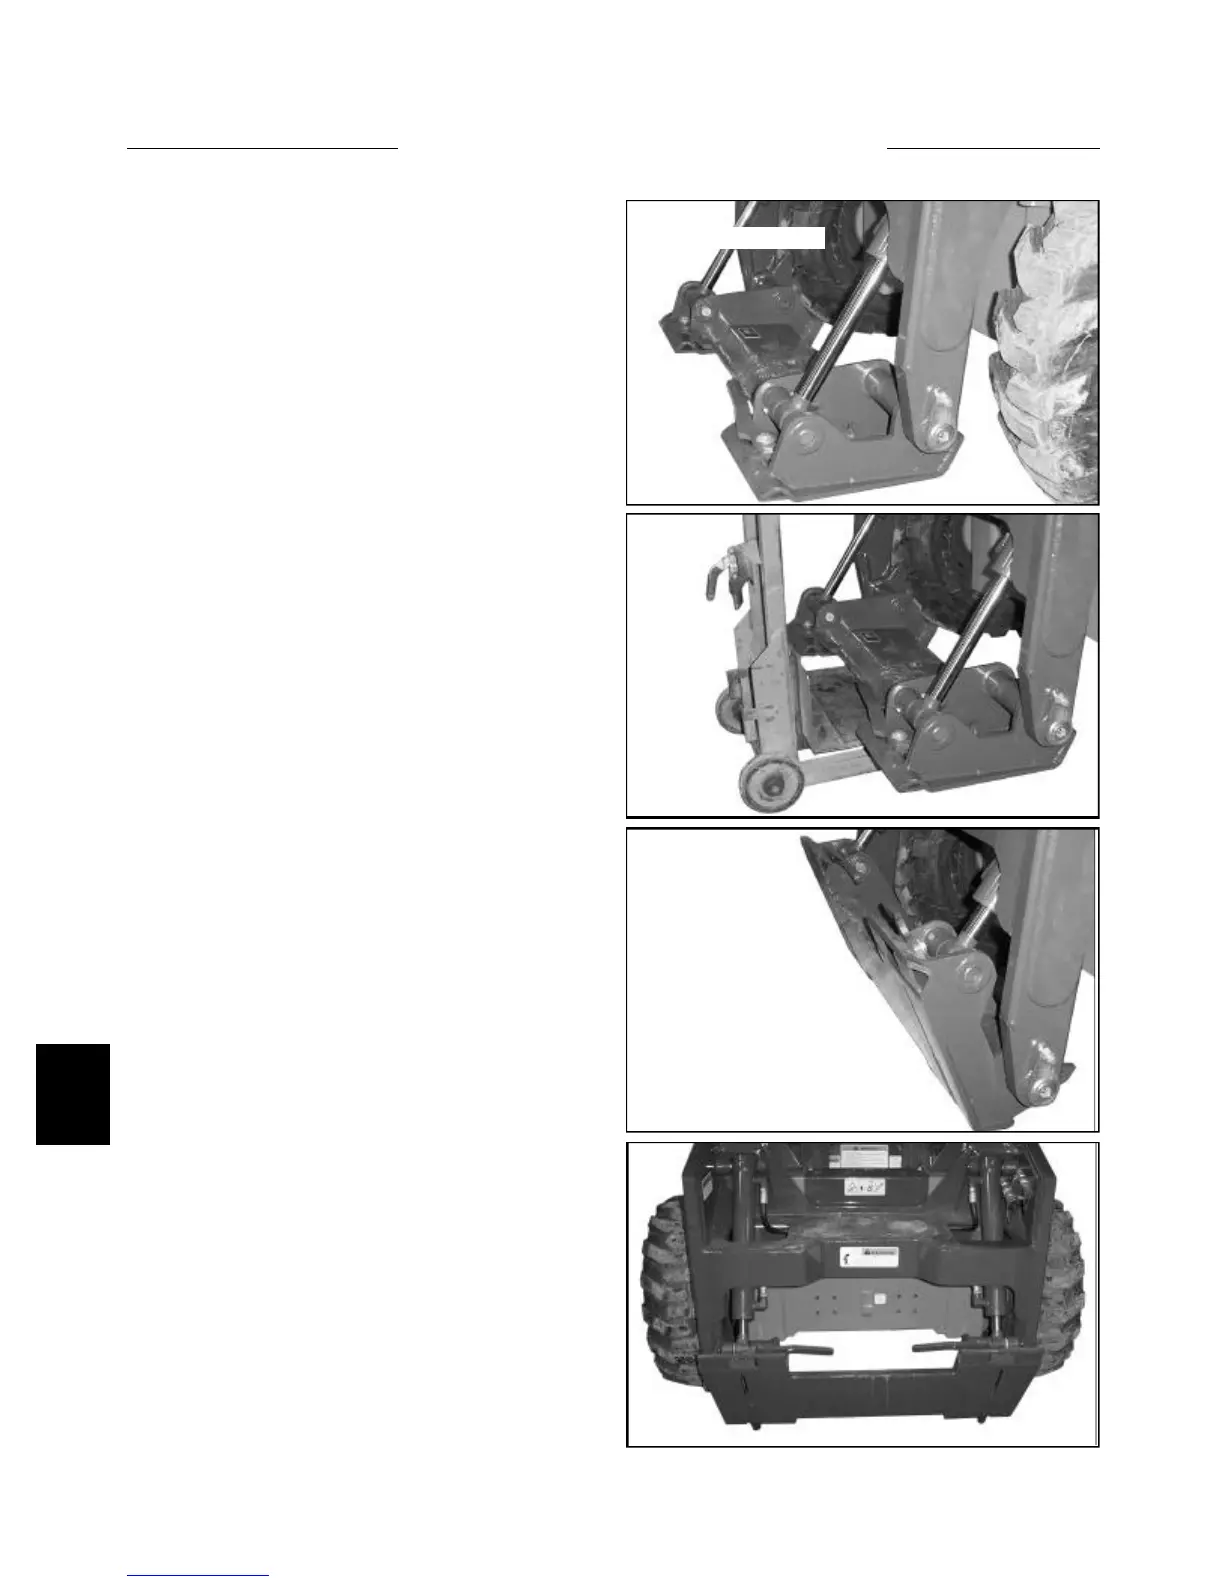
2 Start the engine and extend the hydraulic tilt cylin-
ders approximately 12 inches. (fig. C3880)
3 Shut off the engine and engage the parking brake.
4 Remove the bolts retaining the upper pivot pins to
the quick - tach frame until the quick-tach is level and the
pins removed. (fig. C3880)
5 If this repair is being performed in a proper work
shop, a portable floor jack works excellent for this next
step. Place the floor jack under the quick - tach.
(fig. C3881)
6 The floor jack is used to relieve the weight on the 2
(two) lower pivot pins. Remove the upper pivot pins.
7 Remove the nuts and or bolts retaining the 2 (two)
lower quick - tach pivot pins to the quick - tack or boom
arms. (There are two different types). (fig. C3882)
8 Remove the pivot pins using a brass drift punch and
hammer.
9 Remove the quick - tach from the loader boom arms.
6-4
C3880
C3883
C3882
C3881
Extend tilt cylinders
Installation
Upon installing the quick - tach to the loader boom arms:
1 Make sure all pivot pins and bushings are in good
condition. Do not reuse worn parts. Replace pins and
hardened bushings as required.
2 Use the floor jack to assist installing the quick - tach
to the loader boom arms. (Or lay it down on a piece of
wood. (fig. C3881)
3 Raise the bottom of the quick - tach up to align the
boom arm pivot holes and the lower quick - tach pivot
bushings. Install the 2 lower pivot pins, retaining bolts
and or lock nuts.
4 Align the 2 tilt cylinder pivot bushings with the quick
- tach bushings and install the pins and retaining bolts and
lock nuts.
5 Lubricate all pivots until excess grease can be seen
flowing out around the bushings and pins.
QUICK - TACH 6.1