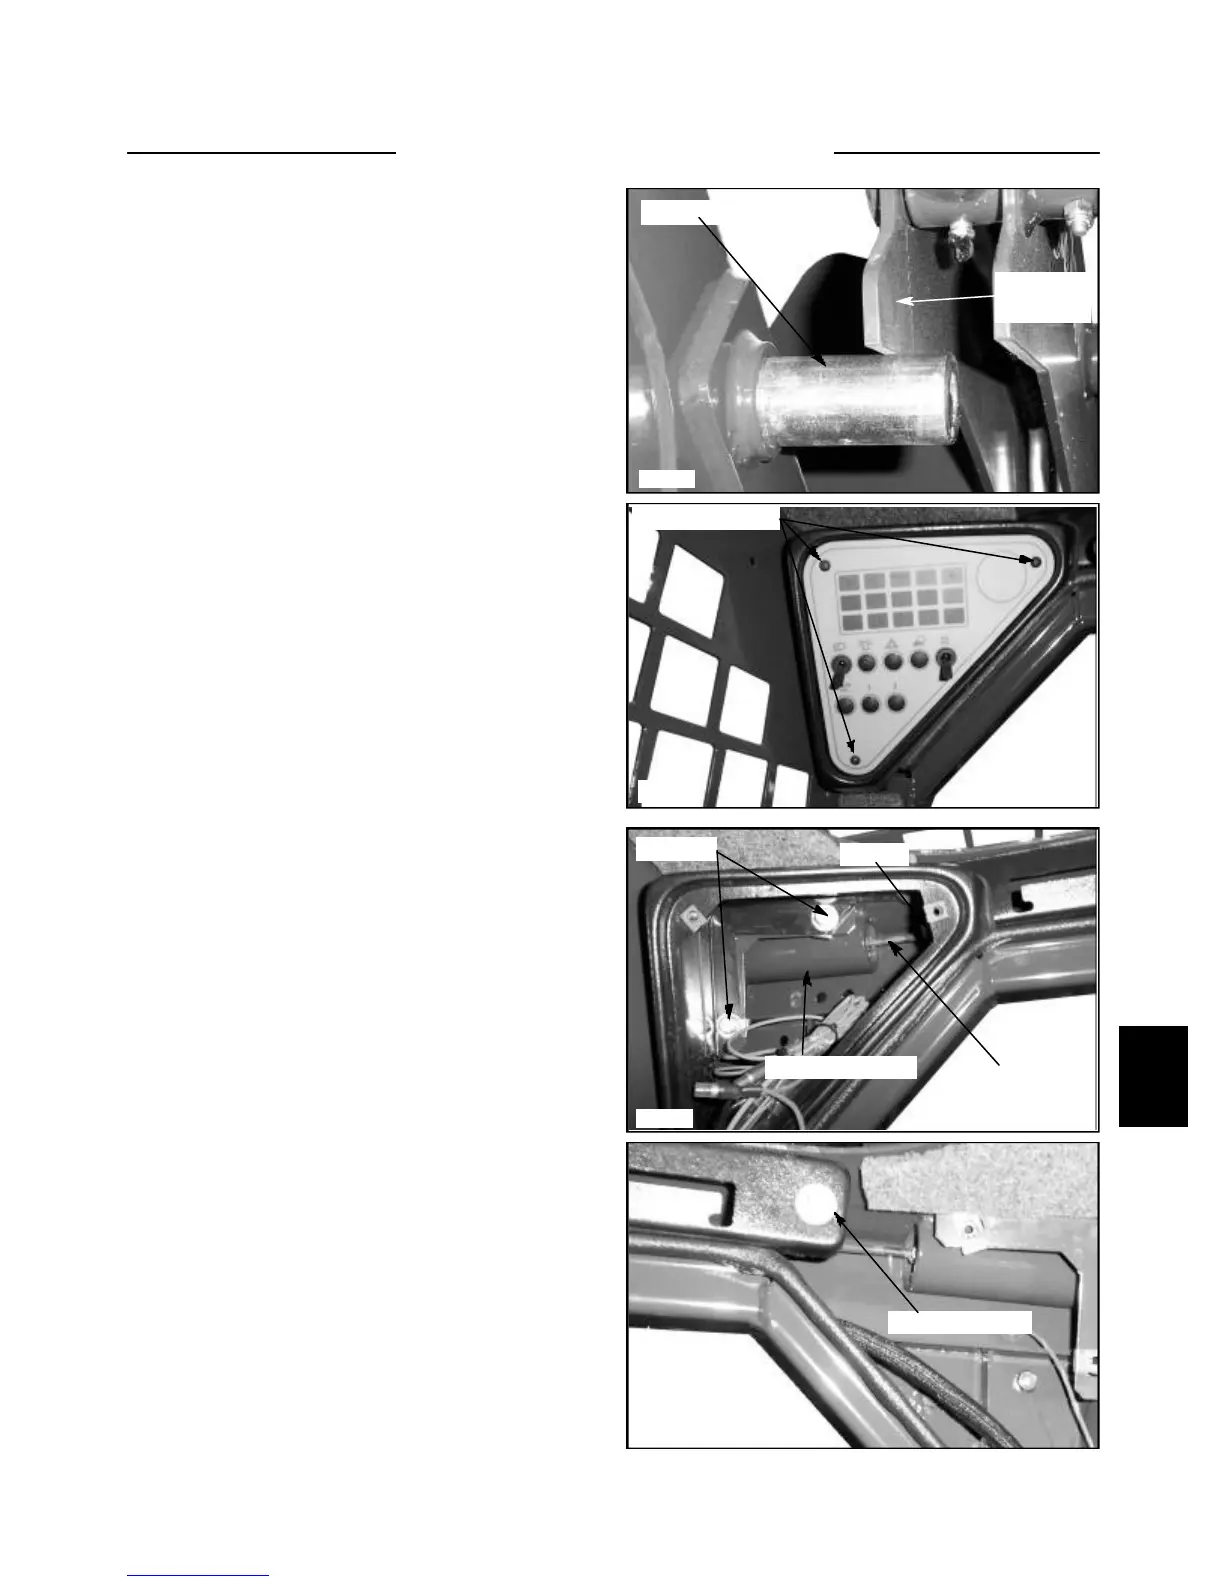
Boom Arm Supports
For safety while performing regular service or mainte-
nance work, the loader is equipped with boom supports.
(fig. C3597) The boom supports, when extended, prevent
the boom arm from lowering when servicing the
hydraulic system, controls or other repair work while the
engine is not operating.
The boom supports should be greased every 8 hours of
use and engagement depth should be checked every time
the supports are used.
1 Raise the boom arms, extend the boom supports and
allow the boom arms to lower onto the supports. Do not
pressure the hydraulic system against the boom supports.
2 Shut off the engine and engage the parking brake.
3 Measure the distance the boom support pins are pro-
truding past the inner boom arm plate. Proper adjustment
should have the support pin protruding past the inner
boom arm plate by 1/4 of an inch. (6.5mm) (fig. C3597)
4 Adjust the engagement depth by removing the 3
screws each on the left and right dash panels to access the
support pins and linkage. (fig. C3577) Only remove one
side if there is only one side to be adjusted.
5 Loosen the jam nut on the support pin linkage. (fig.
C3579) Use care to not damage the plastic center dash
panel.
6 Screw the pin in or out the amount necessary to get
the proper adjustment for support pin engagement on the
boom arms.
7 To remove the support pins and linkage, remove both
dash panels and pods to access the center boom support
panel bolts. (fig. C3598)
8 Remove the bolts and center panel and the support
pins and linkage may be removed, serviced or repaired.
9 Apply 242 Loctite (blue) to the nut and tighten it
against the support pin when installing.
10 Lubricate the boom support pins and replace the dash
panels.
6-7
C3597
C3598
C3579
C3577
Boom support pin
Boom arm
plate
Mounting screws
Pod bolts
Boom support pin
Jam nut
Linkage
Center panel bolt
BOOM ARMS 6.2