4-5
Twist Owner’s Manual
OM_TWIST_0811RevA
CHAPTER 4: BACKRESTS And PUSH HAndLES
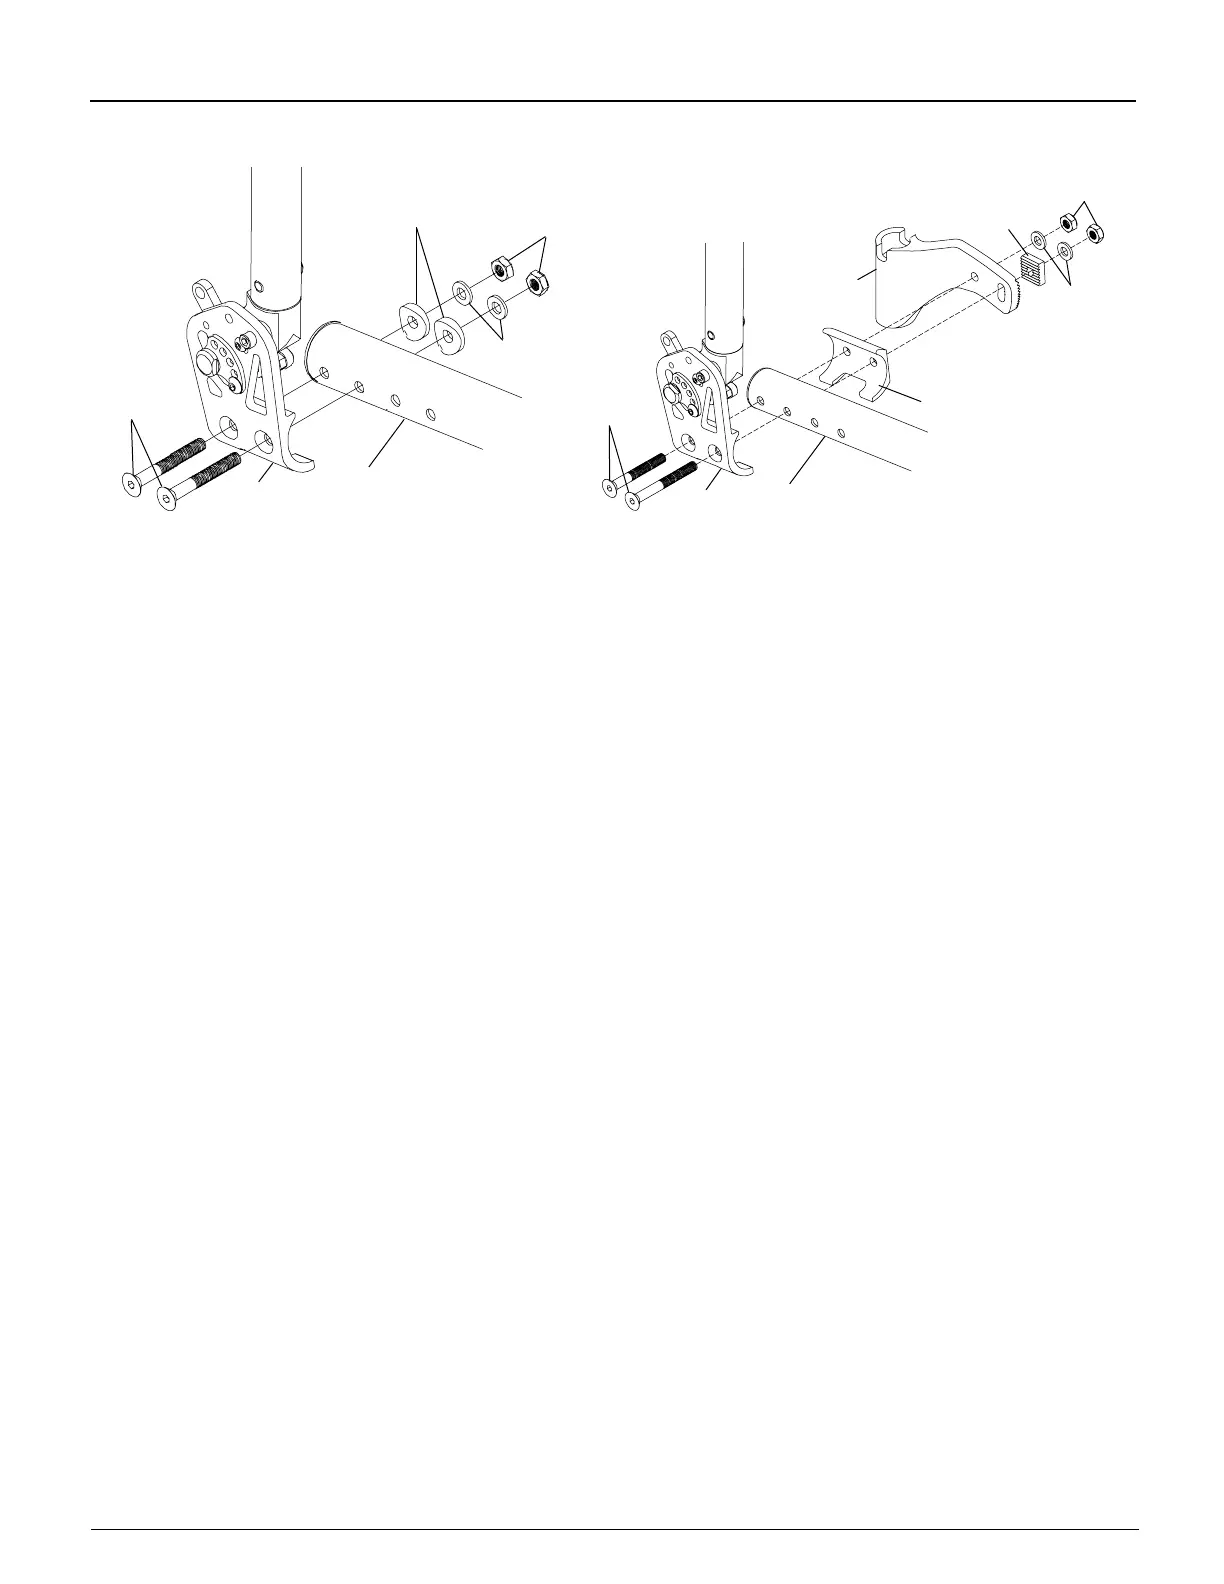
Figure 4-6
Adjusting the Depth
Allen
Screws
Back
Mount
Seat
Tube
Washers
Saddles
Nylock
Nuts
Figure 4-7
Adjusting the Depth with Swing Away Armrests
Receiver
Nylock
Nuts
Washers
Locking
Block
Backrest
Saddle
Seat
Tube
Back
Mount
Allen
Screws
Bolt-On Push Handles
Mounting
Tools Needed:
• 5/32” Allen Wrench
• 3/16” Allen Wrench
1. See Figure 4-8 for the correct location to mount the Bolt-On Push Handles to the rigidizer bar.
2. Assemble the two halves of the clamp around the rigidizer bar. See Figure 4-9.
3. Insert the 1” Allen screw through the washer into the bottom hole on the clamp and loosely tighten.
4. Insert the push handle into the clamp and align the holes in the push handle with the two upper holes in the
clamp.
5. Insert the two 1-1/8” Allen screws through the washers, the two halves of the clamp and the push handle and
securely tighten.
6. Make sure the push handle is correctly positioned for proper pushing and securely tighten the 1” Allen screw.
I WARNING
Your assistant or attendant should NEVER attempt to lift a wheelchair up a curb, step or ight of stairs by lifting on
any removable (detachable) parts, such as Bolt-On Push Handles. Similarly, your assistant or attendant should
NEVER attempt to lower a wheelchair down a curb, step or ight of stairs by holding onto any removable (detachable)
parts, such as the Bolt-On Push Handles.
If you ignore this Warning, the removable parts, such as the Bolt-On Push
Handles, could detach from the wheelchair causing you to fall, tip over or lose control of the wheelchair and seriously
injure yourself or others or damage the wheelchair.