10-6
Twist Owner’s Manual
OM_TWIST_0811RevA
CHAPTER 10: WHEEL LOCKS
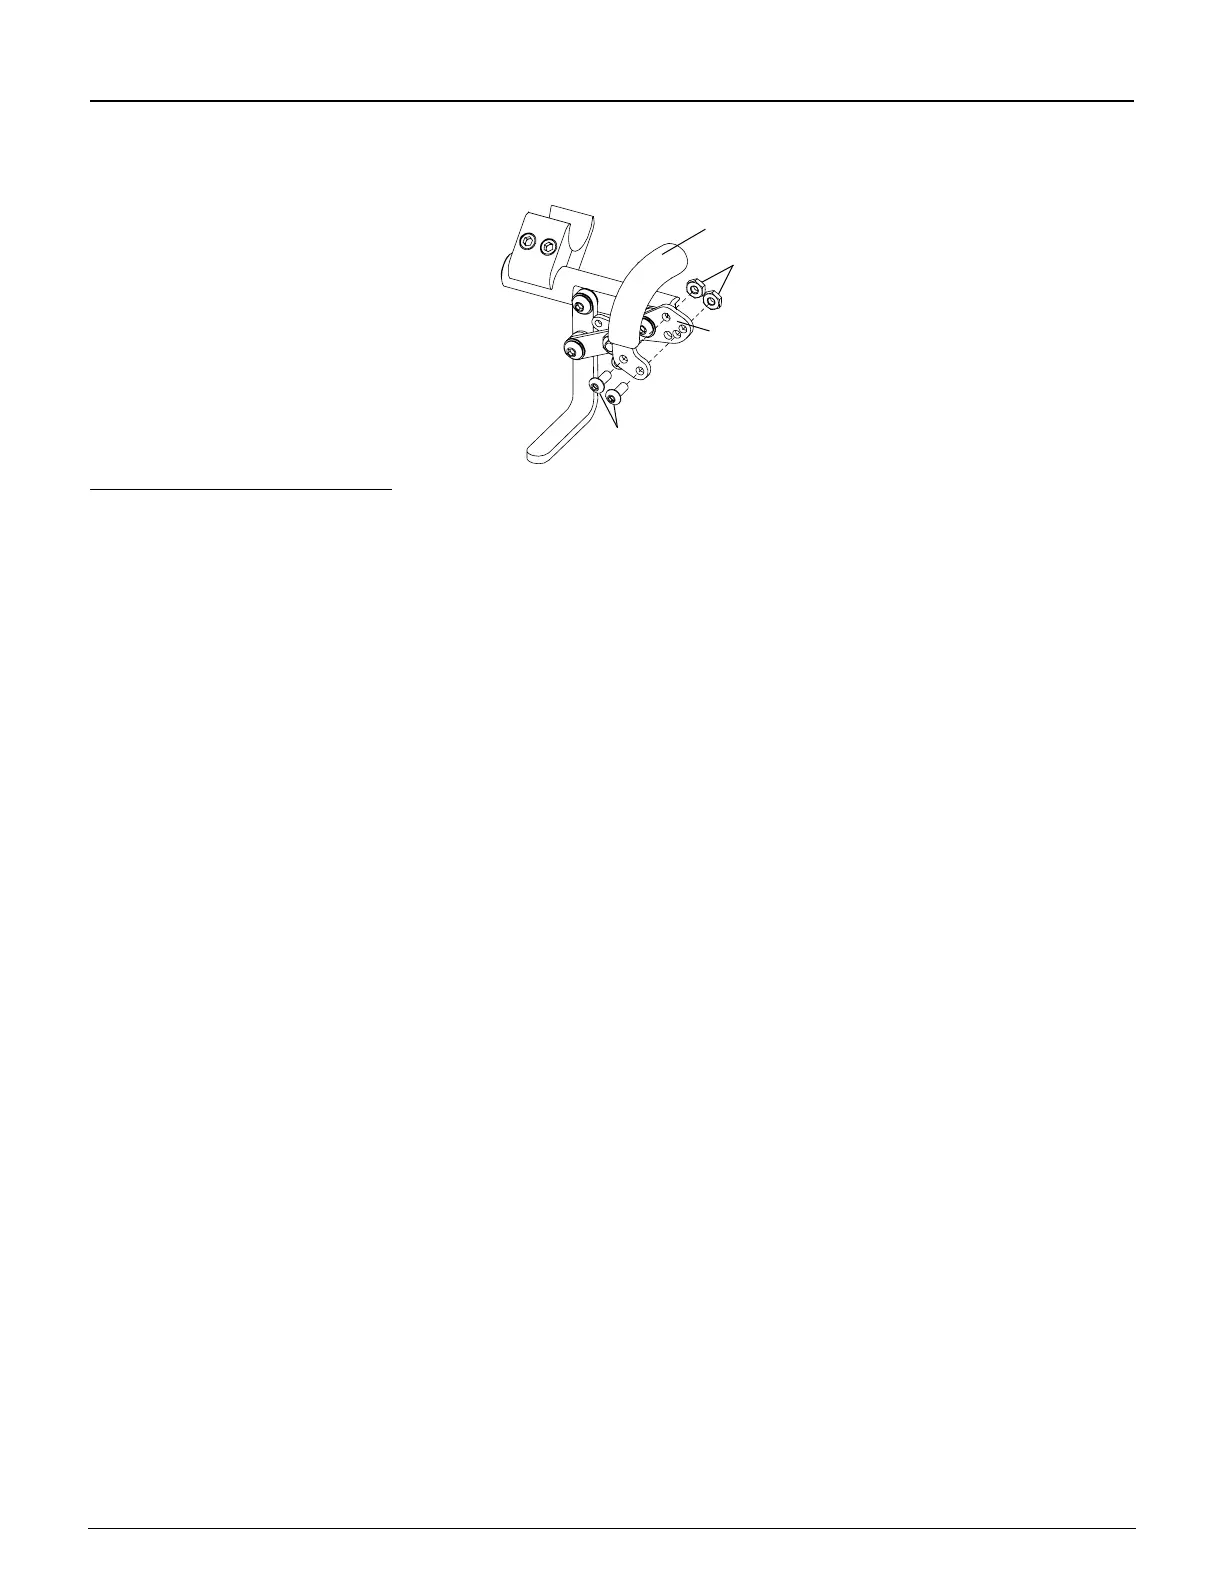
Figure 10-12
Removing the Wheel Lock Handle
Allen
Screws
Handle
Base
Locknuts
Reversed Handle Positions 1, 2, 3
You can achieve three additional wheel lock handle positions for your Uni-Lock by reversing the wheel lock handles
from the right and left Uni-Locks. To do this, follow the procedures below.
Tools Needed:
• 1/8” Allen Wrench
• 3/8” Open End Wrench
1. Remove the two Allen screws and locknuts that secure the wheel lock handle to the wheel lock handle base on
both the right and left Uni-locks. See Figure 10-12.
2. Install the wheel lock handle from the left Uni-Lock on the right Uni-Lock in the desired position (see Figures 10-
10 and 10-11).
3. Install the wheel lock handle from the right Uni-Lock on the left Uni-Lock.
4. Securely tighten all screws and locknuts.
Uni-Lock with Extension Handles
All of the adjustments set forth under “Uni-Lock” on pages 10-3 to 10-6 apply to the Uni-Lock with Extension Handles.