9-1
Twist Owner’s Manual
OM_TWIST_0811RevA
CHAPTER 9: AXLES
I WARNING
Do not attempt any of the procedures in this chapter when the chair is occupied.
If you ignore this Warning, you may
fall, tip over or lose control of the wheelchair and seriously injure yourself or others or damage the wheelchair.
Stainless and Titanium Quick Release Axles
Adjusting
I WARNING
Quick Release Axles are pre-adjusted to permit minimal “play” in the axle. TiLite recommends that you do not adjust
the axle. Improperly adjusting the axle could cause it to malfunction—too much “play” can cause the axle to bend and
become stuck in the axle sleeve; too little “play” can prevent the locking balls from engaging fully, causing the wheel to
disengage from the chair without warning. TiLite recommends that an authorized TiLite dealer make any adjustments.
If you ignore this Warning, you may fall, tip over or lose control of the wheelchair and seriously injure yourself or
others or damage the wheelchair.
Tools Needed:
• 3/4” End Wrench
• 7/16” End Wrench
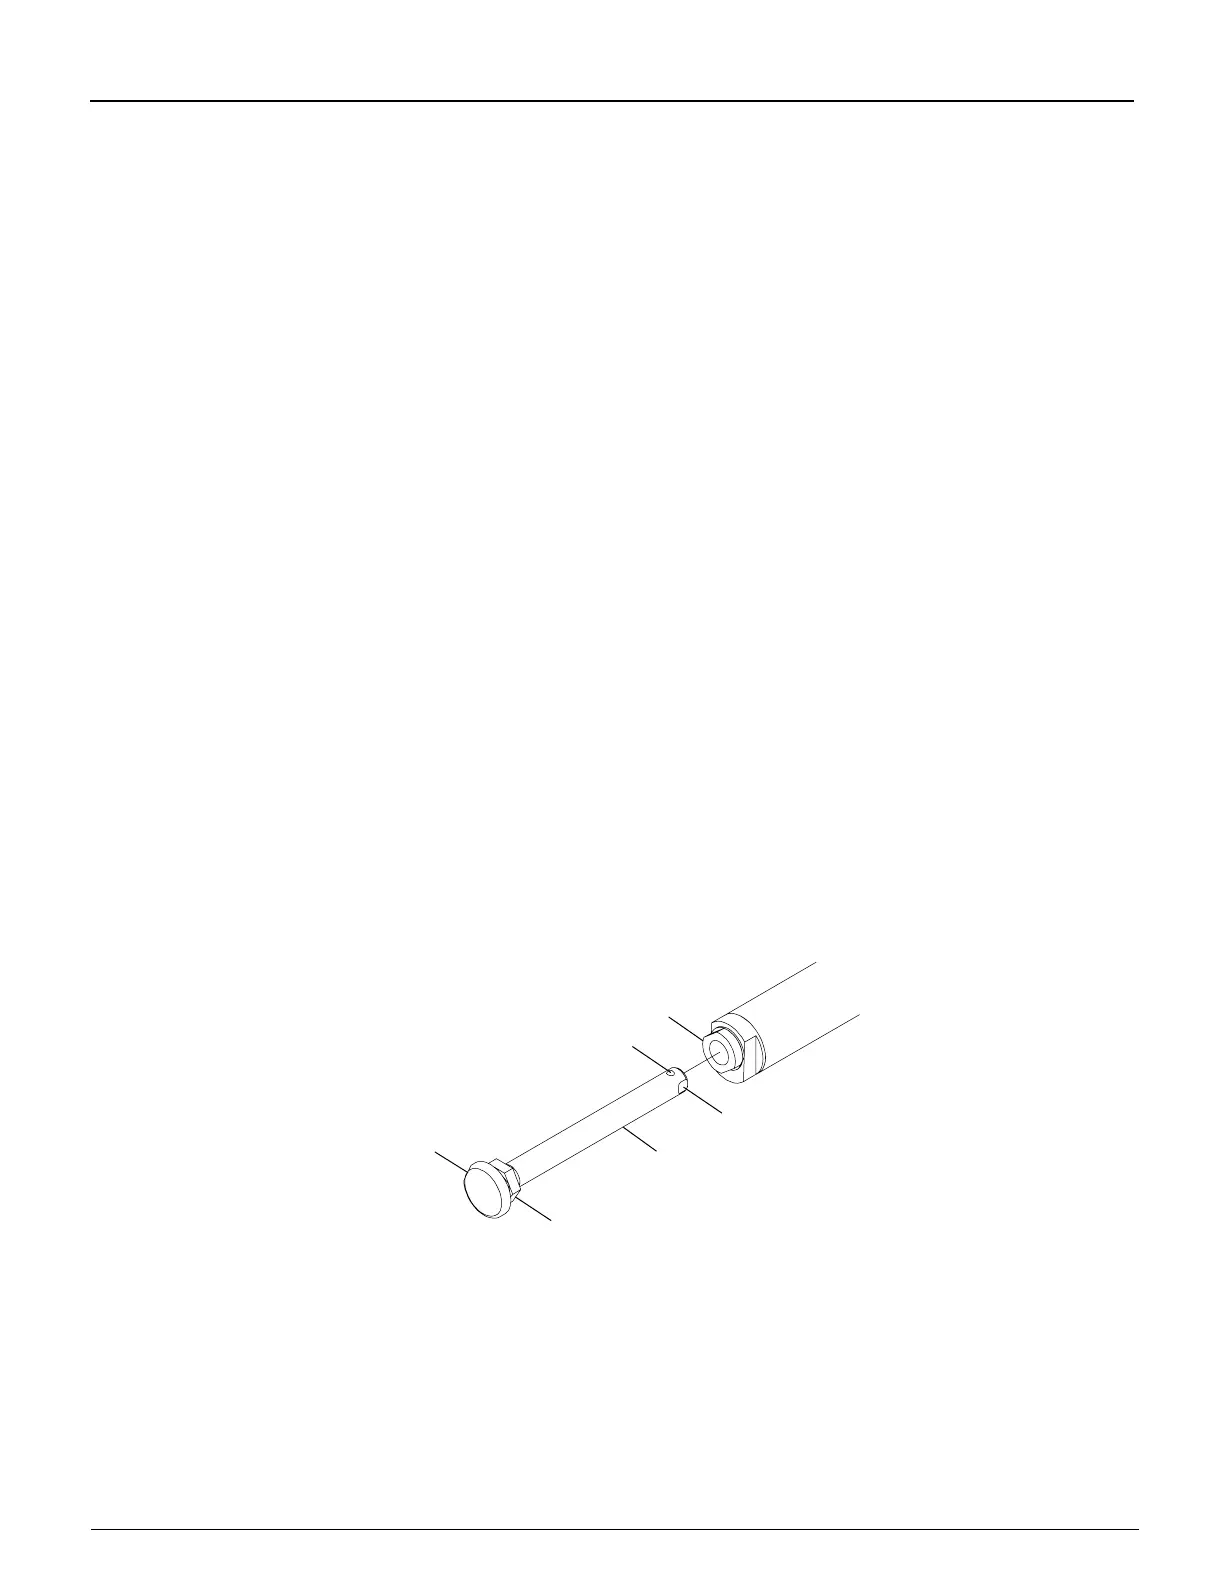
1. Depress the release button and remove the rear wheel and Quick Release Axle. See Figure 9-1.
2. Remove the axle from the wheel by depressing the release button and sliding the axle through the rear wheel hub.
3. Once removed from the hub, release the release button (the locking balls should be fully extended).
4. Increase or decrease axle “play” by adjusting the locknut while securing the opposite end of the axle using the
smaller wrench at the ats at the end of the axle.
5. Depress the release button on the Quick Release Axle and slide the axle through the rear wheel hub.
6. Depress the release button and reinstall the rear wheel into the axle sleeve.
7. Before riding in the chair, make sure the locking balls have fully secured the wheel in the axle sleeve by pulling on
the hub without depressing the release button on the Quick Release Axle. If the locking balls do not fully engage,
repeat these procedures and increase the “play” (i.e., increase the distance between the locknut and the locking
balls) to permit the locking balls to fully engage properly. Also, check to make sure there is not too much “play” in
the axle.
Flats
Axle
Sleeve
Figure 9-1
Adjusting the Quick Release Axle
Locking Balls
Axle
Locknut
Release
Button