68
Work on the product
Replacing the motor
TK Elevator
BA, TW45 | 6231003860 | 03/2023
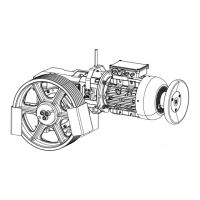
7.7 Replacing the motor
Order a motor with coupling hub on the motor side. Motors of the make CEG
general include a clutch hub.
Disassembly
1. Disconnect the power from the installation and secure it against reactiva-
tion.
2. Secure the car and counterweight against movement.
3. Attach and secure the motor to the lifting gear.
4. Unplug the electrical connections and lines from the motor.
5. Undo the nuts of the motor mounting on the housing flange.
6. Undo the bolts of the flexible coupling.
In the case of the flexible coupling, the elastomer part of the coupling
remains screw-connected to the brake disc.
7. Carefully pull the motor off the coupling connection.
8. If the replacement motor was delivered without a handwinding wheel and
encoder, remove these from the old motor and, including the encoder
mount (clip nut), use them for the new motor.
Installation
1. Place the replacement motor ready for use.
2. Compare the motor data.
3. Attach and secure the motor to the lifting gear.
4. Align the motor to the coupling and housing flange of the gear.
5. By turning the motor shaft, align the lightly greased coupling halves to one
another (tooth to gap; the elastic gear ring must be located between the
clamps of the two coupling halves.)
6. Push the motor and gear coupling together.
7. The locations of the mounting holes must match those of the screws.
8. Push on the motor until the face of the motor contacts the gear flange or
flange ring.
9. Mount the motor on the gear flange.
10. Tighten the nuts evenly alternately and cross-wise up to the prescribed
tightening torque
Chap.10.1P.75.
11. Connect the connection line in the terminal box.
12. Make the electrical connections as per terminal connecting plan Installa-
tion.
13. Establish the connections of the brake and encoder to the control system.
14. Check the function of the brake before commissioning.