100
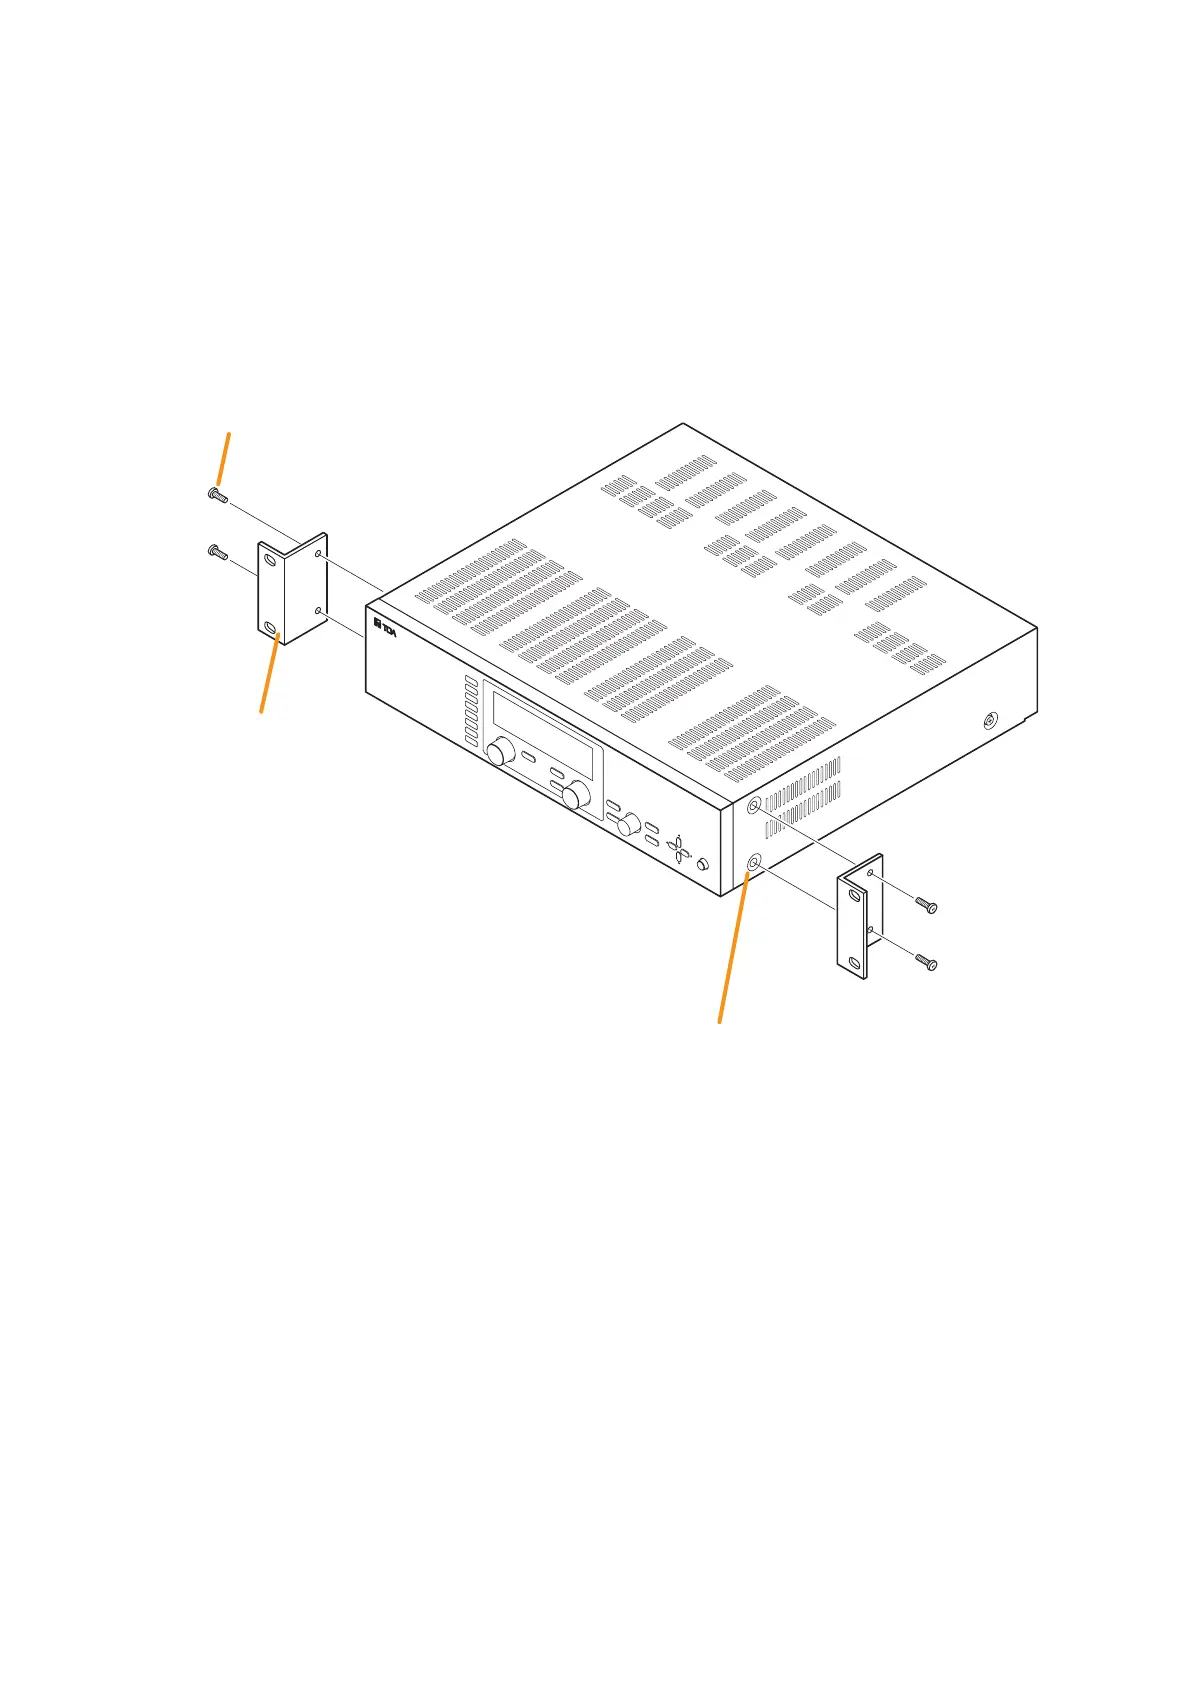
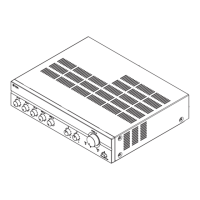
Use the supplied rack mounting bracket when mounting the unit in an equipment rack.
Step 1. Remove four M4 x 8 screws on the sides.
The removed screws are no longer used.
Step 2. Attach the rack mounting bracket to the unit using the supplied four M4 x 16 bracket mounting screws.
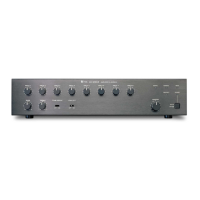
ON/OFF
O
UTPUT SEL
ON/OFF
OUTPUT VOLUME
INPUT VOLUME
POWER
UTILI
TY
ES
C/BACK
MEMORY
ENTER
PARAMETER
8
7
6
5
4
3
2
1
INPUT SELECT
Rack mounting bracket
(supplied)
Screws removed in Step 1 are no longer used.
Bracket maunting screw M4 x 16 (supplied)
Notes
• Remove 4 plastic feet on the bottom surface when mounting the unit in a rack.
• Rack mounting screws are not supplied with the unit. Use the screws that are appropriate for the rack.
• Install the unit at a well-ventilated place, and be sure to mount a 1U or more size perforated panel above
and below the unit to prevent the unit's internal temperature rise.
17. RACK MOUNTING BRACKET ATTACHMENT