BrakeMaintenance
AdjustingtheParkingBrake
ServiceInterval:Every25hours
Every200hours
1.Engagetheparkingbrake.
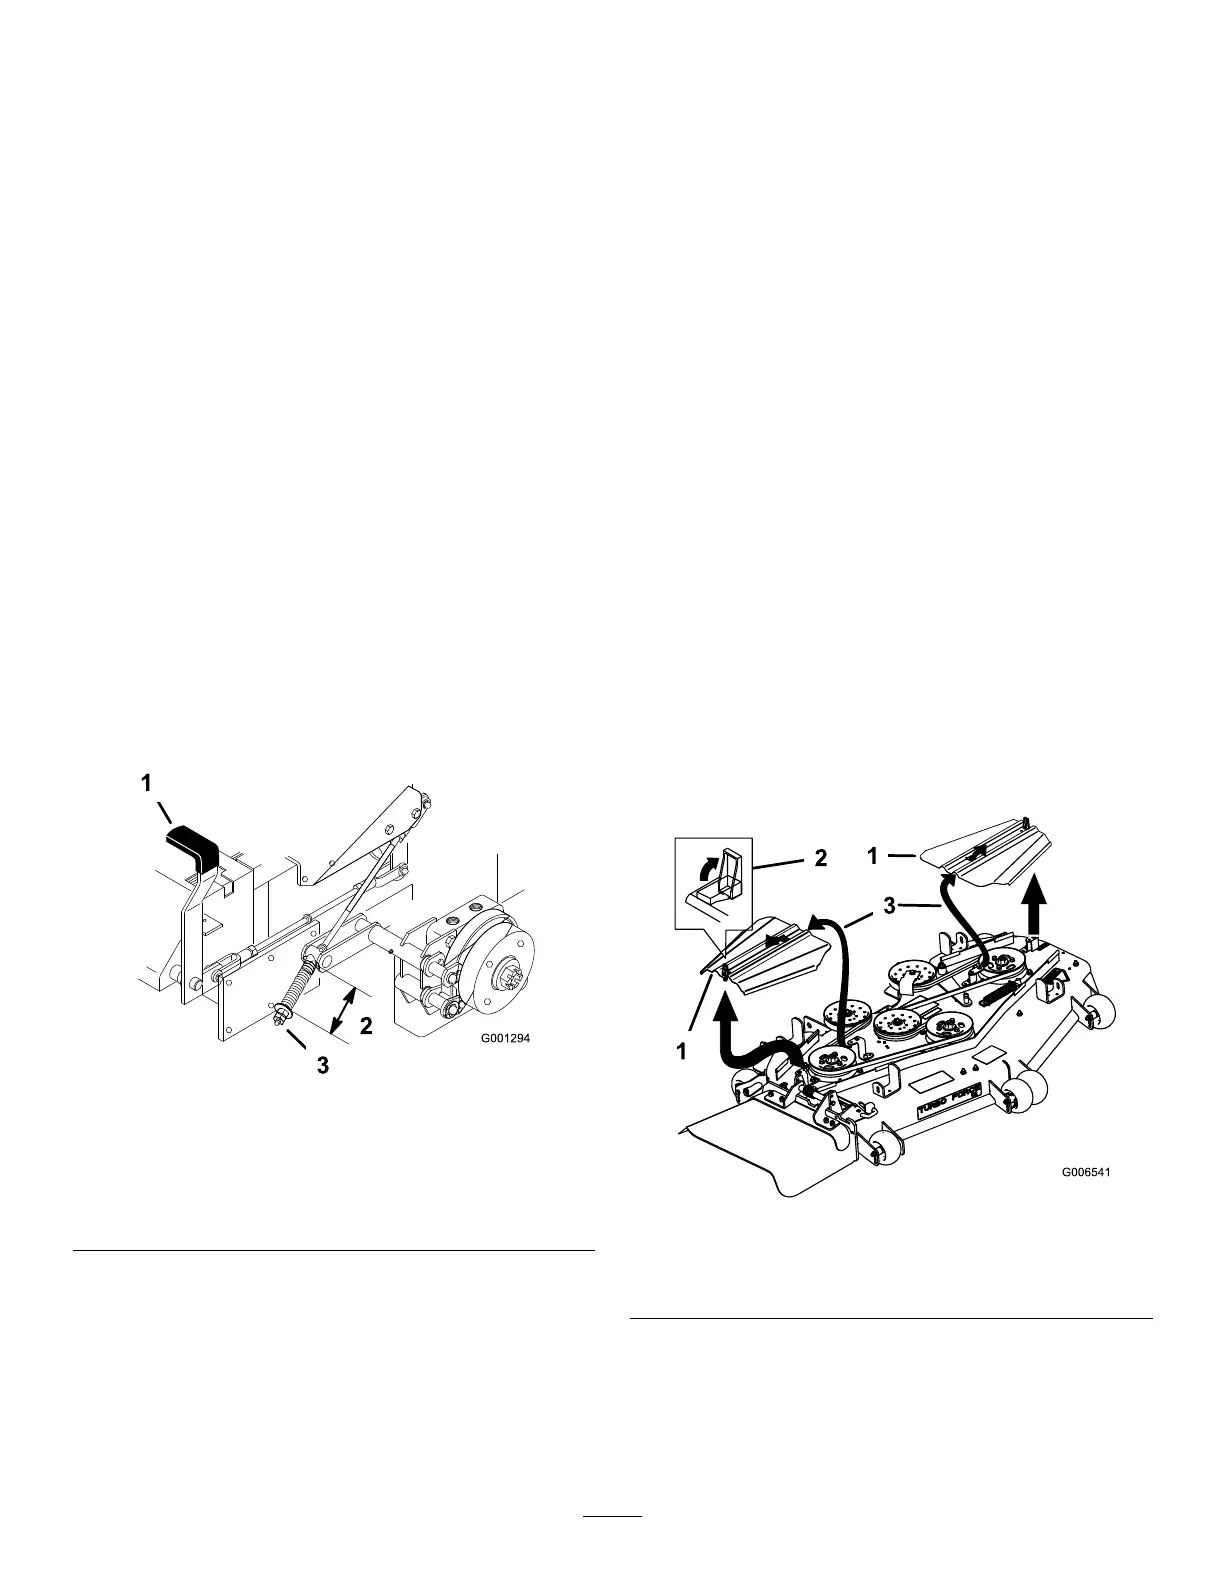
2.Measurethelengthofthespring(Figure80).
Note:Themeasurementshouldbe64mm(2-1/2
inches)betweenthewashers.
3.Ifadjustmentisnecessary,disengagetheparkingbrake,
loosenthejamnutbelowthespringandadjustthenut
directlybelowthespring(Figure80).
4.Turnthenutuntilthecorrectmeasurementisobtained.
Note:Turnthenutclockwisetoshortenspringlength
andturncounter-clockwisetolengthenthespring.
5.Tightenthe2nutstogether.
6.Engagetheparkingbrakeandcheckthemeasurement
ofthespringagain.
7.Ifanadjustmentisnecessary,repeattheprocedures
above.
8.Repeatontheoppositesideofmachine.
g001294
Figure80
1.Brakeleverinengaged
position
3.Adjustingnutandjamnut
2.Spring—64mm(2-1/2
inches)
BeltMaintenance
InspectingtheBelts
ServiceInterval:Every100hours
Checkthebeltsforsquealingwhenthebeltisrotating,blades
slippingwhencuttinggrass,frayedbeltedges,burnmarksand
cracksaresignsofawornmowerbelt.Replacethemower
beltifanyoftheseconditionsareevident.
ReplacingtheMowerBelt
Squealingwhenthebeltisrotating,bladesslippingwhen
cuttinggrass,frayedbeltedges,burnmarksandcracksare
signsofawornmowerbelt.Replacethemowerbeltifanyof
theseconditionsareevident.
1.Disengagetheblade-controlswitch(PTO),movethe
motion-controlleverstotheNEUTRAL-LOCKposition,
andengagetheparkingbrake.
2.Shutofftheengine,removethekey,andwaitforall
movingpartstostopbeforeleavingtheoperating
position.
3.Loosenthebottomboltholdingthemower-deck
curtaintothemowerdeck.RefertoReleasingthe
Mower-DeckCurtain(page36).
4.Removethesheet-metalguard.RefertoRemovingthe
Sheet-MetalGuard(page37).
5.Removethebeltcovers(Figure81).
g006541
Figure81
1.Beltcover3.Insertslotintothetab
2.Latch
6.For72inchmowers,loosentheidlerplateboltsholding
theidlerplate(Figure84).
7.Removetheidlerspring.
8.Removethebeltguideonthespring-loadedidlerpulley
showninFigure82andFigure84.
55