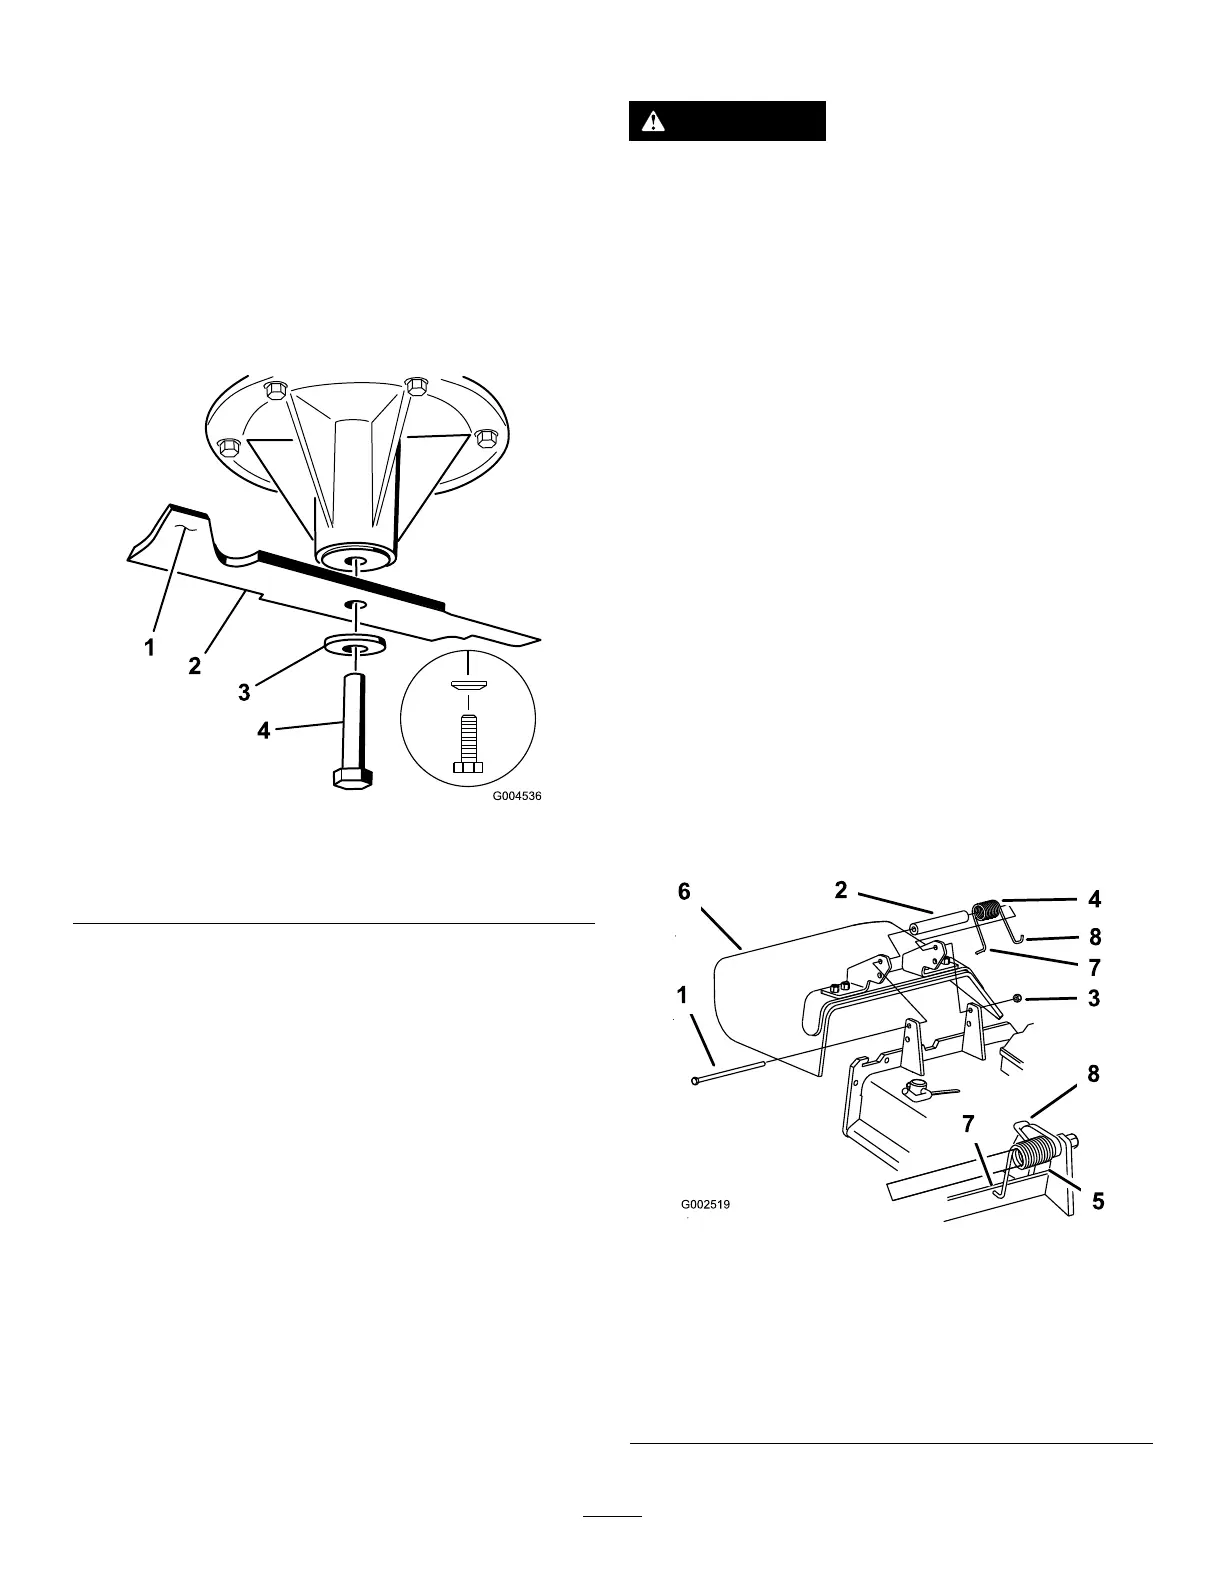
InstallingtheBlades
1.Installthebladeontothespindleshaft(Figure106).
Important:Thecurvedpartoftheblademustbe
pointingupwardtowardtheinsideofthemowerto
ensurepropercutting.
2.Installthespringdiskandbladebolt(Figure106).
Note:Thespring-diskconemustbeinstalledtoward
thebolthead(Figure106).
3.Torquethebladeboltto115to150N∙m(85to110
ft-lb).
g004536
Figure106
1.Sailareaoftheblade3.Springdisk
2.Blade4.Bladebolt
ReplacingtheGrassDeector
WARNING
Anuncovereddischargeopeningcouldallowthe
lawnmowertothrowobjectsintheoperator'sor
bystander'sdirectionandresultinseriousinjury.
Also,contactwiththebladecouldoccur.
•Neveroperatethelawnmowerunlessyouinstall
acoverplate,amulchplate,oragrasschuteand
catcher.
•Makesurethatthegrassdeectorisinthedown
position.
1.Removethelocknut,bolt,springandspacerholding
thedeectortothepivotbrackets(Figure107).
2.Removethedamagedorworngrassdeector.
3.Placethespacerandspringontothegrassdeector.
PlacetheLendofthespringbehindthedeckedge.
Note:MakesurethattheLendofthespringis
installedbehindthedeckedgebeforeinstallingthebolt
asshowninFigure107
4.Installtheboltandnut.
5.PlacetheJ-hookendofthespringaroundthegrass
deector(Figure107).
Important:Thegrassdeectormustbeableto
lowerintoposition.Liftthedeectoruptotest
thatitlowersintothefull-downposition.
g002519
Figure107
1.Bolt
5.Springinstalled
2.Spacer6.Grassdeector
3.Locknut
7.L-endofspring,place
behinddeckedgebefore
installingbolt
4.Spring8.J-hookendofspring
70