Note:Thedifferencebetweenthedimensions
obtainedinsteps4and6mustnotexceed3mm(1/8
inch).
Note:Ifthisdimensionexceeds3mm(1/8inch),the
bladeisbentandmustbereplaced.
WARNING
Abladethatisbentordamagedcouldbreak
apartandcouldseriouslyinjureorkillyouor
bystanders.
•Alwaysreplaceabentordamagedblade
withanewblade.
•Donotleorcreatesharpnotchesinthe
edgesorsurfacesoftheblade.
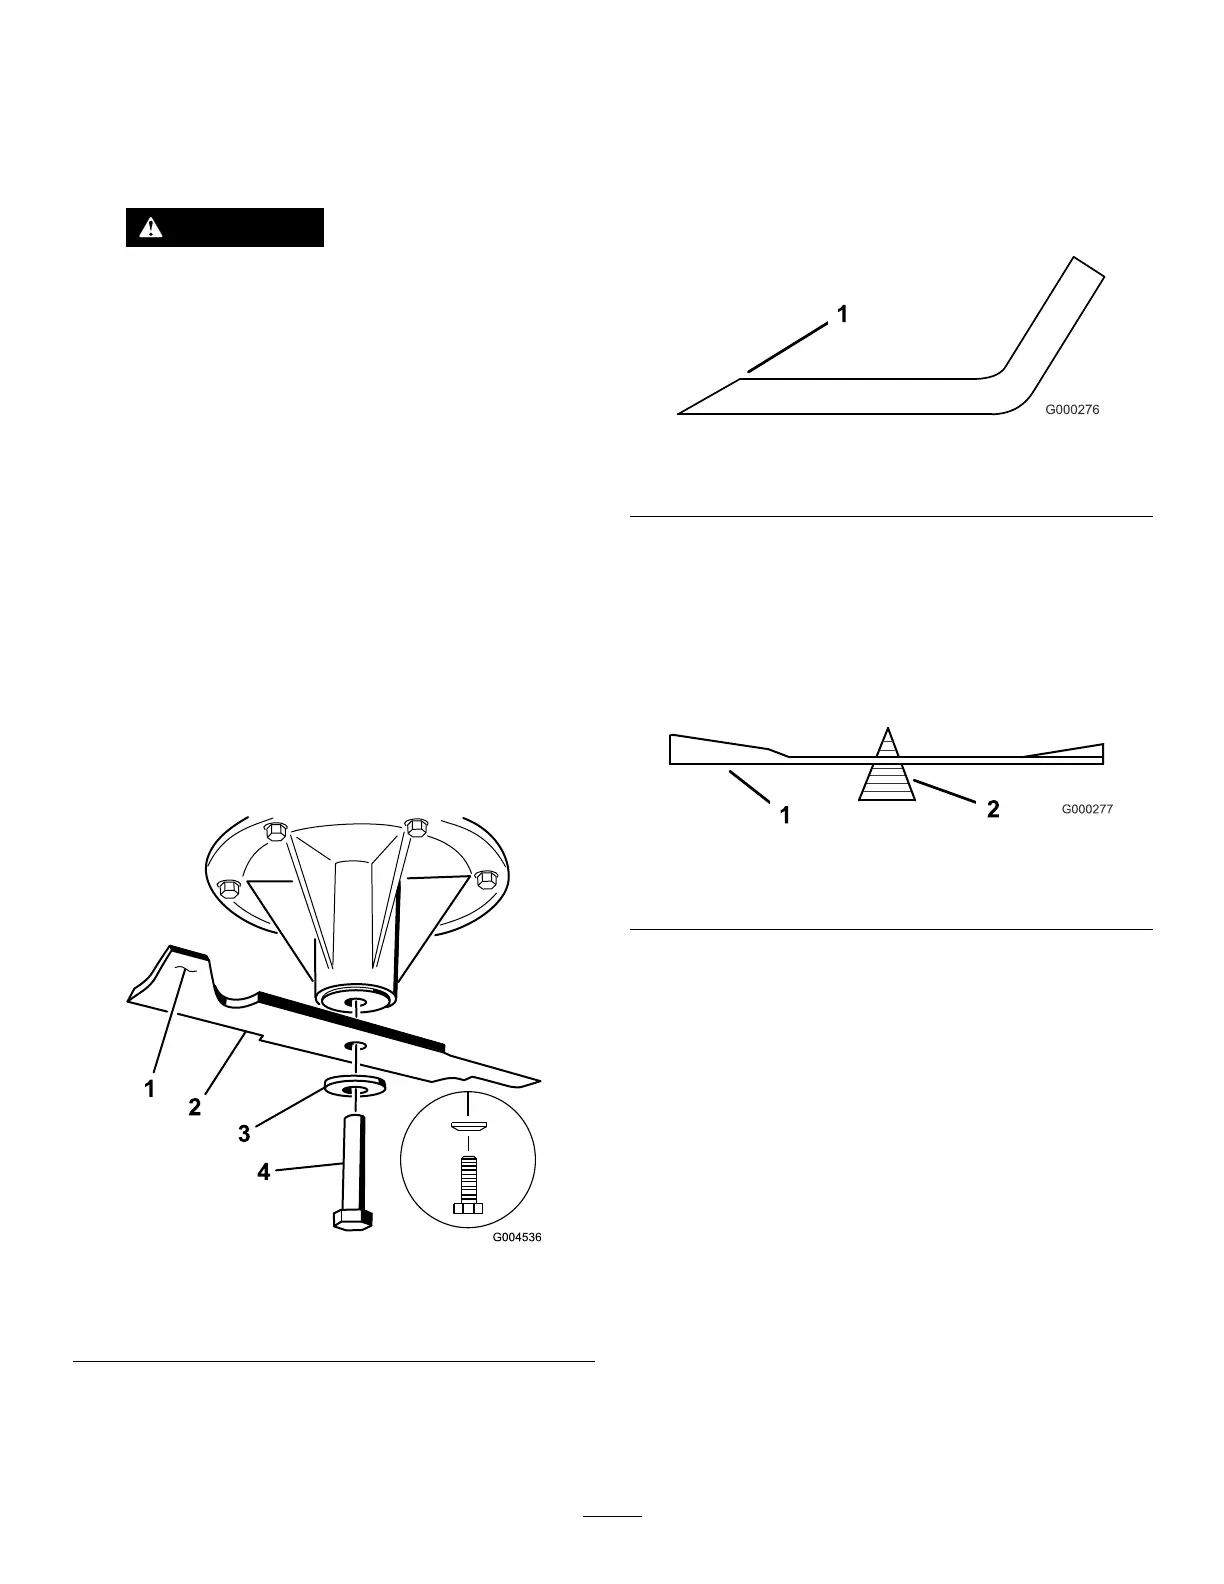
RemovingtheBlades
Bladesmustbereplacedifasolidobjectishit,ifthe
bladeisoutofbalance,orifthebladeisbent.Toensure
optimumperformanceandcontinuedsafetyconformance
ofthemachine,usegenuineTororeplacementblades.
Replacementbladesmadebyothermanufacturersmayresult
innonconformancewithsafetystandards.
1.Holdthebladeendusingaragorathickly-padded
glove.
2.Removethebladebolt,thecurvedwasher,andthe
bladefromthespindleshaft(Figure103).
g004536
Figure103
1.Sailareaoftheblade3.Curvedwasher
2.Blade4.Bladebolt
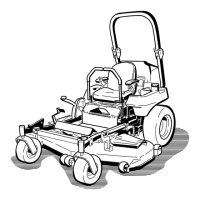
SharpeningtheBlades
1.Usealetosharpenthecuttingedgeatbothendsof
theblade(Figure104).
Note:Maintaintheoriginalangle.
Note:Thebladeretainsitsbalanceifthesameamount
ofmaterialisremovedfrombothcuttingedges.
g000276
Figure104
1.Sharpenatoriginalangle.
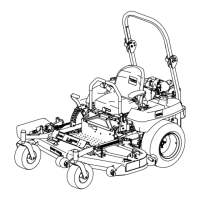
2.Checkthebalanceofthebladebyputtingitonablade
balancer(Figure105).
Note:Ifthebladestaysinahorizontalposition,the
bladeisbalancedandcanbeused.
Note:Ifthebladeisnotbalanced,lesomemetaloff
theendofthesailareaonly(Figure104).
g000277
Figure105
1.Blade2.Balancer
3.Repeatthisprocedureuntilthebladeisbalanced.
69