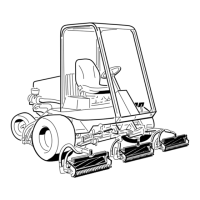
Reelmaster 5010 SeriesHydraulic System (Rev. C) Page 4 -- 96
Cutting Reel Motor
1. Hydraulic reel motor (#4)
2. O--ring
3. 90
o
hydraulic fitting
4. O--ring
5. Hydraulic hose
6. O--ring
7. Hydraulic fitting
8. O--ring
9. Hydraulic hose
10. Hydraulic fitting
11. Hydraulic hose
12. Hydraulic hose
13. 90
o
hydraulic fitting
14. Hydraulic hose
15. Hydraulic reel motor (#1)
16. Hydraulic reel motor (#5)
17. Hydraulic hose
18. Hydraulic hose
19. Hydraulic reel motor (#3)
20. Hydraulic reel motor (#2)
Figure 81
4
3
20
2
8
6
7
4
3
19
2
8
6
7
4
3
16
2
9
8
5
6
7
4
3
15
2
10
11
8
6
12
4
3
1
2
9
8
5
6
7
2
3
4
5
4
2
13
14
4
3
2
5
4
3
2
17
18
17
17
18
17
2
3
4
FRONT
RIGHT
Removal (Fig. 81)
1. Parkthemachineonalevelsurface,engageparking
brake,lower cutting unitsandstop engine.Removekey
from the ignition switch.
2. Read the General Precautions for Removing and
Installing Hydraulic System Components at the begin-
ning of the Service and Repairs section of this chapter.
3. Label all hydraulic connections for assembly pur-
poses. Thoroughly clean hydraulic connections prior to
loosening hydraulic lines from reel motor.
Figure 82
FRONT
4 1 5
32

 Loading...


