ReplacingtheTracks
RemovingtheTracks
1.Removeanyattachments.
2.Parkthemachineonalevelsurface,ensuring
that1segmentofthesprocketisnotengaged
withthetrack.
g262081
Figure71
1.Sprocketsegment
3.Lowertheloaderarms.
4.Shutofftheengineandremovethekey.
5.Raisethemachineoffthegroundsothatthe
bottomofthetrackisatleast10.2cm(4inches)
offtheground.Supportthemachineusingjack
stands.
Note:Usejackstandsratedforyourmachine.
WARNING
Mechanicalorhydraulicjacksmayfailto
supportthemachineandcauseserious
injury.
Usejackstandswhensupportingthe
machine.
6.Removethelockingbolt,spacer,andnut(Figure
70).
7.Usinga1/2-inchdriveratchet,releasethe
drivetensionbyturningthetensioningscrew
clockwise(Figure70andFigure72).
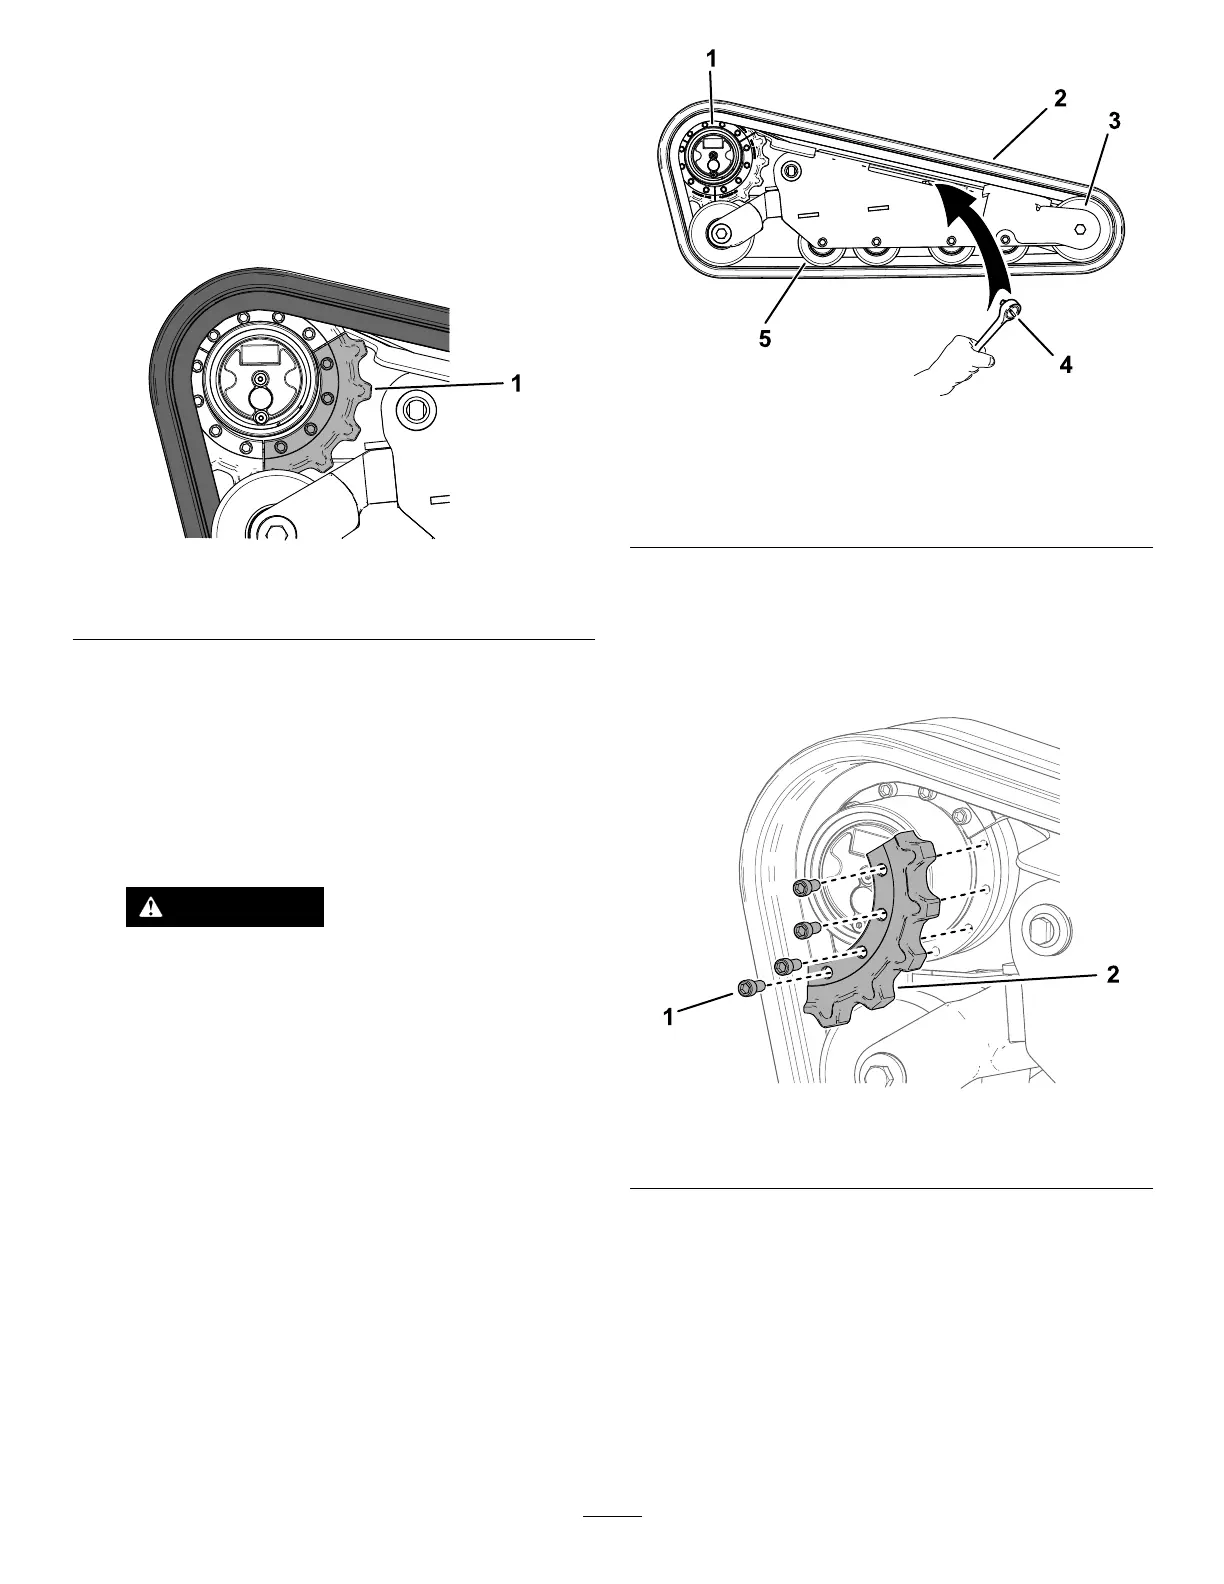
g262083
Figure72
1.Sprocket4.Ratchet(1/2inch)
2.Track
5.Roadwheel(4)
3.Frontwheel
8.Removethesegmentofthedrivesprocketnot
engagedwiththetrack.
Important:Ifyoudonotremovethe
sprocketsegment,itmaybedifcultto
installanewtrackwithoutdamagingit.
g262082
Figure73
1.Screw(4)2.Sprocketsegment
9.Startthemachineanddisengagetheparking
brake.
10.Movethetractioncontrolforwarduntilasecond
segmentofthesprocketisnotengagedwiththe
track.
11.Shutofftheengineandremovethekey.
12.Removethesprocketsegment(Figure73).
13.Startthemachineanddisengagetheparking
brake.
45