14.Movethetractioncontrolforwarduntilthelast
segmentofthesprocketisnotengagedwiththe
track.
Note:Youdonotneedtoremovethissegment.
15.Removethetrackfromthetrackframe.
InstallingtheTracks
1.Wrapthenewtrackaroundthefrontwheel
(Figure72).
2.Pushthetrackunderandbetweentheroad
wheelsandwrapitaroundthereartension
wheel(Figure72).
3.Prythetrackcleatsontotheplanetaryhousing.
4.Starttheengineanddisengagetheparking
brake.
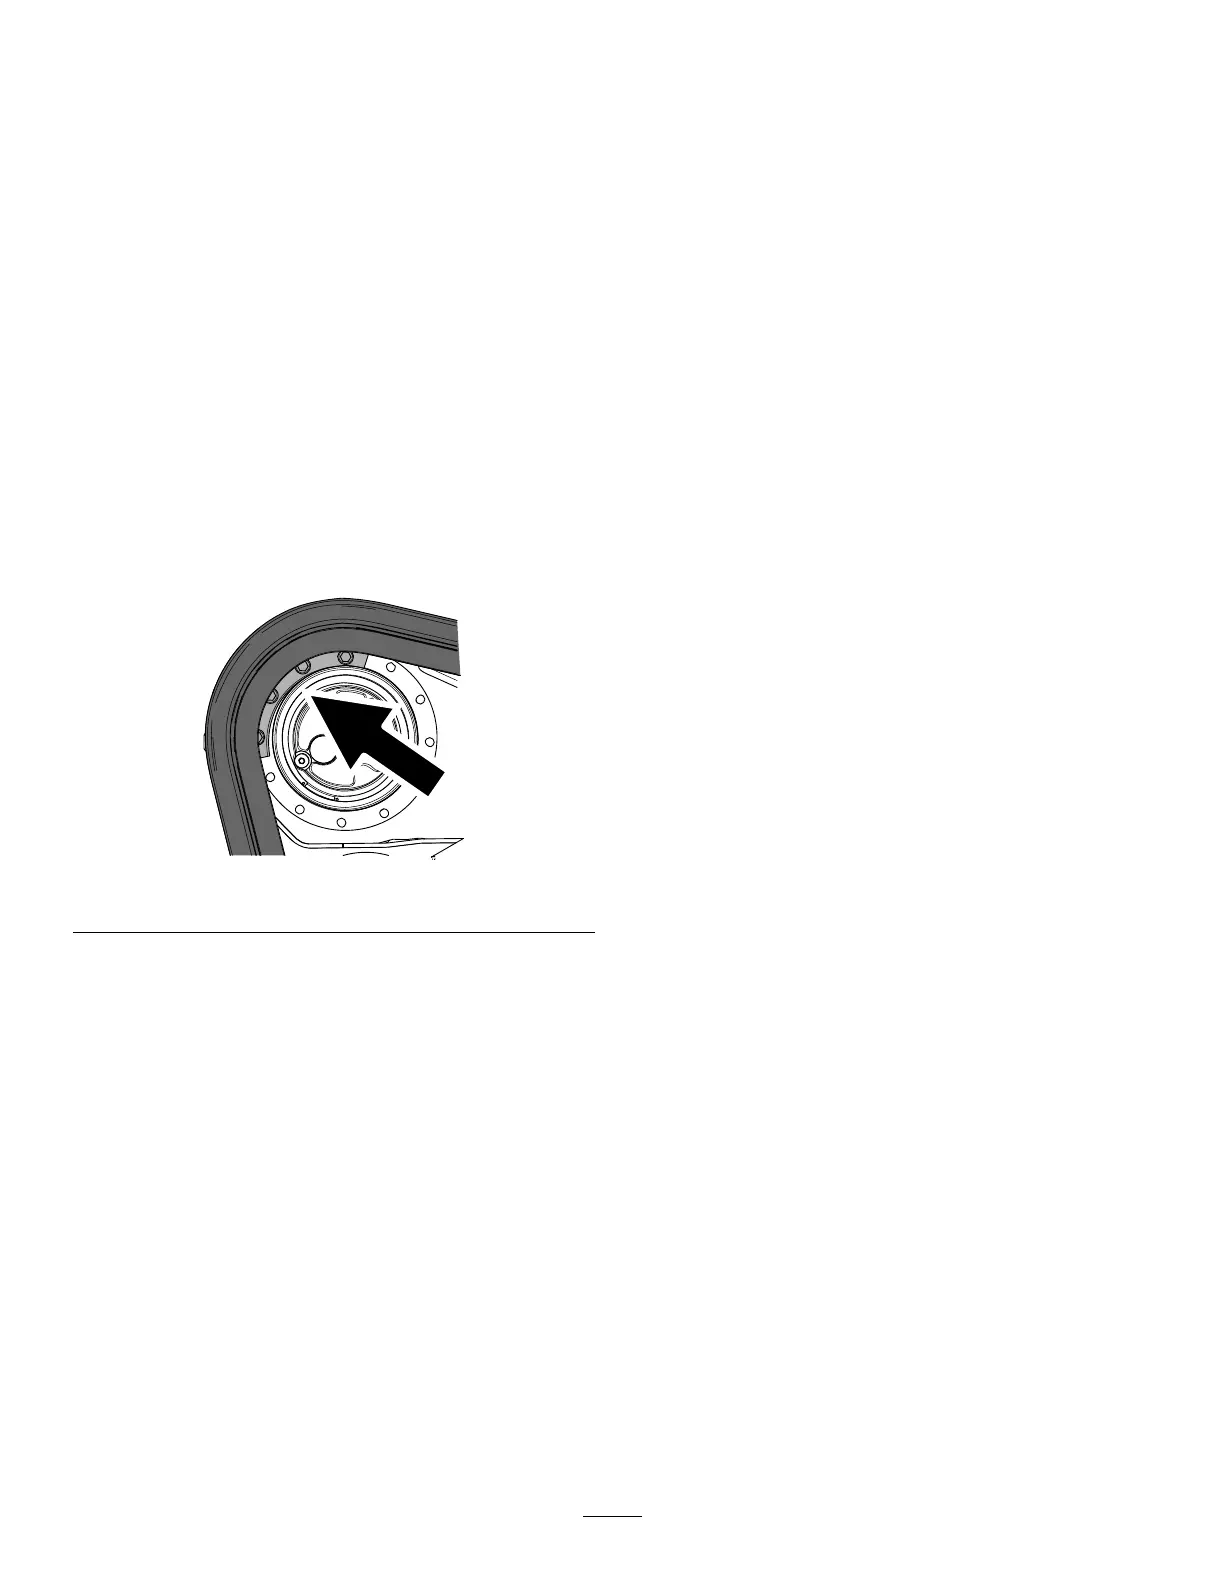
5.Movethetractioncontrolforwarduntilthe
drivesprocketsegmentengageswiththetrack
(Figure74).
g262086
Figure74
6.Shutofftheengineandremovethekey.
7.Applythread-lockingcompoundtotheboltsof1
drivesprocketsegmentthatyouremovedand
installthesprocketsegment(Figure73).T orque
theboltsto247to301N∙m(182to222ft-lb).
8.Starttheengineanddisengagetheparking
brake.
9.Movethetractioncontrolforwarduntilbothdrive
sprocketsegmentsengagethetrack.
10.Applythread-lockingcompoundtothebolts
oftheotherdrivesprocketsegmentthatyou
removedandinstallthesprocketsegment
(Figure74).T orquetheboltsto247to301N∙m
(182to222ft-lb).
Note:Installthesprocketsothatthecasting
numbersinthesprocketfaceoutward.
11.Usinga1/2inchdriveratchet,turnthetensioning
screwcounterclockwiseuntilthegapbetween
theroadwheelandtrackis20mm(0.79inch)
asshowninFigure68.
12.Alignthenotchinthetensionscrewtothe
nearestlocking-boltholeandsecurethescrew
withthelockingbolt,spacer,andnut.Torquethe
lockingboltto1,130N∙cm(100in-lb).
13.Lowerthemachinetotheground.
14.Repeattheproceduretoreplacetheothertrack.
15.Closetheaccesscoverandtightenthebolts
(Figure69).T orquetheboltsto41N∙m(30ft-lb).
46