Strata CTX100 Installation
Installing the CTX100 Cabinet
2-18 Strata CTX I&M 10/02
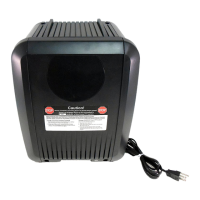
Replacing the Power Supply
1. Make sure that the power supply switch is Off and that the AC power cable is not plugged into
an outlet.
2. Set the power supply in its proper place in the cabinet (see Figure 2-16).
3. Secure the power supply to the cabinet with the screws.
4. Connect the green/green-yellow wire from the AMAU motherboard to the FG screw on the
power supply.
5. Plug the DC cable into the CN OUT connector.
6. Install the ABCS battery charger.
7. Plug in the reserve battery cable to the CN-BAT connector of the ABCS battery charger.
8. Plug in the AC power cord connector into the AC-IN plug.
9. Insert and tight the two screws in front of the power supply (see Figure 2-15).
10.Plug the BASE/EXP jumper plug into the appropriate BASE or EXP connector on the power
supply (see Figure 2-14).
Step 8: Set Jumpers and Install Option PCBs onto the ACTU
Refer to Figure 2-17 with the following steps.
1. On the ACTU PCB, set the battery jumper, “BATT,” to the “On” position.
2. On the ACTU, make sure the Mu/A jumper plug is set to the Mu position (U.S. and Canada).
3. On the ACTU PCB, set the BBMS jumper “ATTACHED BBMS,” to the “NO” position.
Note If you are installing the AETS option PCB, before mounting the AETS, dress its green
jumper wire under and behind the Ethernet port and out the top as shown in Figure 2-17.
Remove the screw just above the AETS, place the jumper wire ring over the hole and
replace the screw to hold the jumper wire ring in place.
4. Install needed option PCBs onto the ACTU (AETS, AMDS, BSIS, ARCS).
5. Position the option PCB in its respective area with the arrow pointing up.
6. Line up the option PCB connectors and plastic stand-offs with the connectors and stand-off
holes on the ACTU and snap securely into place.
7. Insert the SmartMedia card (gold contacts face left, notched corner faces forward and up) into
the SmartMedia slot on the ACTU.
8. Make sure that the power supply switch is Off.
9. Install the ACTU into the Base Cabinet (see following photos).
Note For more details about the jumpers and add-ons (subassemblies) for the ACTU, see Table
2-2 on page 2-21.
 Loading...