BAS-SVX45F-GB 79
Appendix A: Configuring Tracer UC600 for BACnet/IP
Establishing a Network Connection with Tracer TU
The following procedure describes how to establish a BACnet/IP network connection with Tracer
UC600. IP and BACnet configuration tasks must be performed prior to this procedure.
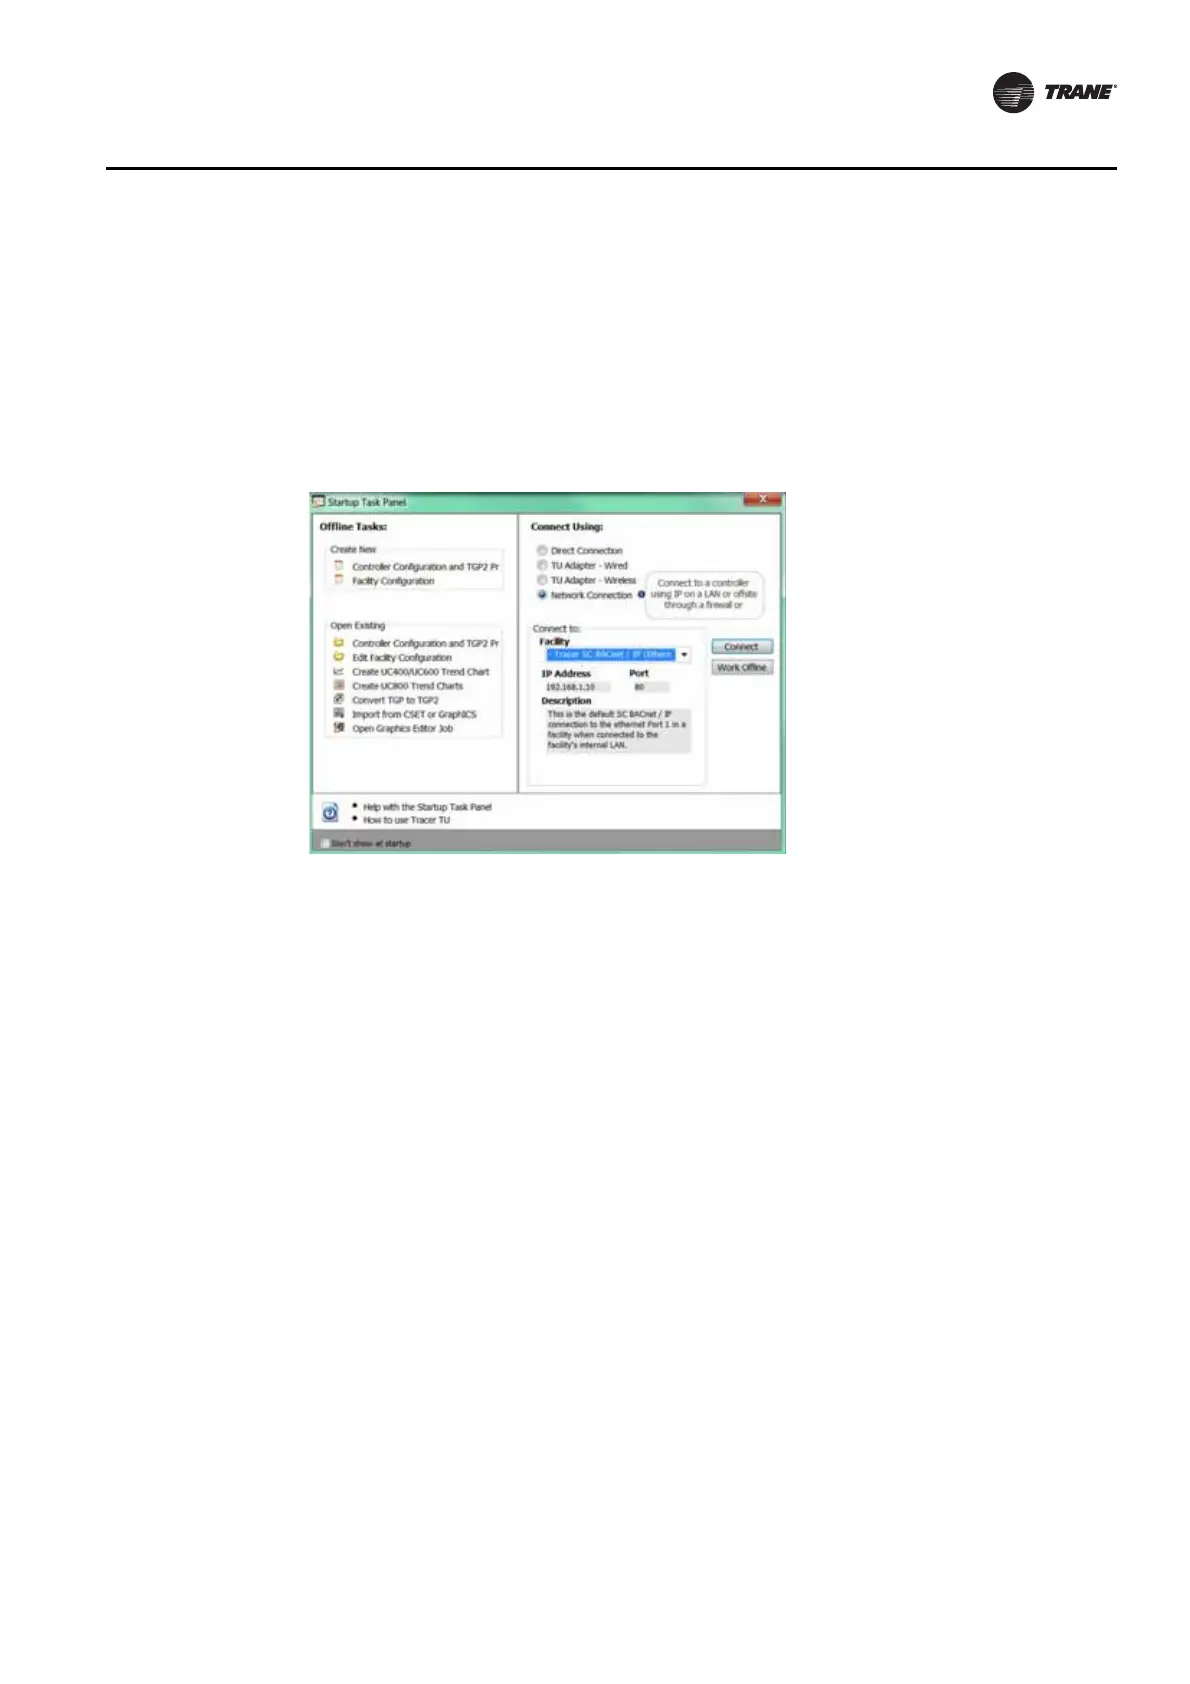
To establish a network connection:
1. In the Startup Panel dialog box, select the Network Connection radio button.
2. From Facility drop-down list (inside the Connect to frame), select IP Ethernet 1 network.
Note: If you need to add a facility, see “Connecting Using Tracer SC,” p. 42.
Figure 44. Establishing a network connection
Configuring IP Information
1. Navigate to Utilities > Status > Controller Settings. The Controller Settings utility opens.
2. Click Protocol to display a list of protocols that Tracer UC600 uses to communicate with other
controllers.
3. Configure the Tracer UC600 with either a specified static IP address or, if necessary, configure
it to automatically acquire its IP address from the network's Dynamic Host Configuration
Protocol (DHCP) server. A hostname can be assigned to the device if a dynamic address is being
used (See
Figure 45, p. 80).
4. In the Security frame, select whether to enable HTTP communications (port 80) for remote
communication. (See
“Security,” p. 81 for more information).
Note: At this time the Tracer TD7 display option is not available when connecting with the
BACnet/IP protocol. This option will be available in a future Tracer UC600 firmware
upgrade.
5. Click Send to Device.
6. Proceed to the “Configuring BACnet Information,” p. 80.