© Copyright 2016 TRENDnet. All Rights Reserved.
Select Disable to not use SNMP on the Switch.
Type a System Name for the Switch.
(The System Name is same as the host name)
Type a System Location for the Switch.
Type a System Contact for the Switch.
Click Apply to configure the settings.
Click this button to reset the fields to the last setting.
Community Name
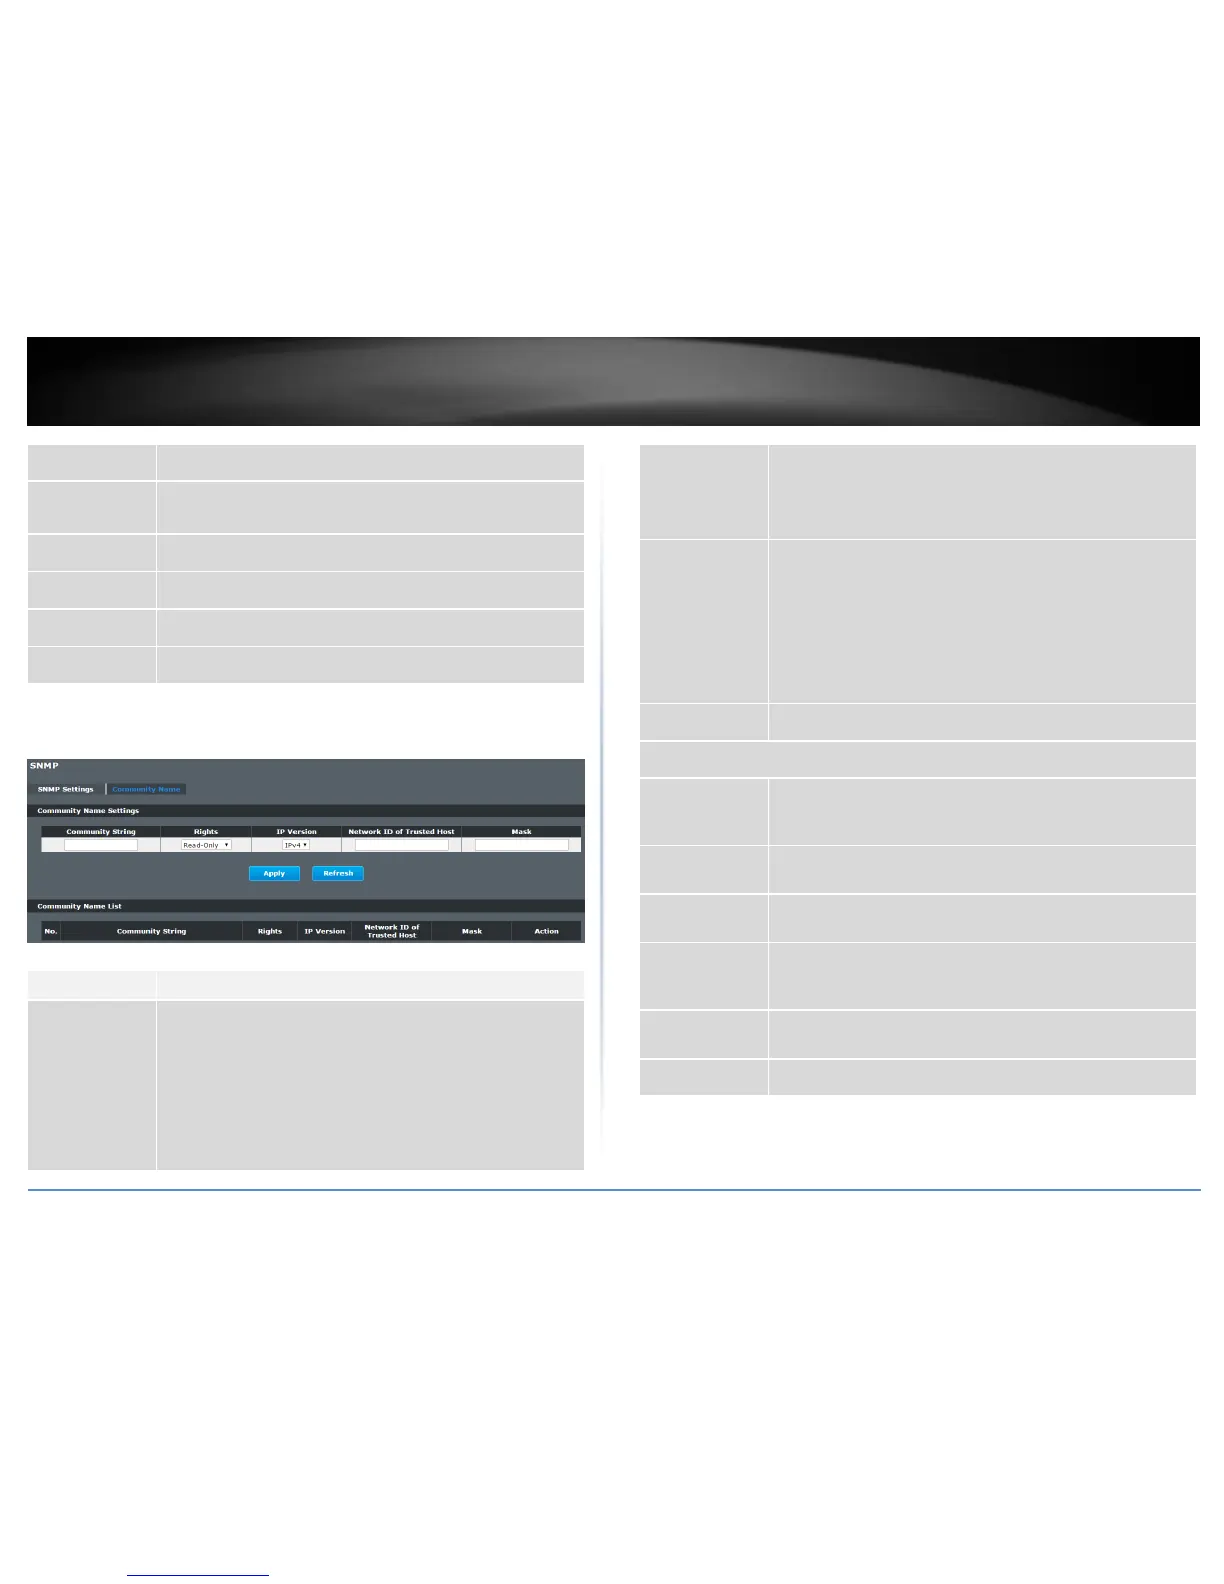
Management > SNMP > SNMP > Community Name
Enter a Community string, this will act as a password for requests
from the management station.
An SNMP community string is a text string that acts as a password.
It is used to authenticate messages that are sent between the
management station (the SNMP manager) and the device (the
SNMP agent). The community string is included in every packet
that is transmitted between the SNMP manager and the SNMP
agent.
Select Read-Only to allow the SNMP manager using this string to
collect information from the Switch.
Select Read-Write to allow the SNMP manager using this string to
create or edit MIBs (configure settings on the Switch).
Network ID of
Trusted Host
Type the IP address of the remote SNMP management station in
dotted decimal notation, for example 192.168.1.0.
Type the subnet mask for the IP address of the remote SNMP
management station in dotted decimal notation, for example
255.255.255.0.
Click Apply to configure the settings.
Click Refresh to begin configuring this screen afresh.
This field indicates the community number. It is used for
identification only. Click on the individual community number to
edit the community settings.
This field displays the SNMP community string. An SNMP
community string is a text string that acts as a password.
This field displays the community string’s rights. This will be Read
Only or Read Write.
This field displays the IP address of the remote SNMP
management station after it has been modified by the subnet
mask.
This field displays the subnet mask for the IP address of the
remote SNMP management station.
Click Delete to remove a specific Community String.
 Loading...