XRS2 and SRS2 EID Stick Reader
Issue 5, 03/2018
18
Information for servicing
Warning!
1. Turn off the stick reader and disconnect from the PC or power adapter before disassembling it.
2. Disconnect the battery pack.
The stick reader may contain valuable information required by the customer. When servicing a stick reader,
always back up customer data to a PC, then transfer it back to the stick reader before returning it to the
customer. Data Link software is used to transfer the data.
To back up customer data using Data Link:
1 Connect the stick reader to the PC's USB port using the USB A to mini USB cable (824575).
1 Power on the stick reader.
2 Launch Data Link by double-clicking on the Data Link icon on the desktop:
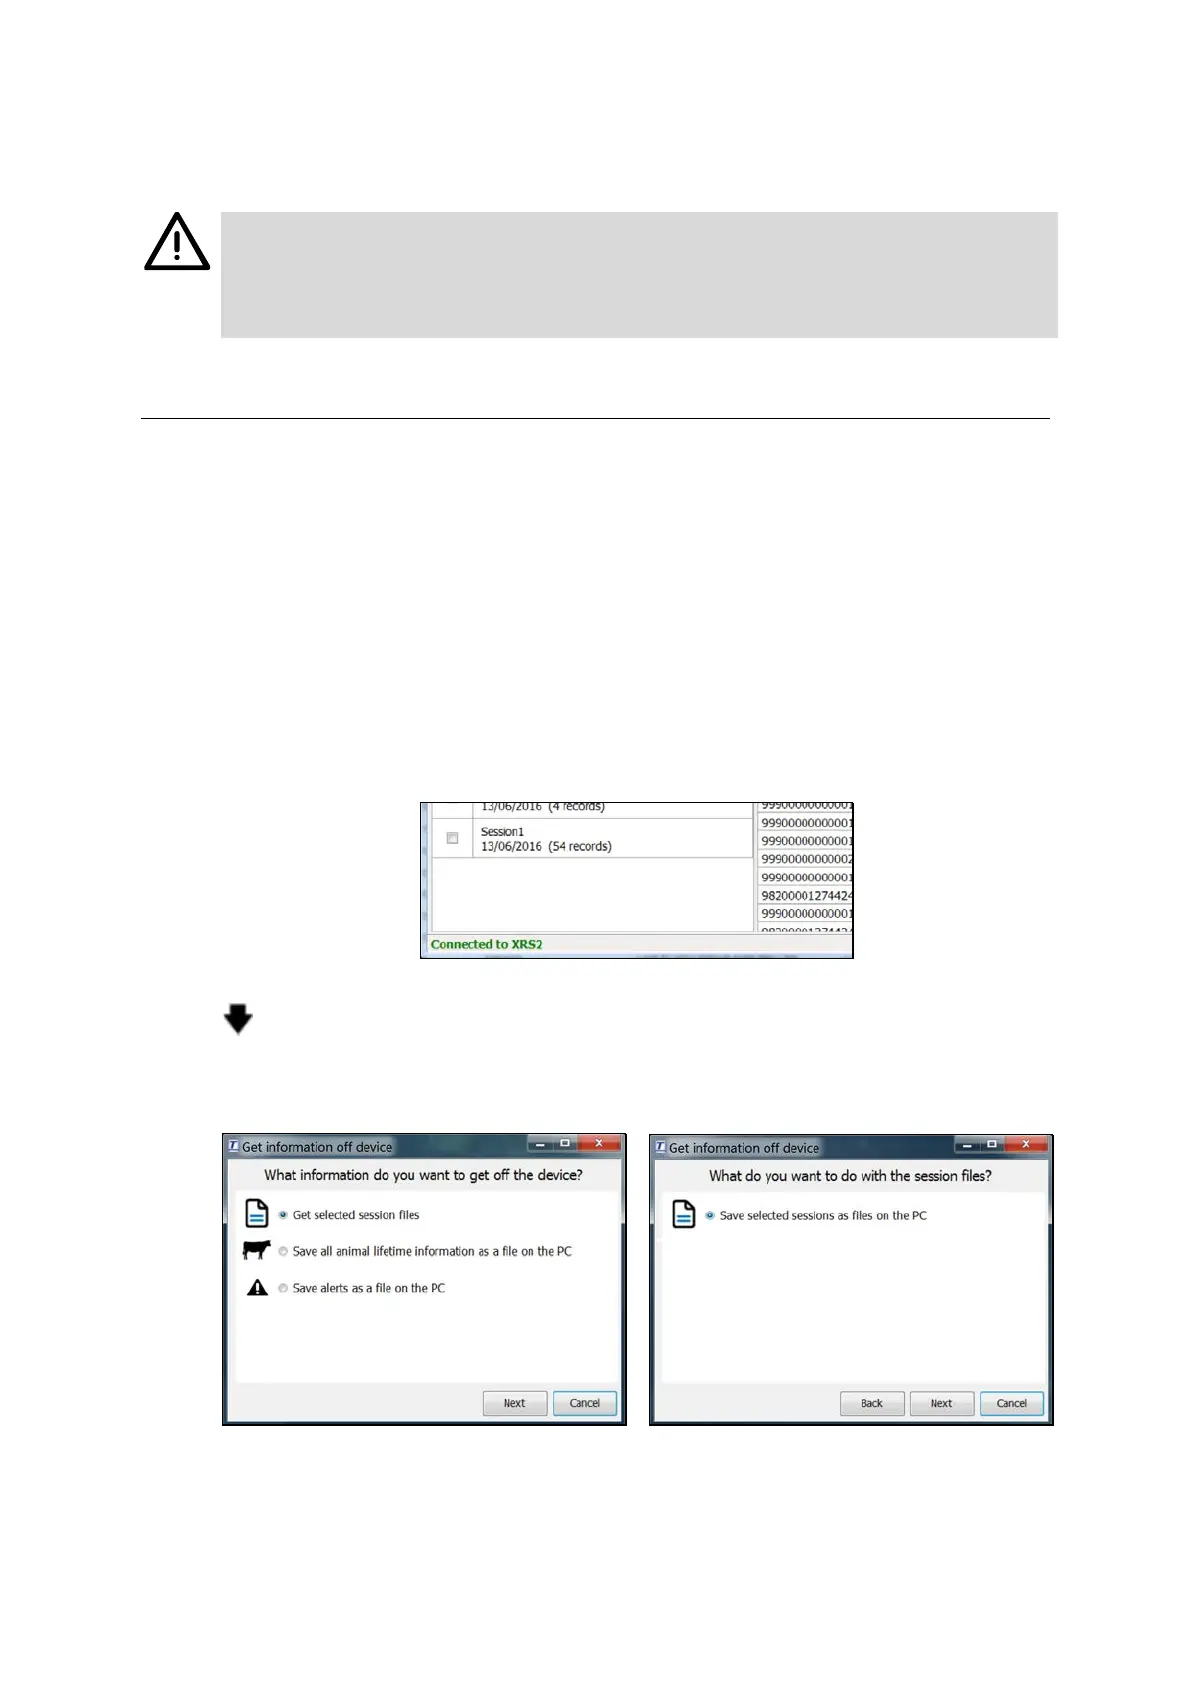
3 After a several seconds, ‘Connected to SRS2/XRS2’ should be displayed in the bottom left-hand corner and
all sessions saved on the device will be displayed.
4 Select the check boxes next to all session files, or use the drop down to Select All.
5 Click
to import all files from the stick reader.
6 Select ‘Get selected session files’, click ‘Next’ and select ‘Save selected sessions as files on a PC’, click
‘Next’. Save the file to a folder named to reflect the stick reader serial number.
7 Once you have finished servicing the device, transfer the data from the PC back to the stick reader.

 Loading...