TRUE ICE truemfg.com
TEC_TM_171 | REV. G | EN
P#224534
02/28/2024 Page 28 of 72
Installation & Setup (cont.)
Uncrating
1. Inspect the exterior packaging for damage. Follow TRUE's recommended procedure for accepting deliveries.
NOTICE ›
If your ice machine is damaged, note all damage on the delivery receipt, immediately file a claim with the delivery freight
carrier, and contact TRUE.
2. Remove the exterior packaging. Inspect your ice machine for visible or cosmetic damage.
NOTICE ›
If your ice machine is damaged, note all damage on the delivery receipt, immediately file a claim with the delivery freight
carrier, and contact TRUE.
3. Move your ice machine as close to the final installation location as possible before removing the wooden skid.
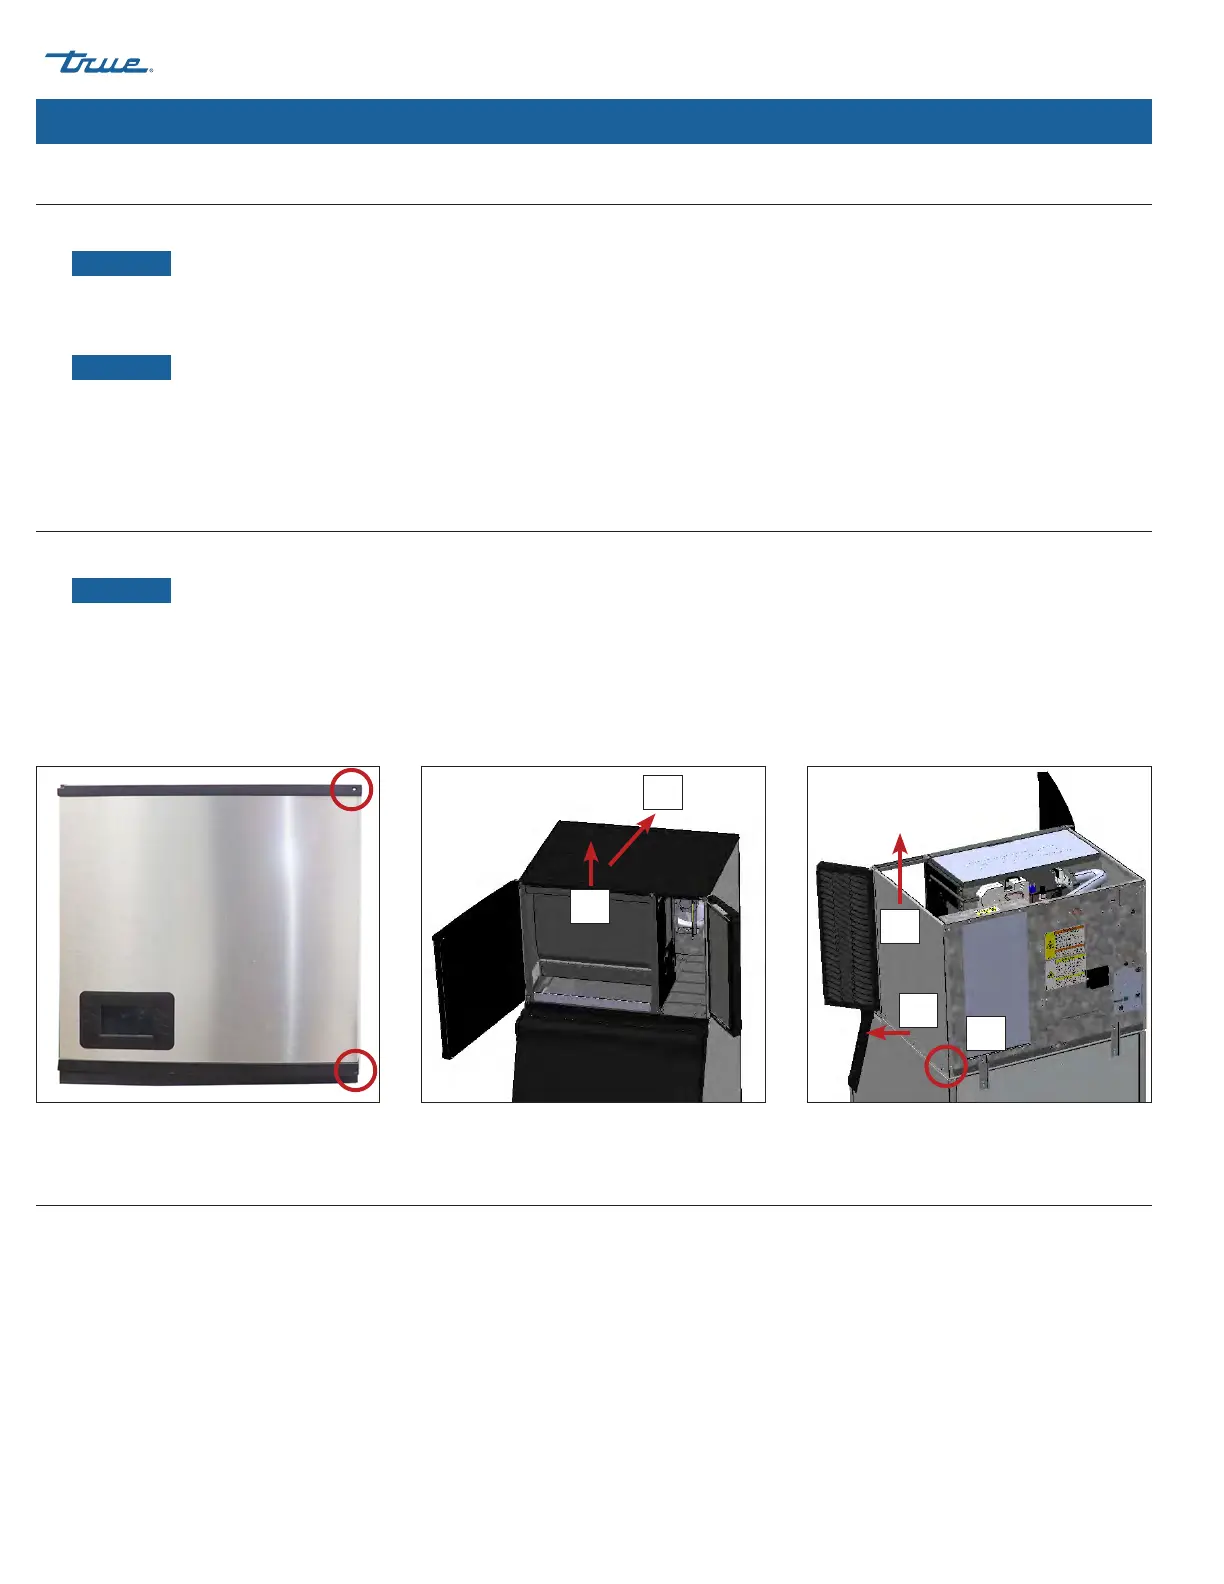
Panel Removal
1. Remove the front panel screws. Then, open the front panels. See fig. 1.
NOTICE ›
Panels cannot be removed without opening the front panels.
2. Carefully lift the front of the top panel. Then, slide the top panel towards the ice machine's rear and lift the panel. See fig. 2.
3. Remove the side panel's rear screw. See fig. 3.
4. Unfasten the side panel's bottom fasteners. Then, lift the side panel. See fig. 4.
Interior Inspection
1. Remove the shipping tape and packing material. If any are left in the ice machine it will not work properly.
2. Inspect the interior for damaged components.
3. Check that the refrigerant lines do not rub or touch each other or other surfaces, and that the fan blade turns freely.
4. Check that the compressor is snug on all mounting pads.
5. Position the dispenser unit/ice storage bin in its permanent location.
Fig. 1. Front panel screw locations. Fig.2. Lift the front edge, slide the top panel back,
then lift to remove.
Fig. 3. Remove the screw, pull panel from adhering
tabs, then lift to remove.
1
1
2
2
3