DAILY MAINTENANCE
5
S
t
ep 1: Prepare the Oven
WARNING: The oven operates at approximately 525°F (274°C) and may
cause injury if not allowed to cool properly.
• Turn off the oven by pressing the On/Off key.
• S
lightly open the o
ven door.
• Cooling takes appr
oximately 30 minutes. DO NOT clean the oven until the
o
v
en displays OVEN OFF: READY TO CLEAN.
S
t
ep 2: Remove the Wire Rack and Lower Jetplate
WARNING: Be sure the oven interior is cool before removing these items.
CAUTION: Do not force the rack out by pulling upward. Forcefully
dislodging the rack could cause the top ceramic jetplate to br
eak.
• The wire rack and lower jetplate are connected and can be removed together.
• Push the wire rack towards the rear cavity wall (Fig A) and then lift up (Fig B).
• M
aneuver the bottom jetplate out from under the tabs on the rear cavity wall.
CA
UTION: DO NOT remove the top ceramic jetplate; breakage will result in
a non-warranty service call.
S
tep 3: Clean the Wire Rack and Lower Jetplate
• Detach the wire rack from the jetplate and wash, rinse, sanitize, and dry each part.
Step 4: Clean the Air Filter
CAUTION: TurboChef does not recognize blocked air vents as a warrantable
claim.
The filter must be cleaned regularly or replaced if damaged. During oven
operation, the filter must r
emain in place at all times.
• Remove the air filter from the back of the oven.
• Rinse the air filter with hot water
.
• Allow the air filter to dry completely.
CAUTION: DO NOT operate the oven without the air filter in place.
Step 5: Wipe the Oven Interior
• Use a food vacuum or damp towel to remove large particles from the oven cavity.
Continued on page 6.
Daily M
ain
tenance
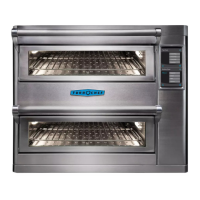
Follow the steps below when cleaning your NGO
o
v
en. Use only TurboChef ®-approved cleaning
chemicals. The use of any other cleaning products
may damage critical o
ven components, resulting in a
non-warranty service call.
Sup
plies and E
quipment
TurboChef ® Oven Cleaner (Product Number:
103180),
T
urboChef ® Oven Guard (Product Number:
103181, optional for easier maintenance), Kay Click-
S
an® sanitizer, nylon scrub pad, cleaning towel, dispos-
able gloves, protective eyewear, dust mask (optional)
Step 1
S
tep 2 (Fig A)
Step 2 (Fig B)
S
tep 4
S
t
ep 5

 Loading...