D1.
When switching on the Ultimaker, the main thing you will notice is that the display
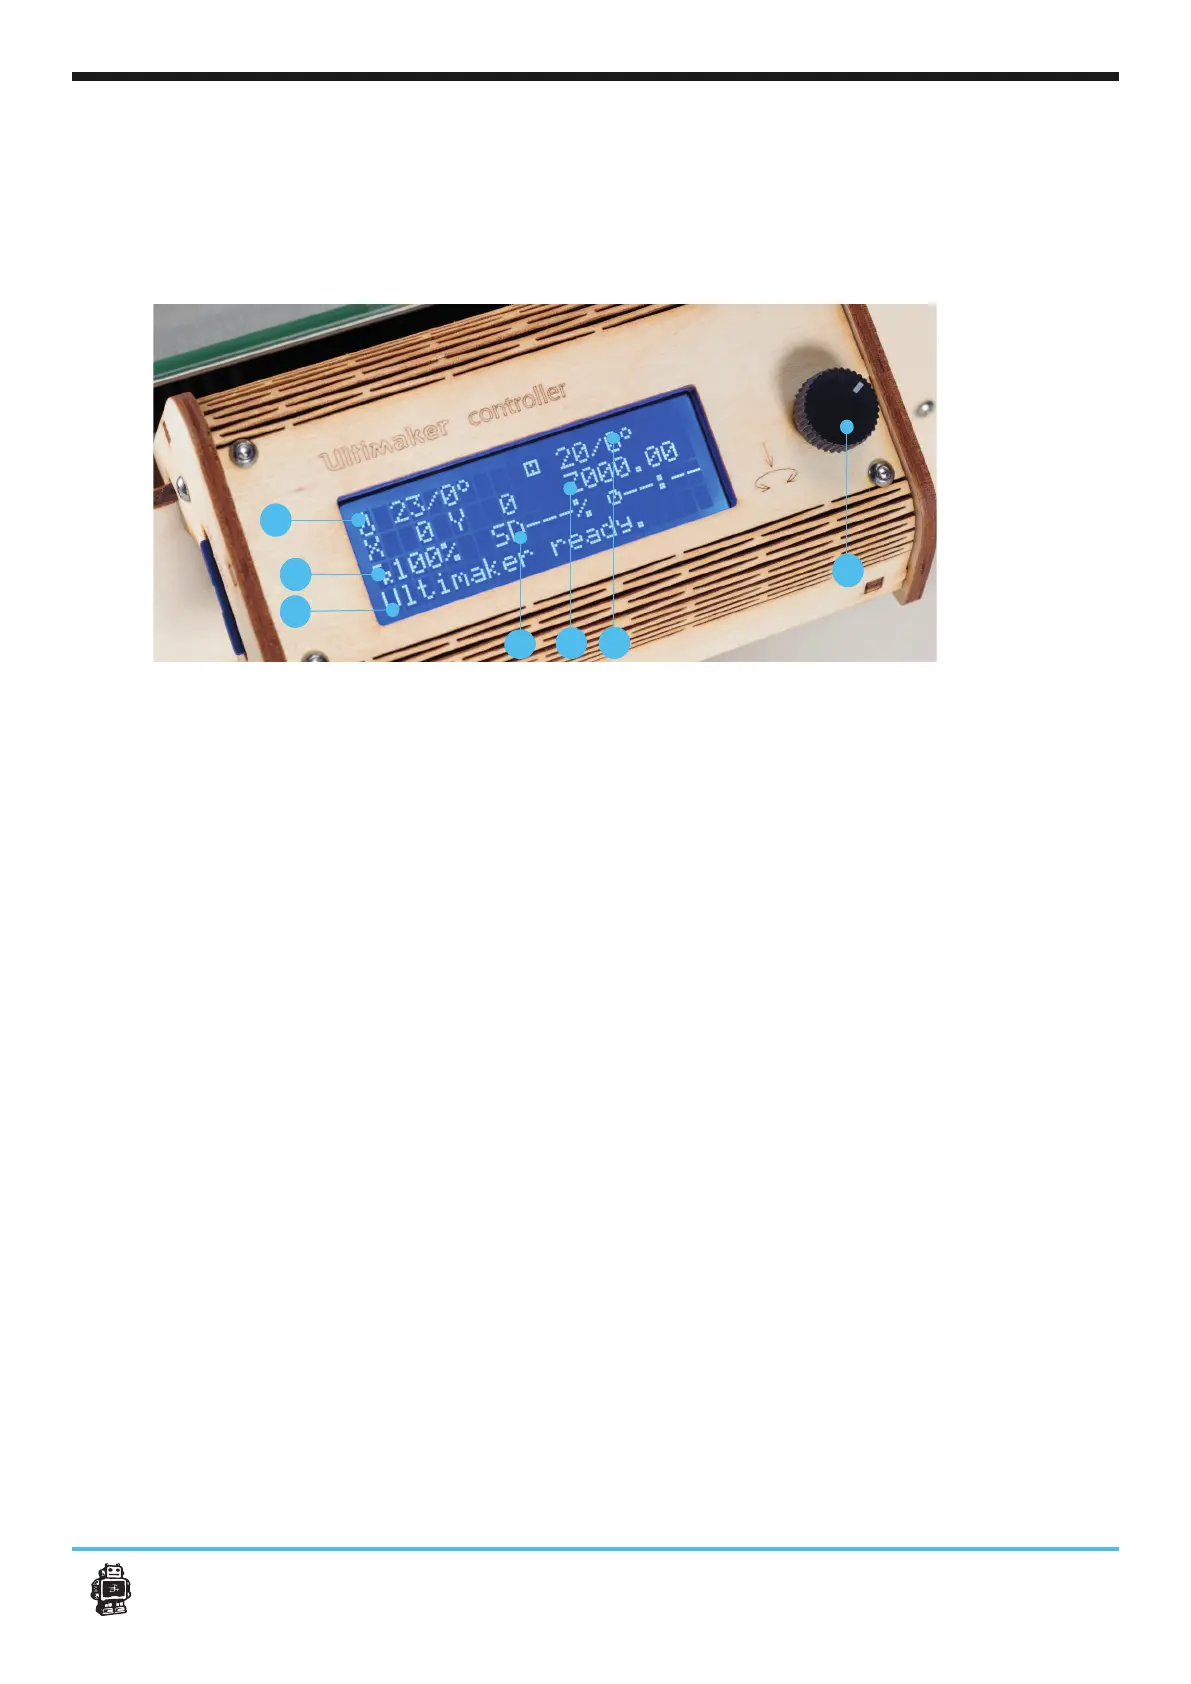
lights up. You instantly get the mainscreen of the controller as shown in the image
bellow. First lets explain what you see and their functionalities
22Use of the Ultimaker controller display
2
3
4
5
6
1
1. Push wheel : You can navigate through the display by using the button. This button can
be pushed and rotated. By rotating you can select or control an action. By pushing you
chosen action.
2.024°’ shows the
000°’ is the target temperature. For
example when preheating the target becomes 024°/210°
3. FeedRate: This is the print speed of your machine, You can change this by rotating the
pushwheel (Number 1). Its recommended you leave this value on 100%, especially when
you are not an experianced user.
4. SD card indication: The note: ‘Card inserted’. is obvious, it means your SD-card is ins-
erted and is accessible. When you remove the card by pushing it, the menu will read ‘Card
removed’.
5. Print process indication: 000%SD keeps track of how far you are into you print. 000%
6. Height 3D model:
Optional:
7. Heated bed temperature / Target temperature: 020°’ shows the
000°’ is the target temperature. For
example when preheating the target becomes 020°/65°
7