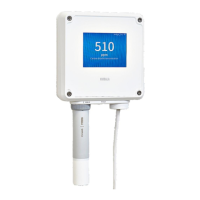
Mounting
Consider configuring the transmitter before mounting it.
Choose the location of the transmitter so that the power outlet is accessible.
Besides the standard wall mounting, the transmitter has the following mounting options:
• Wall mounting with adapter plate
• DIN rail mounting
• Pole mounting
For more information on the mounting options, see Indigo500 Series User Guide (M212287EN),
available at www.vaisala.com.
Standard wall mounting
• Allen key (4 mm), provided
• Crosshead screwdriver
• Drill with Ø 8 mm drill bit
• Screws (2 pcs), provided
• Washers (2 pcs), provided
• Wall plugs (2 pcs), provided
See images A and B at the beginning of this document.
1. Open the 2 hex screws on the cover of the transmitter using a 4-mm Allen key.
2. Open the transmitter cover.
3. Hold the transmitter level against the installation surface and use a pen to mark the places
of the mounting holes. The mounting holes are 157 mm (6.18 in) apart.
4. Drill 55 mm (2.17 in) deep holes and insert wall plugs.
5. Mount the transmitter to a wall using 2 screws and a crosshead screwdriver. Place nylon
washers under the screws to protect the surface of the transmitter.
When you close the transmitter cover, tighten the hex screws to 4.5 Nm.
10 M212290EN-D

 Loading...