Engine (continued)
15. Connect the battery; refer to Installing the Battery, page 6–68.
16. Turn the fuel valve to the O
N position.
17. Prime the fuel system.
18. Start the engine and inspect the machine for any leaks.
19. Allow the machine to reach operating temperature level, check and adjust the
coolant level as necessary.
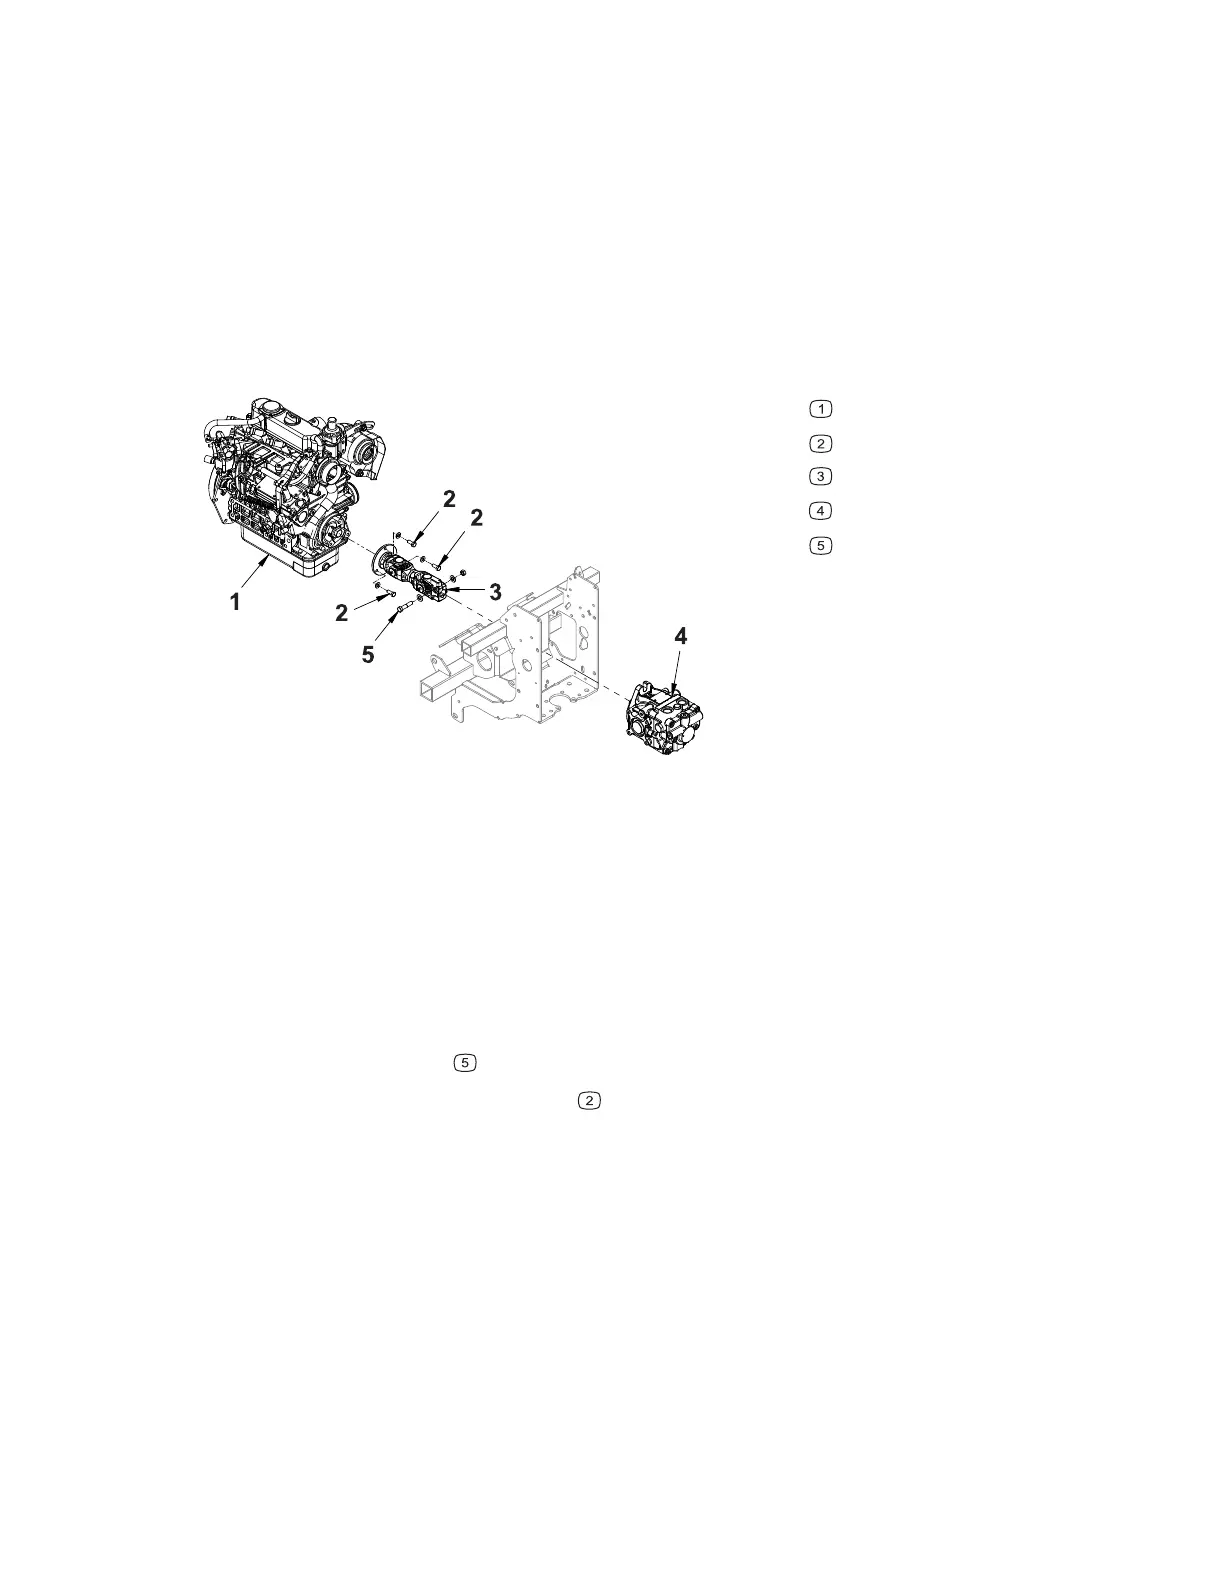
Removing and Installing the Drive Shaft
G420298
Engine Assembly
Mounting Bolt
Drive Shaft Assembly
Hydraulic Pump Assembly
Pinch Bolt
1. Remove attachments from the machine.
2. Park the machine on a level surface, engage the parking brake, and remove the
key from the ignition.
3. Switch the main circuit breaker to the O
FF position, to de-energize the electrical
system.
4. Remove the radiator; refer to 4520Z Removing the Radiator, page 4–16.
5. Remove the canvas cover.
6. Loosen the pinch bolt
.
7. Remove the three mounting bolts
from the drive shaft flange.
8. Remove the drive shaft from the machine.
9. To install the drive shaft, position the drive shaft on the hydraulic pump shaft.
Note: Apply blue thread locker to the three drive shaft mounting bolts before
installation.
10. Align the drive shaft flange mounting holes with the crankshaft and install the
three drive shaft mounting bolts.
11. Tighten the pinch bolt.
12. Adjust the RPM sensor; refer to Adjusting the RPM Sensor, page 6–55.
13. Install the canvas cover.
Engine: Engine Service and Repairs Page 4–20 4520Z
09.40001Rev 00



 To Next Page