46
0900‑5005 REV‑00
PROCEDURE 6. PRINT, SAVE, OR EXIT AN ACTIVE EXAM
When the exam is complete, you can take several actions from the Results screen.
If you want to… Tap…
Record patient information Patient ID
Print the exam results Print
Save the exam results (the system stores the
largest measurement)
Save and Exit
Exit without saving the exam results Exit
Note: A printed exam report always contains the largest measurement and the exam date and time, but you
can customize the remaining information in the report. For more information about adding and customizing
information to be printed, see “Configure Printed and PDF Report Settings” on page33.
Note: This is the last point in the scanning process where you can add or modify patient or operator
information. After you save the exam, patient or operator information cannot be changed.
For information about viewing, deleting, and exporting saved exams, see the section “Managing Saved
Exams” on page47.
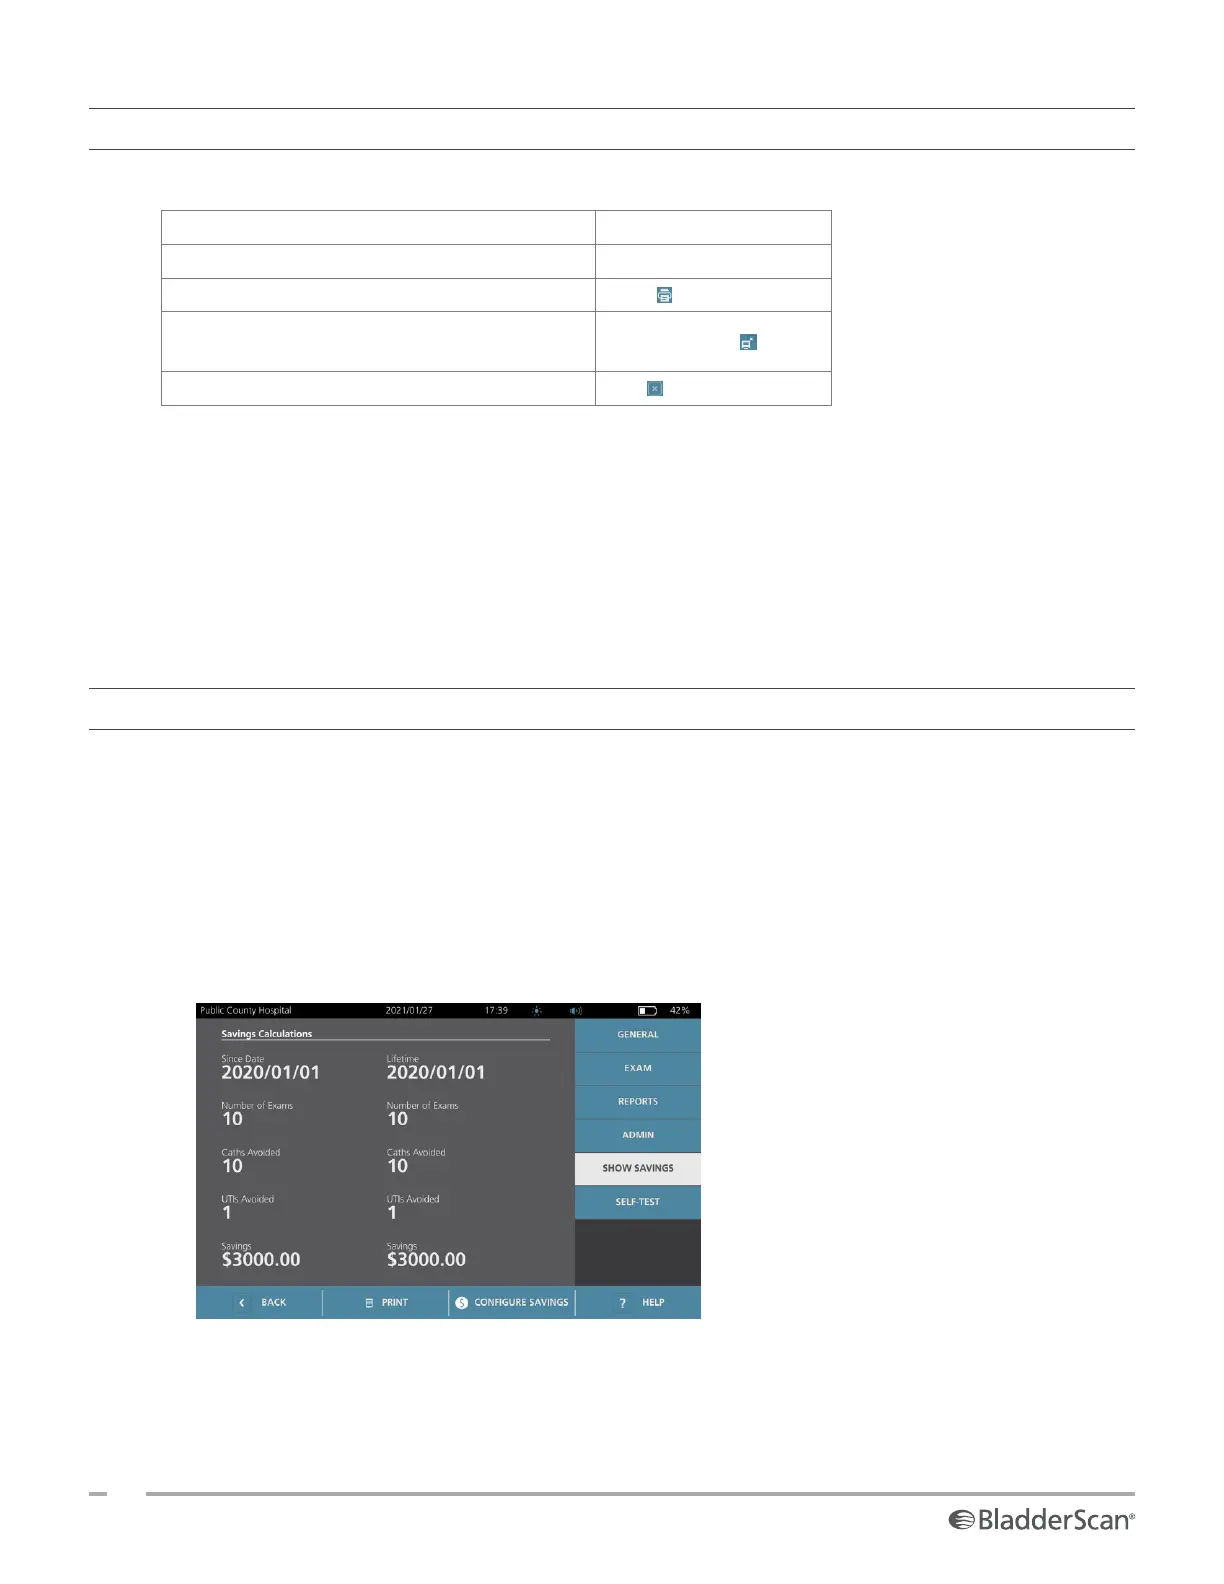
PROCEDURE 7. VIEW COST SAVINGS
The system calculates and displays information related to cost savings, catheterizations avoided, and UTIs
avoided. The default settings can be customized to reflect the rates and costs at your facility. For more
information on customizing savings preferences, see “Customize Cost Savings Calculations” on page34.
The system calculates savings since the most recent calculation reset and for the life of the system. You can
show, configure, and reset cost savings at any time.
1. On the Home screen, tap Settings.
2. Tap Show Savings. The Settings screen opens to the Show Savingstab.
3. If you have a printer and want to print the savings calculations, tap Print.
4. When you are finished viewing the savings calculations, tap Back. The console returns to the
Homescreen.