33
Operations & Maintenance Manual: Setting Up
0900‑5005 REV‑00
PROCEDURE 4. CONFIGURE PRINTED AND PDF REPORT SETTINGS
If a printer is attached to the console, you can print scan results. Reports are printed vertically, like a receipt.
Scan reports are made up of a number of sections. Some of the sections are optional.
You can also export saved exams to an external USB drive. For information on exporting exams, see “Export
Saved Exams” on page49.
You can customize which sections and B‑mode images are included in reports, regardless of whether they
are printed or exported in PDF format.
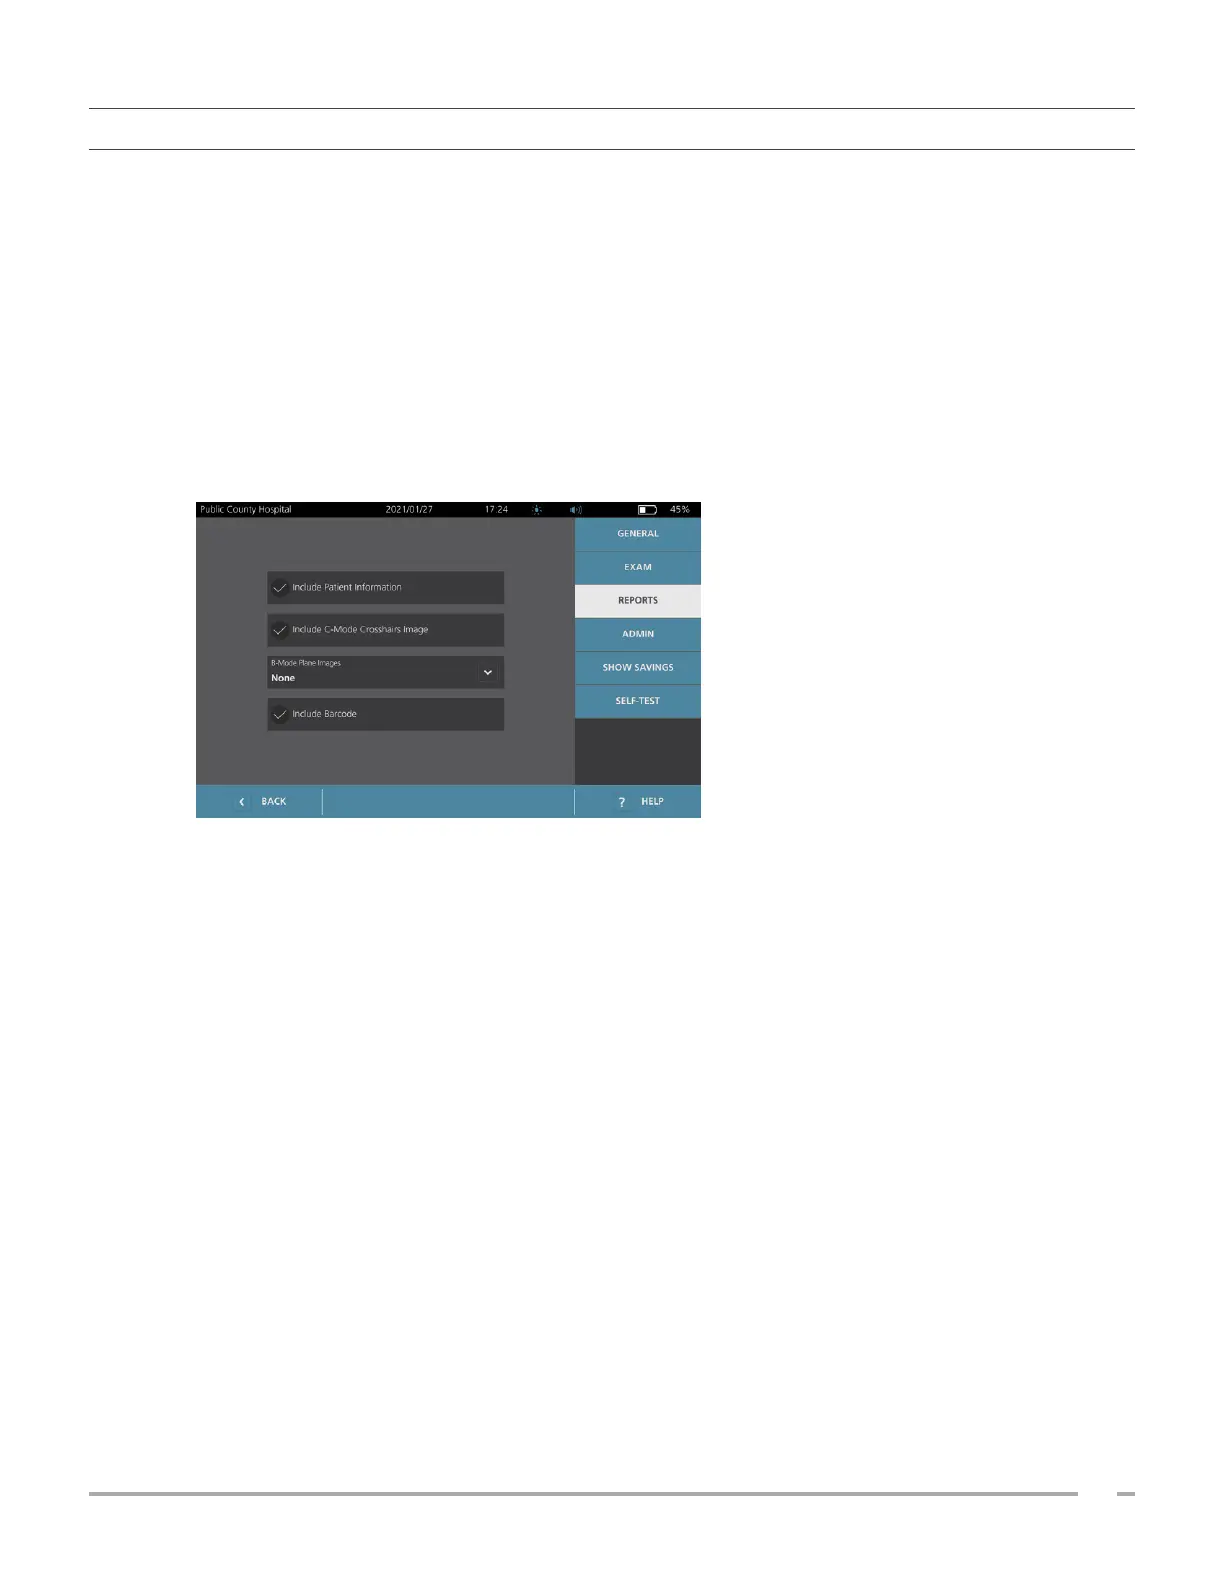
1. On the Home screen, tap Settings, and then tap Reports.
2. If a keypad appears, key in the PIN for Settings, and then tap Enter.
The Settings screen opens to the Reportstab.
3. Tap the information to include in reports. If a check mark is displayed to the left of the information
description, the following information is printed:
• Include Patient Information—Select to include patient data, such as patient ID or date ofbirth.
• Include C‑Mode Crosshairs Image—Select to include the coronal view image computed by the
system. The aiming circle and crosshairs are printed as black lines.
• B‑Mode Plane Images—Select one of the following groups of images to include in printed and
exported reports:
○ None—Select to include no B‑mode image planes.
○ All—Select to include all 12 B‑mode image planes.
○ Sagittal & Transverse—Select to include the two primary B‑mode image planes.
• Include BladderTraq™ Outline—Select to add outlines of the bladder’s internal contours to the
B‑mode image.
• Include Barcode—Select to include the exam’s final volume measurement as a barcode.
4. When you are finished configuring the printed report settings, tap Back. This saves your settings and
returns the console to the Home screen.