Vertiv | Liebert® CRV4 | User Manual 39
Electrical Installation
Chapter 4: Electrical Installation
In this chapter, the electrical installation of the Liebert® CRV4 air-cooled units is explained in-depth to help
users with the various activities, which include work introduction and installation notes, connecting cables of
the indoor unit, and the installation inspection.
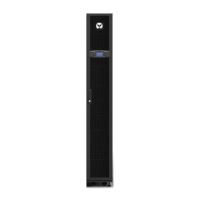
• Liebert CRV4 series is a range of sophisticated devices used in industrial, commercial, or other
professional occasions. It is not tailored for the general public. The total rating power is larger than 1 kW
and is in accordance with the IEC61000-3-12 standards. Hence, a port of less than a 350-short-circuit is
required between the user power and the grid.
• Permission is required from the power supply department to ensure that the air conditioner is connected
to a power no less than 350 circuit ratio.
4.1. Task Introduction and Notes
4.1.1. Cables to Connect On-site
1. Power cable and control cabinet of the indoor unit
2. Input and output control cables of the unit
3. Outdoor unit (air-cooled series): signal control cable and power cable
4. Solenoid valve cable of the long piping kit (an optional requirement)
4.1.2. Installation Notes
1. The connections of all the power cables, control cables, and ground cables should be in compliance with the
local and national electrical regulations.
2. Observe the unit name-plate for the full load current. The cables sizes must meet the conditions as specied
in the local cabling protocols and rules.
3. Mains supply requirement: 380 V to 415 V ± 10%; 50 Hz/ 60-Hz, 3N-
4. The power soft cable is a Y-type connection. If damaged, it has to be replaced immediately to eliminate the
dangers. The replacement procedure must be carried out by an authorized professional or experienced
service personnel.
5. The electrical installation and maintenance must be carried out by some authorized personnel or a trained
engineer well-versed with the inner workings of the electrical connection (for example, a service engineer
from the manufacturer’s side).
6. Prior to the cabling, a voltmeter must be used to measure the power supply voltage and ensure that the
power supply has been switched O.
7. Use screws, guide rails, or other modes to x the device rmly during the installation process to avoid
movement or shaking during the start-up or operation mode.
 Loading...