VIDEONICS DIGITAL VIDEO MIXER PAGE 5
Chapter 2 •Chapter 2 • QuickStart
Whether you’re a video expert looking for just the basic steps or a
beginner who wants instant gratification, this chapter will have you
mixing in minutes! If you run into problems or would like more
information, refer to the table of contents or the index to locate a
more complete discussion.
PREVIEW
OUT
POWER
HEAD
PHONE
IN 4
IN 1
IN 2
OUT
IN 3
CONTROL
(
GPI
)
POWER
CONTROL HEADPHONE PREVIEW V — IN 4 — S RLV S RLV S
IN 3
OUT
IN 2
IN 1
V
LRV
LRVLRV
LRV
VIDEO
OUT
AUDIO
OUT
VIDEO
OUT
AUDIO
OUT
A
BC DEF
VIDEO
IN
AUDIO
IN
VIDEO
IN
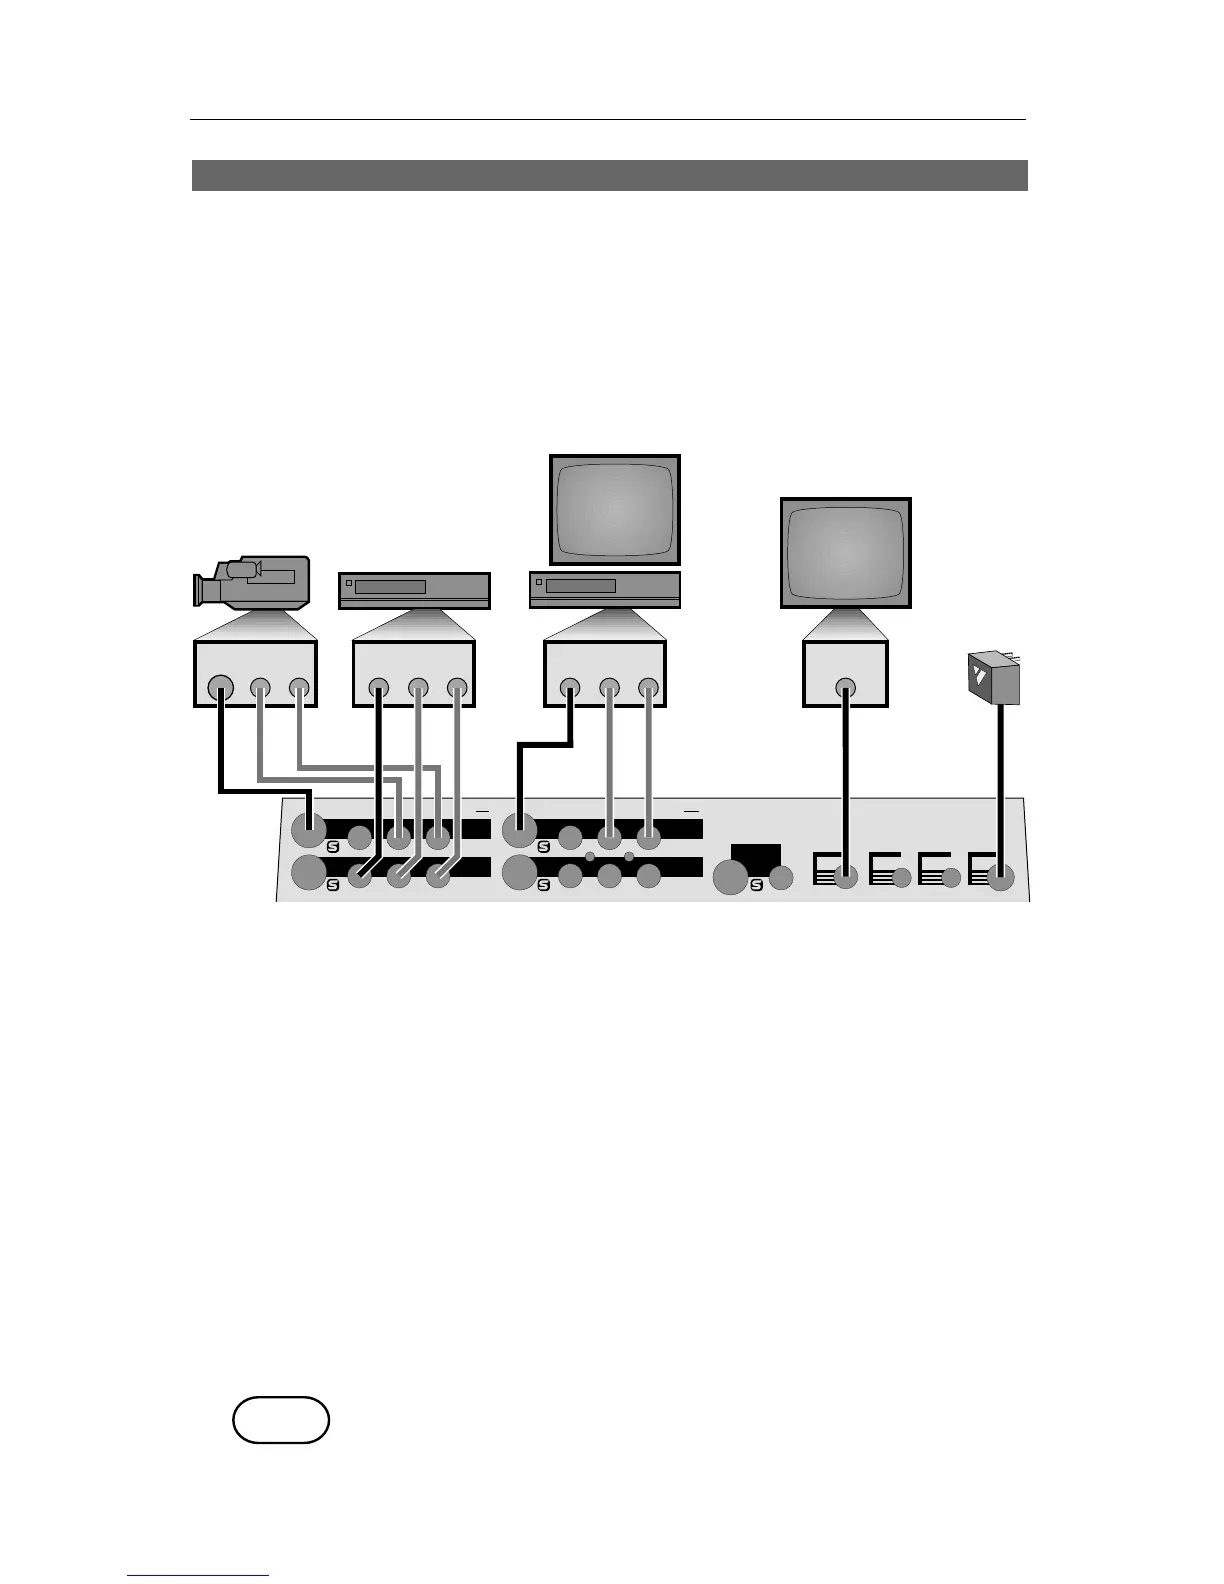
Setup and Installation
• Connect the power supply (F) and turn the unit on, confirming that
the power light comes on.
• Connect the MX-1’s OUT jacks to the VIDEO and AUDIO IN jacks of a
VCR (D). Connect a television/monitor to the VCR in the normal
fashion (A), so that you will be able to see the VCR’s output. Turn the
television and VCR on.
• Connect the MX-1’s PREVIEW OUT jack to the VIDEO IN jack of a
second monitor (E).
Note: These instructions assume a two-monitor setup. If you are using only
one monitor, connect it to PREVIEW.
• Connect a camcorder, VCR or other source to IN 1 (B). Connect a
second source to IN 2 (C). Turn on the video sources and start the
tapes rolling.
• Press SHIFT and AUDIO/VIDEO at the same time and the MX-1 will
automatically find and use the inputs that have video signals con-
nected.
Demo
• Press DEMO. You should see the two sources alternating, with a variety
of transition effects in between. (If only one source is connected, the
demo will perform transitions from that source to itself.)
DEMO