PAGE 6 VIDEONICS DIGITAL VIDEO MIXER
• Press any key to stop the demo.
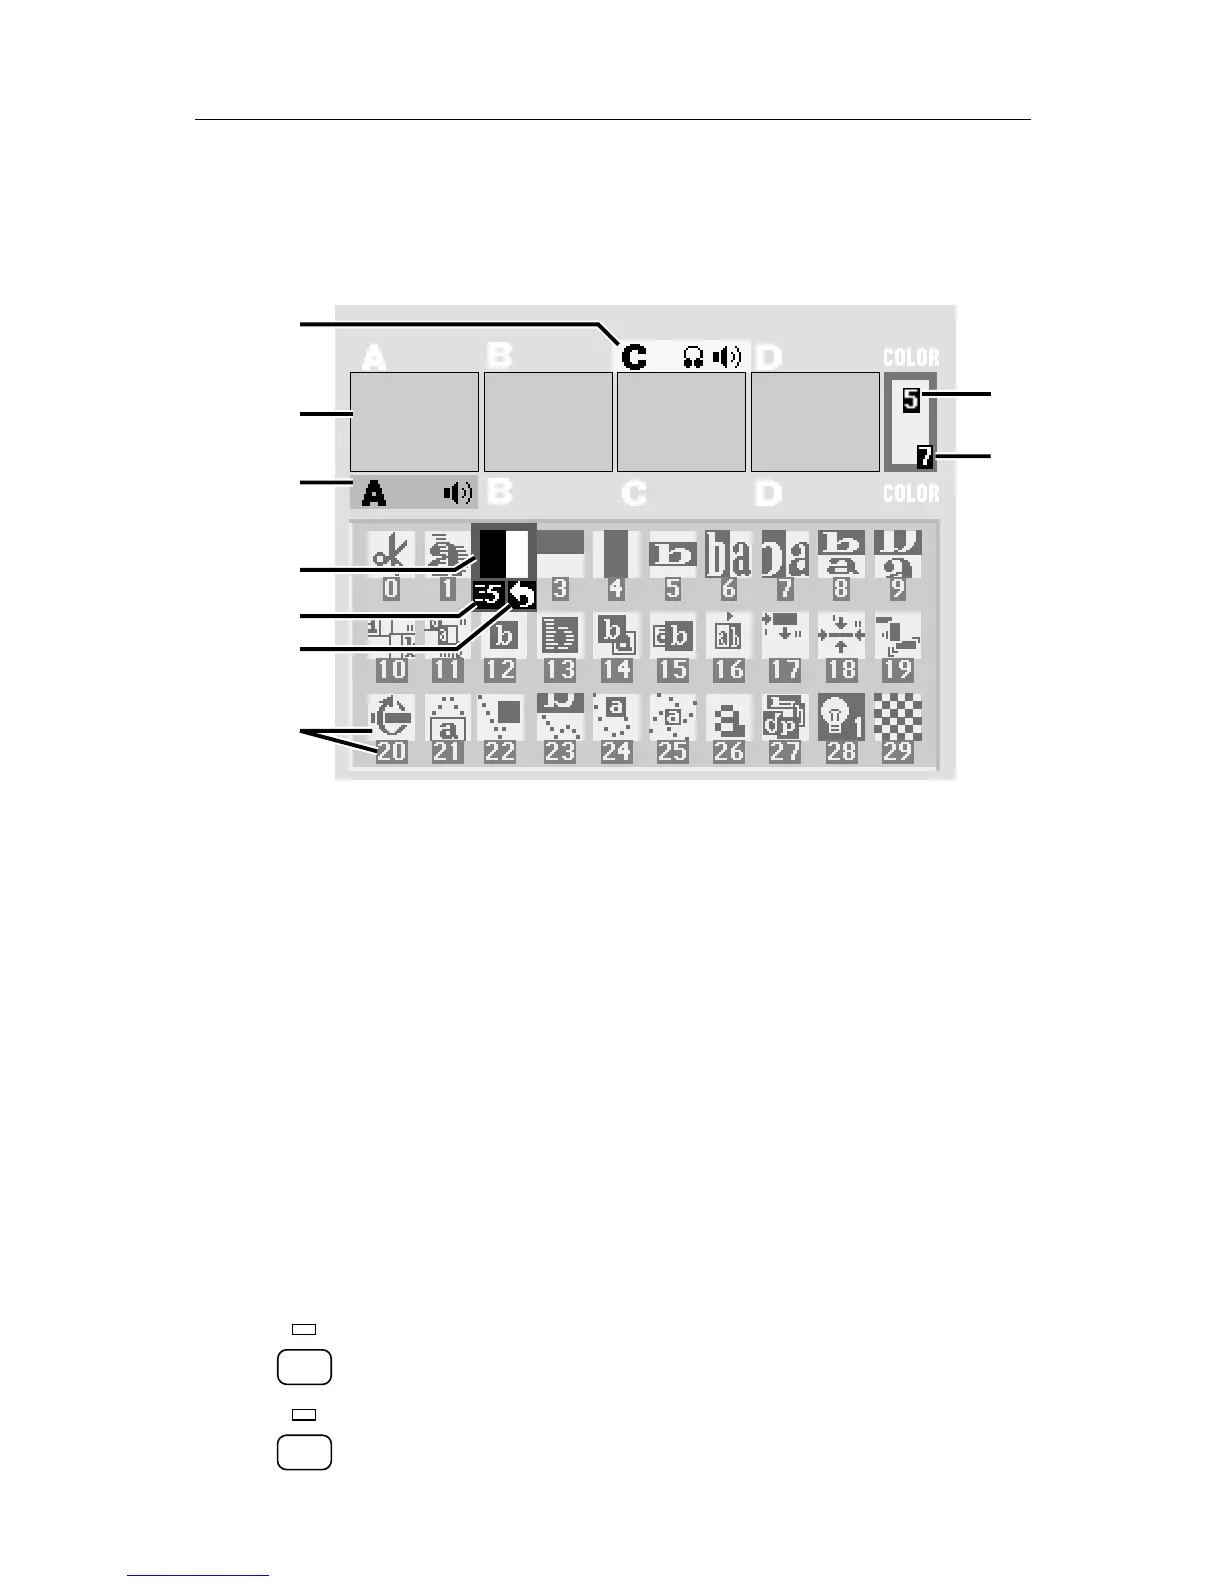
The PREVIEW screen
• You should see the following (with some slight differences) on the
PREVIEW monitor screen:
A
D
E
F
C
H
J
B
G
A
D
E
F
C
H
J
B
G
• This screen shows you four preview images (B) — these are your video
inputs in miniature.
Note that the preview images are reduced size and frame rate (that is,
they don’t change as quickly as a single-source video monitor’s im-
age). Depending on the type of video connected to the inputs, you
may also see lines outside the preview images. Preview image quality
does not affect the output.
• The PREVIEW screen shows you the three most important things you
need for accomplishing a transition:
Which input is the CURRENT source (A) — that is, which one is
currently on the OUTPUT monitor. The current source is highlighted in
yellow.
The NEXT source (C) — that is, the one that will appear on the
OUTPUT monitor after the transition is complete. The NEXT source is
highlighted in green.
An array of symbols (G), each of which represents an effect that can be
used when transitioning between sources. A blue highlight (D) shows
which effect will be used next.
• The PREVIEW screen also shows the speed (E) and direction (F) that
will be used for the next transition and the background (H) and border
(J) colors.
Cutting Between Sources
• Press CUT→A. The light above the button will come on and the
OUTPUT monitor will show whatever is plugged in to the input labeled
CUT ➔
A
B
CUT ➔