QE20 Fibre Networking User Manual Document: LT0732
Page 3-24 24 May 2023 Issue 1.0
By default, the Moxa switch has an IP address of 192.168.127.253. If the
reported IP address for the Moxa switch is not 192.168.127.253 then the
Moxa has another IP address assigned. It may be necessary to assign a
different IP address and net mask to the PC Ethernet port so the PC and
Moxa are on the same sub-net and can communicate over Ethernet.
If the Status column shows Locked right click the entry found, and on the
menu select Unlock. Enter the assigned username and password – by default
these are admin and moxa. Click OK and make sure the status changes to
Unlocked.
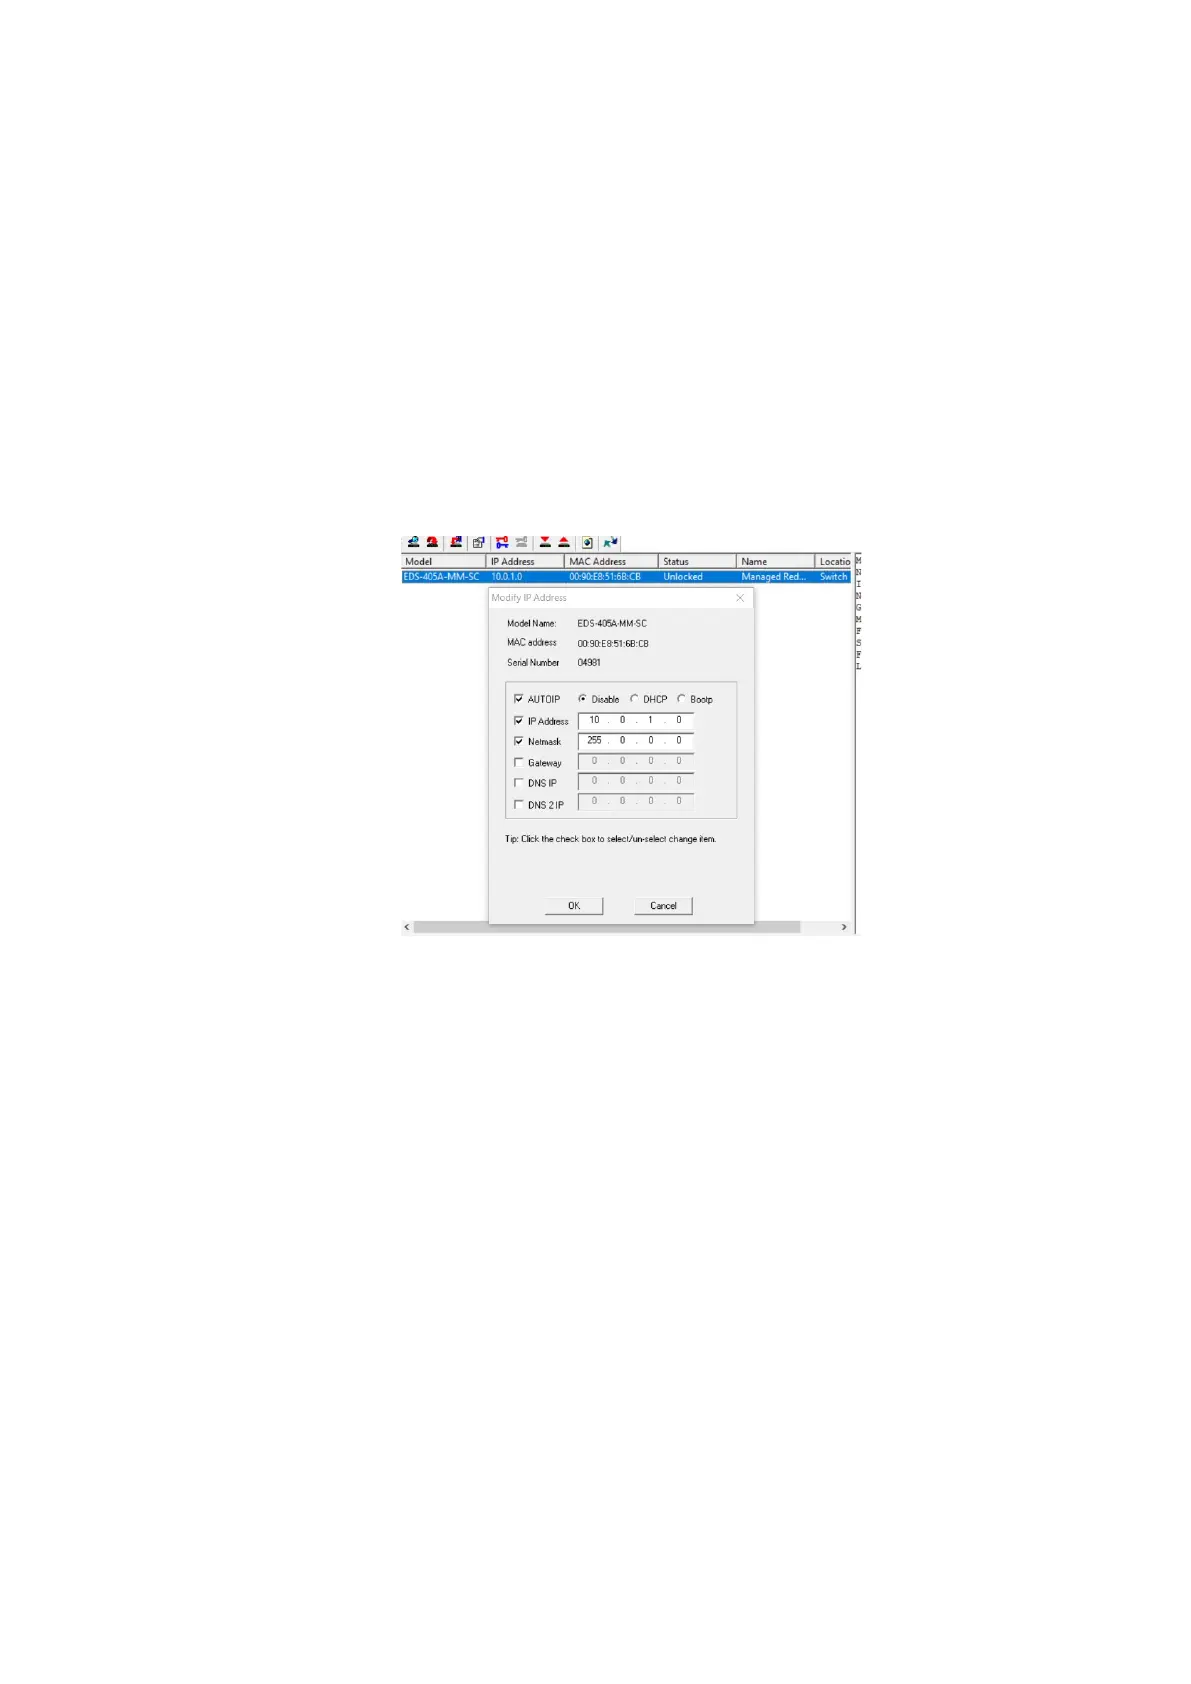
Right click the entry found, and on the menu select Modify Configuration. A
Modify IP Address dialog box should be shown.
Tick AUTOIP and select Disable.
Tick IP Address and enter the assigned IP address (e.g., 10.0.1.0).
Tick Netmask and enter the subnet mask (e.g., 255.0.0.0).
Click OK.
At this point the PC will lose connectivity with the Moxa switch.
• Remove the IP Address assignment on the PC Ethernet port and select
DHCP. Further configuration of the Moxa switch can be done using the built-in
Web Server.
3.1.21 Configure Moxa Switch Using Built-In Web Server
To configure the MOXA switch using its assigned IP address:
• Enable the DHCP Server function on the PIB by fitting J13 “DHCP
SERVER/TAMPER”. Note at most one device (PIB, Moxa switch, ATA) on the
QE20 network should have the DHCP Server function enabled.