To avoid risk of electrical shock, personal injury, or death, disconnect electrical power source to unit, unless test
procedures require power to be connected. Discharge capacitor through a resistor before attempting to service.
Ensure all ground wires are connected before certifying unit as repaired and/or operational.
WARNING!
Disassembly
24 ©2012 Viking Preferred Service
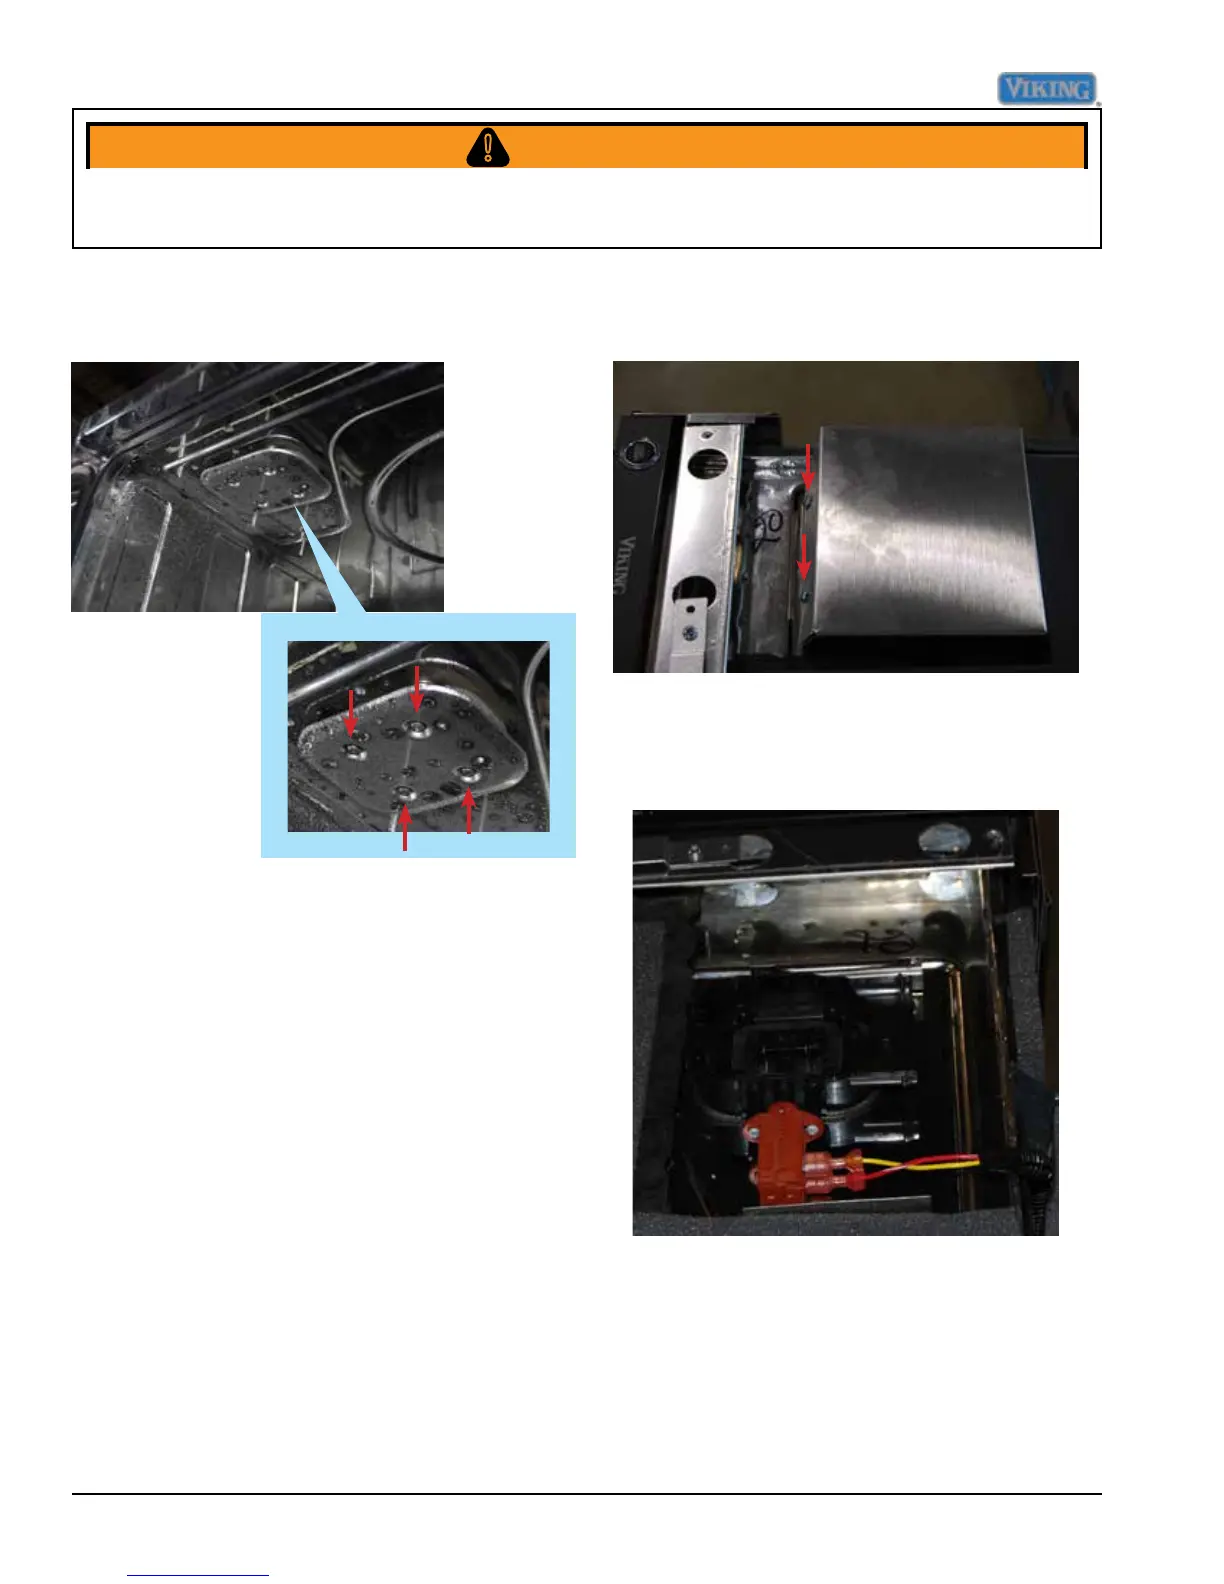
Vent Assembly Removal
Remove four TORX screws shown in photos below.
Remove the panel and set aside to gain access
to the mounting screws for the vent assembly,
remove screws as shown in photo below.
Remove the two screws from top panel of dish-
washer shown in photo below. Remove cover
and set aside
At this time the vent assembly can be re-
moved from unit by lifting up and out,t from
the top of unit.
Reverse previous steps for installation.