To avoid risk of electrical shock, personal injury, or death, disconnect electrical power source to unit, unless test
procedures require power to be connected. Discharge capacitor through a resistor before attempting to service.
Ensure all ground wires are connected before certifying unit as repaired and/or operational.
WARNING!
Disassembly
©2012 Viking Preferred Service 27
Drain Motor Disassembly
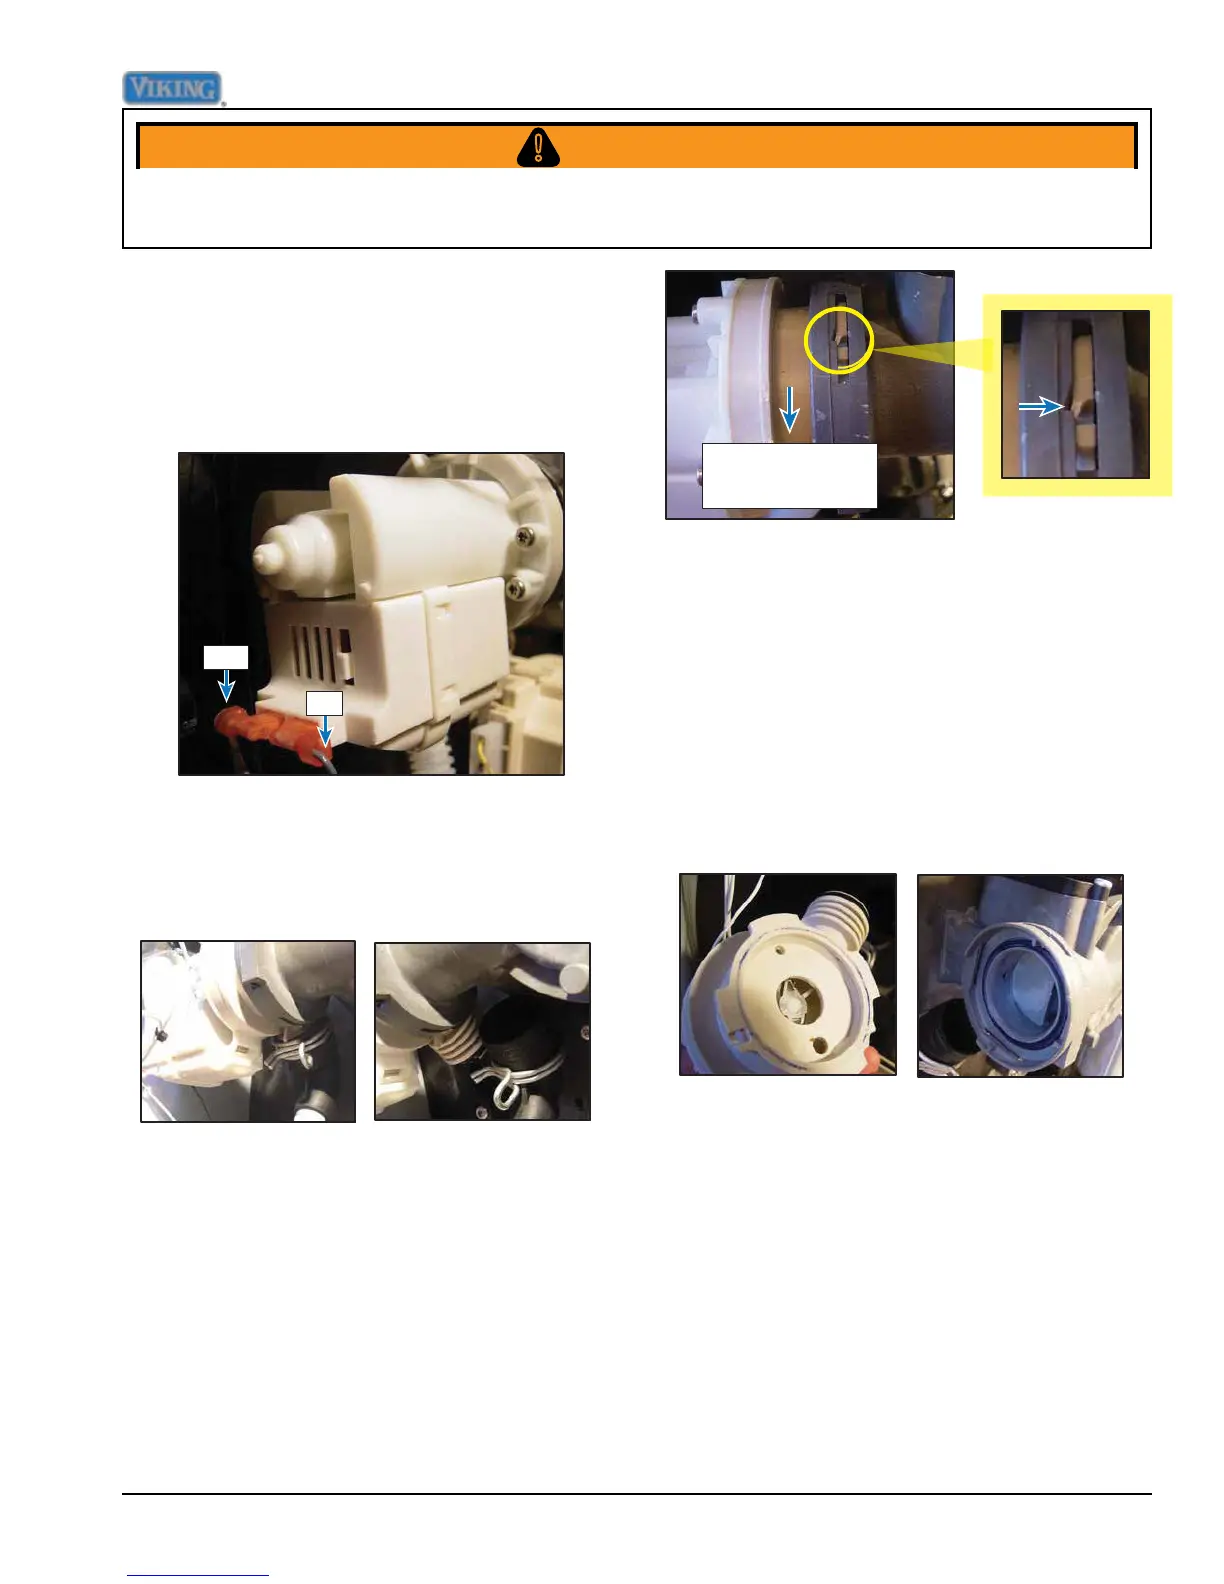
The image below shows the drain motor.
When required, the main control sends
120-volts from terminal P6-4 (brown) wire on
the control board and Neutral. Unplug the
wires to the motor.
P10-1
P6-4
Locate the drain hose on the rear of the
pump. Using a pair of pliers, disconnect the
hose. Image below (left) shows the hose
connected and below right shows the hose
disconnected.
Next, release the drain motor from the sump
assembly. Locate the release tab (indicated
by the yellow dotted line, below left). Using
a at blade screwdriver, bend the tap in the
direction shown by the arrow (below right)
to release the pump from the main housing.
Grasp the pump and rotate clockwise and the
pump can be removed.
When tab is released
rotate clockwise to
remove pump
When reinstalling pump, make sure to bend
the tab back in place to lock the pump in the
sump housing.
The image below (left) shows the pump
removed. The image below (right) shows
sump area with pump removed. Note the
location of the O-ring gasket in the sump.
Make sure the gasket is in place when
reinstalling the pump or the unit will leak
water into the base pan.