© 2011 Viking Preferred Service
32
Service Diagnostics and Procedures
Door Disassembly (cont.)
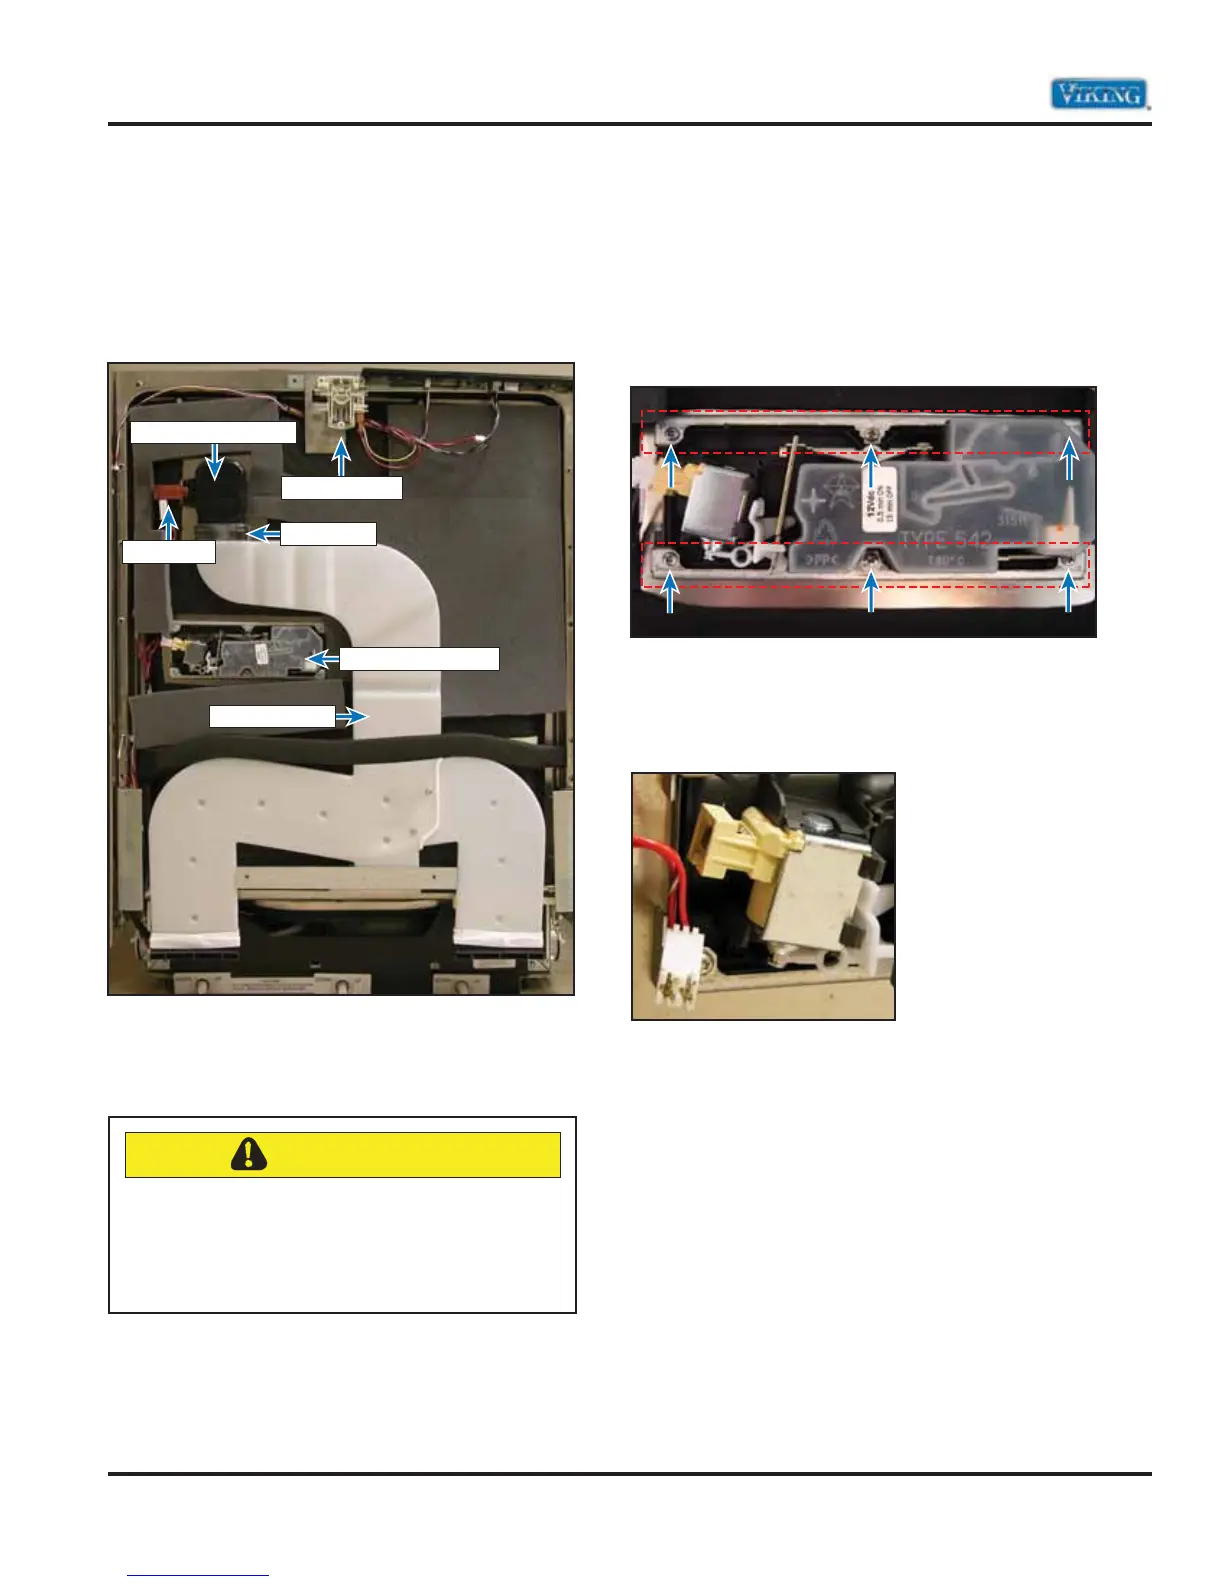
Inner Door Components–450 Model
With the inner door panel removed you now have
access to the inner door components.
The following image shows the inner door with all
the panels removed.
From here you can test the door interlock switch,
the detergent dispenser mechanism, the dryer
vent assembly, and WAX motor.
Detergent Dispenser
The image below shows a close-up of the detergent
dispenser. In order to remove the dispenser, first
remove the six T15 TORX® 1/2” (1.7 cm) screws
and the two brackets, which hold the dispenser
in place (brackets indicated by the red dotted
line below).
The image below shows the solenoid unplugged
to remove the dispenser assembly. Unplug the
two-wire connector plug in order to remove the
dispenser.
Interlock Switch
Detergent Dispenser
Inner Door Duct
Active Vent Assembly
Rubber Seal
WAX motor
CAUTION
Make sure that if the vent tube is removed for
any reason, the rubber seal that connects the
vent tube to the door assembly is securely
fastened. Failure to do so may cause steam to
escape during the wash and dry cycles.