© 2011 Viking Preferred Service
34
Diagnostics
Door Disassembly (cont.)
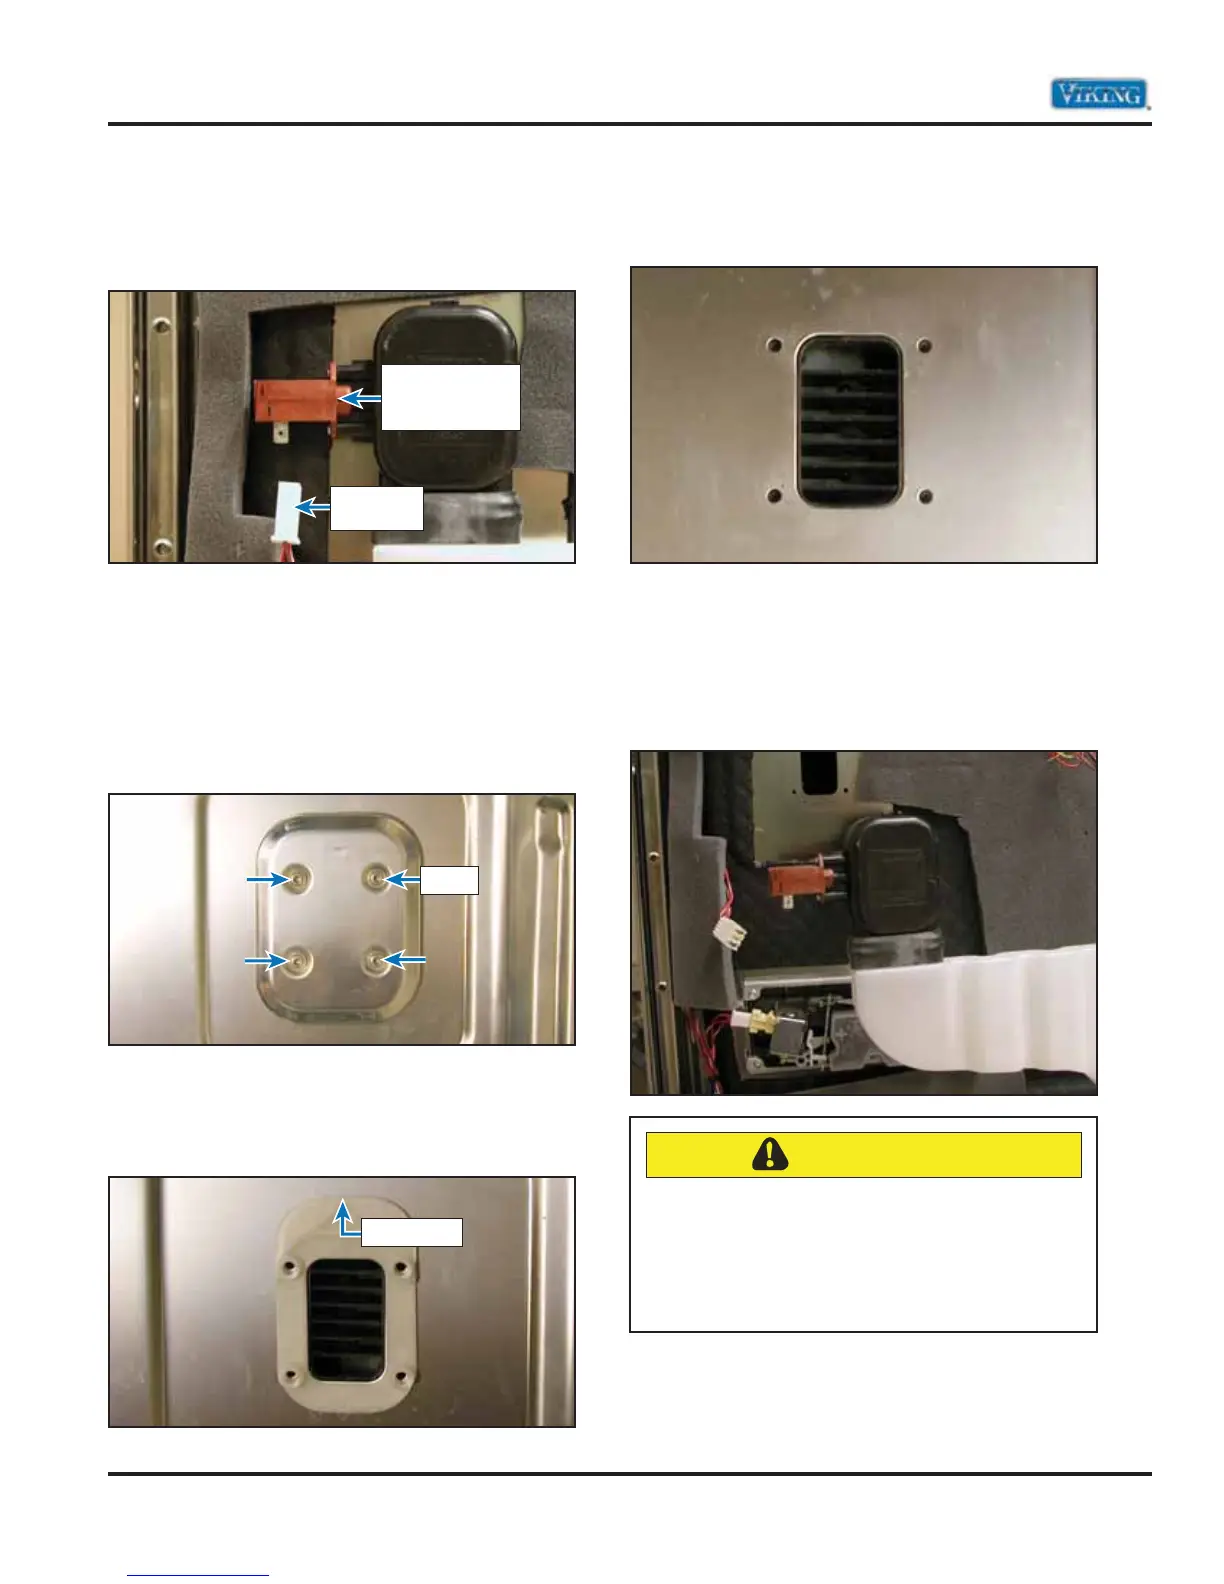
Door Vent Mechanism–450 model
In order to remove the dryer door vent mechanism
and WAX motor, unplug the WAX connector harness.
Note: The vent door is normally open when the
dishwasher is not in use. When switched on, the
WAX motor will heat up and close the internal door
during a wash cycle and open during the dry cycle.
Open the door and remove the four T15 x 7/8”
(2.2 cm) TORX ® screws that hold the stainless steel
diverter plate in place.
With the diverter plate removed you will see a
plastic spacer. The spacer is marked with the word
“UP” on each end. When reassembling, make sure
the wider edge is facing the top of the door.
The image below shows the vent spacer removed.
Now close the door and you can now remove the
dryer door vent mechanism as shown below.
Be sure that when reassembling the vent that the
lip edge of the vent is positioned properly in the
opening of the door liner. Failure to do so could
cause a water leak inside the door.
Dryer Vent Door
WAX Motor
12 Volts
Connector
Harness
Screw
Top of door
CAUTION
Make sure that when reinstalling the dryer
door vent mechanism that the O-ring gasket
is in place as shown above. Failure to do so
may cause water to leak inside the door and
then onto the consumer’s floor.