© 2011 Viking Preferred Service
46
Service Diagnostics and Procedures
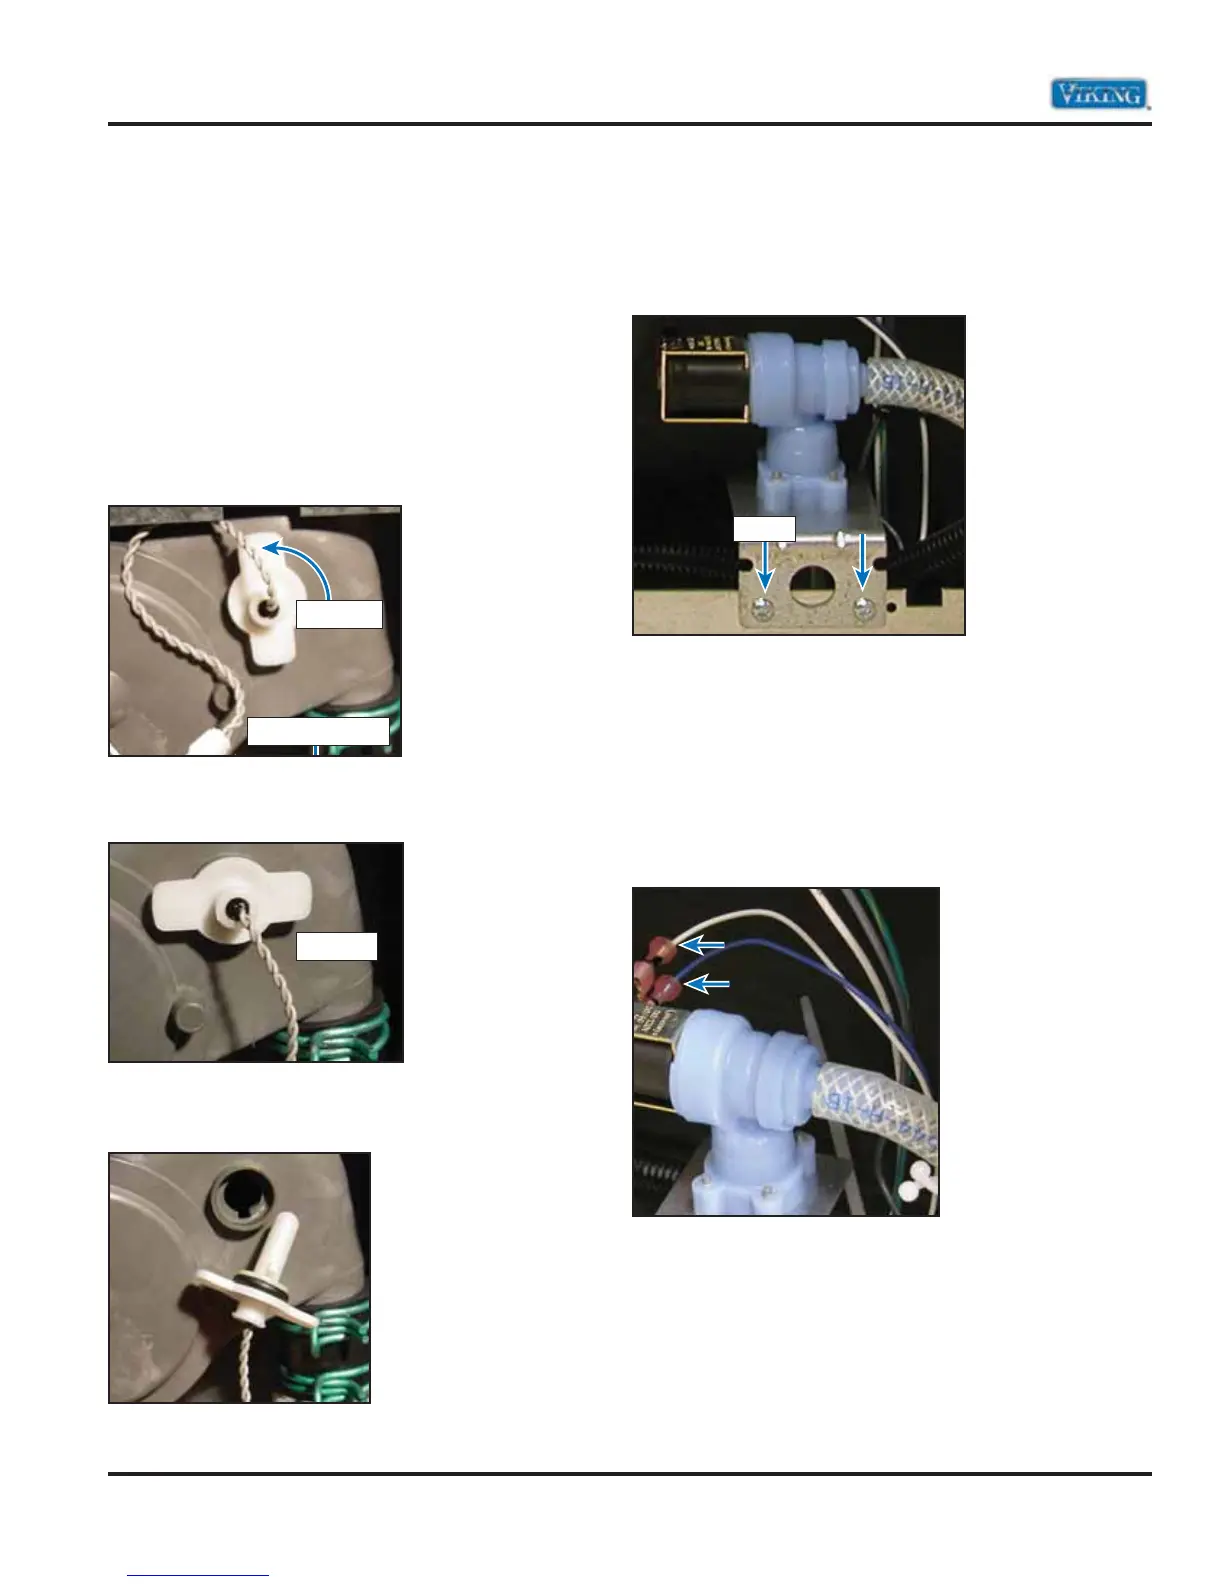
Water Temperature Sensor Disassembly
The water temperature sensor will sense the
temperature of the water throughout the wash
cycle. It is an N.T.C (Negative Temperature Control)
sensor which reads approximately 47k їohms at
77° ambient. As the water temperature rises, the
resistance drops.
In order to remove, unplug the 2-wire connector and
then twist the sensor counterclockwise to release
from the sump assembly. The image below shows the
temp sensor in the locked position. Grasp the sensor
tabs and twist counterclockwise to release.
The image below shows the temp sensor in the
unlocked position.
While grasping the tabs, pull the sensor out of the
sump assembly as shown.
Fill Valve Disassembly
In order to access the fill valve, you will need to
lay the unit on its back. Remove the base pan and
moisture sensor. The valve is secured to the rear
frame with two TORX® screws as shown.
Remove the two screws shown above and remove
the fill valve from the base.
Unplug the white and blue wires from the coil,
and then disconnect the fill tube from the valve
outlet. The fill valve is a 120-volt valve. The coil is
a 1.1K ї ohm coil and is controlled from P6-6 (line
voltage-blue) and P6-7 (Neutral–White) on the main
terminal block.
To Control Board
To Unlock
Unlocked
Screw