© 2011 Viking Preferred Service
48
Service Diagnostics and Procedures
Control Board Disassembly (cont.)
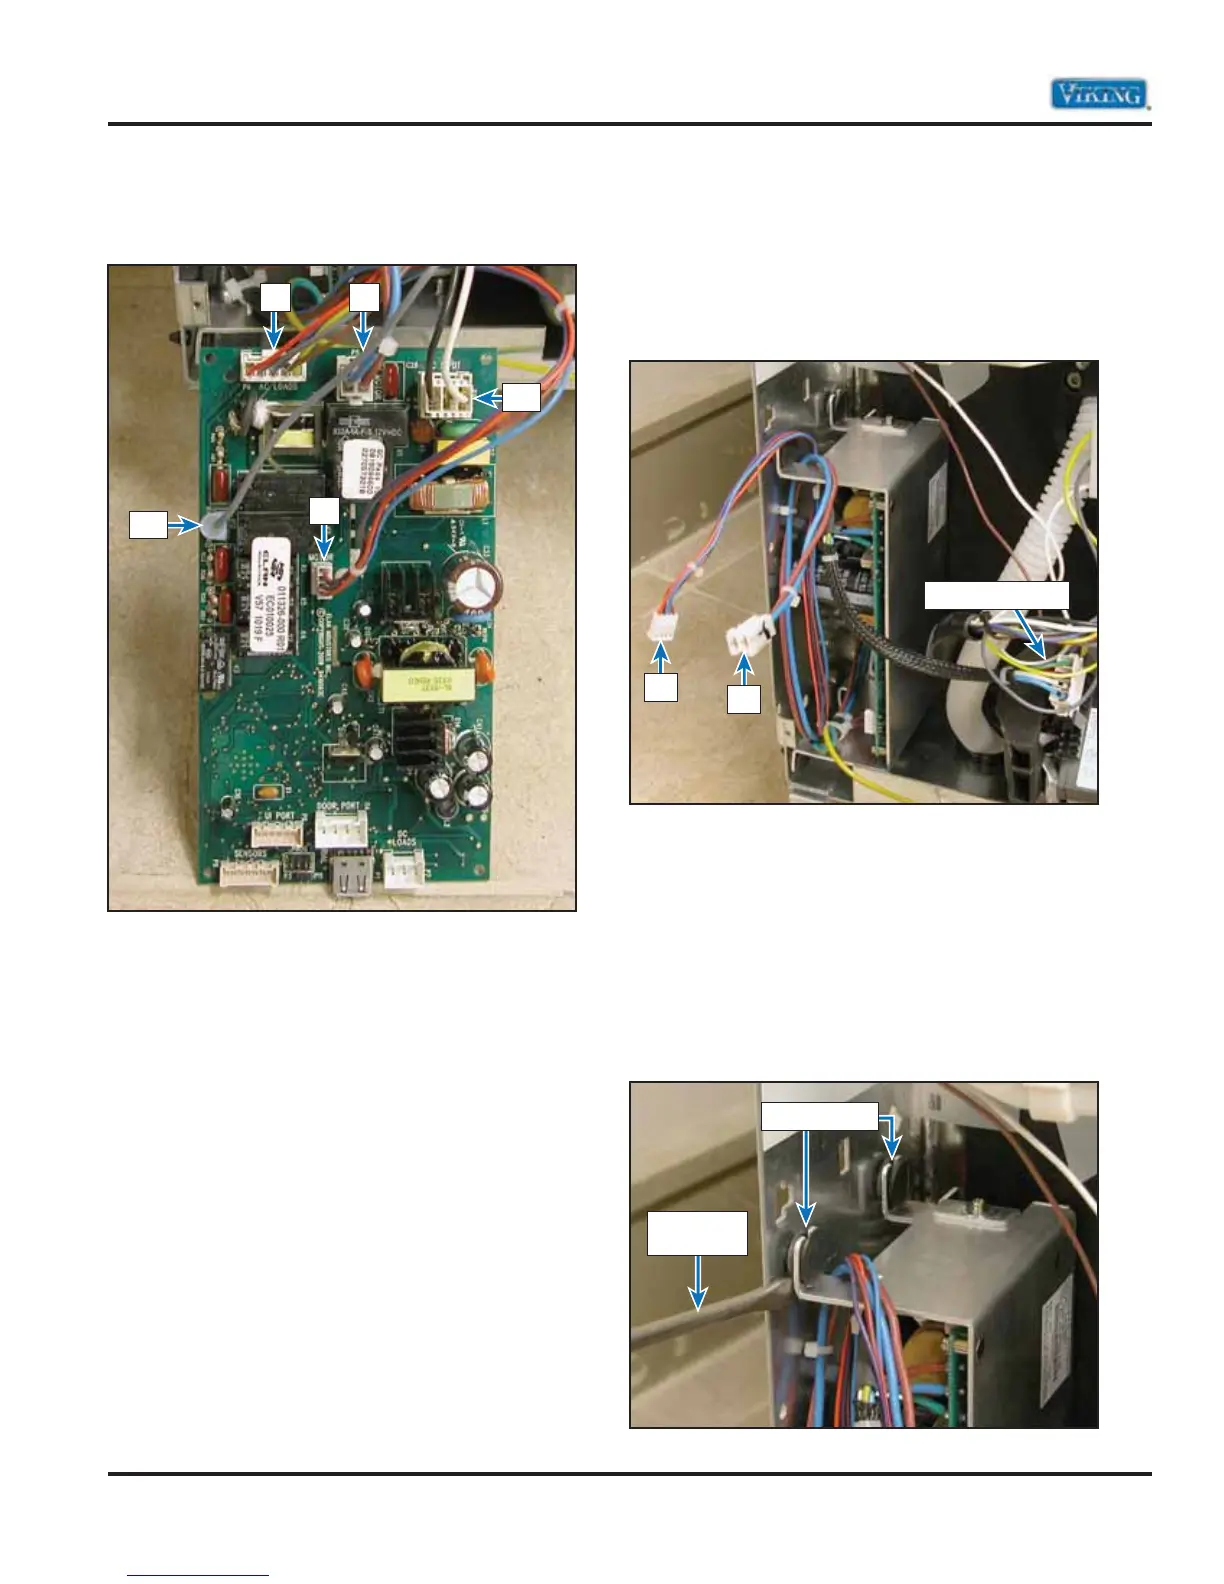
Disconnect the P2, P5, P6, P10, and P12 connectors
from the board.
Note: It is recommended that the control be taken
out before removing the motor control board. It
makes it easier to handle removal.
Motor Controller Board Disassembly
With the control board removed, you can now
remove the motor controller for service. The image
below shows the motor controller with the P5
and P2 connectors disconnected from the control
board. The 4-wire connector to the motor is still
connected.
P5 provides 120-volt AC power to the motor
controller. P2 provides the control signal voltage
between the control board and the motor
controller.
The motor controller is secured on the left side
support frame by four plastic locking plugs. Using
a flat blade screwdriver as shown below, carefully
extend the bracket away from the dishwasher
frame. This will release the locking tabs.
P12
P6 P5
P2
P10
Locking Tabs
Screwdriver
Blade
P2
P5
Motor Connector