Disassembly
©2013 Viking Preferred Service 33
To avoid risk of electrical shock, personal injury, or death, disconnect electrical power source to unit, unless test
procedures require power to be connected. Discharge capacitor through a resistor before attempting to service.
Ensure all ground wires are connected before certifying unit as repaired and/or operational.
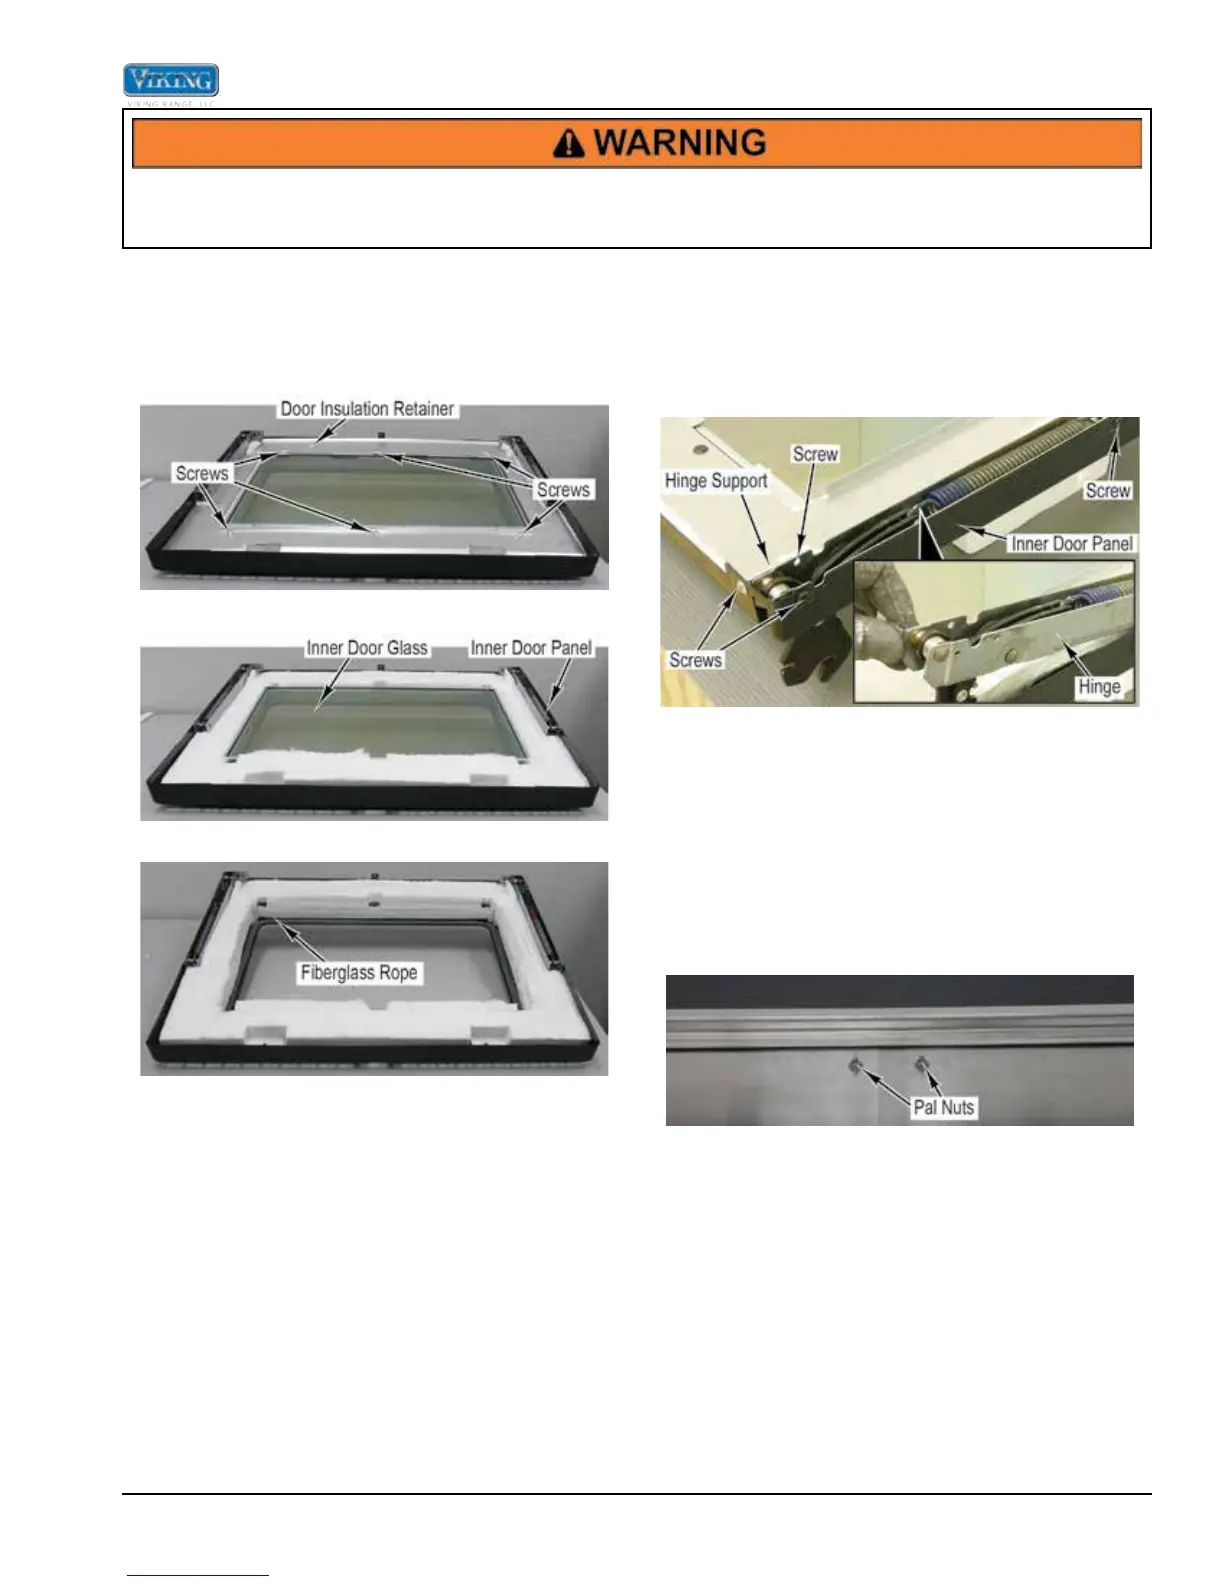
Inner Door Glass Removal
1. Remove outer door panel assembly (see Outer Door
Panel Assembly Removal).
2. Remove six screws and door insulation retainer from
door glass brackets.
3. Remove inner door glass from inner door panel.
4. Remove black fiberglass rope from inner door panel.
Note: Use care with insulation. Make sure to replace
any damaged or missing insulation. Keep vent
on inner door panel clear of insulation.
5. Reverse procedure for installation.
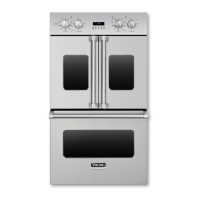
Door Hinge Removal
1. Remove outer door panel assembly (see Outer Door
Panel Assembly Removal).
2. Remove three screws and hinge from inner door
panel.
3. Remove screw and hinge support from hinge.
Note: Use care with insulation. Make sure to replace
any damaged or missing insulation. Keep vent
on inner door panel clear of insulation.
4. Reverse procedure for installation.
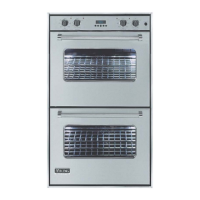
Door Logo Removal
1. Remove outer door panel assembly (see Outer Door
Panel Assembly Removal).
2. Lift door insulation panel up to remove two pal nuts
and logo from outer door panel.
3. Reverse procedure for installation.