Disassembly
40 ©2013 Viking Preferred Service
To avoid risk of electrical shock, personal injury, or death, disconnect electrical power source to unit, unless test
procedures require power to be connected. Discharge capacitor through a resistor before attempting to service.
Ensure all ground wires are connected before certifying unit as repaired and/or operational.
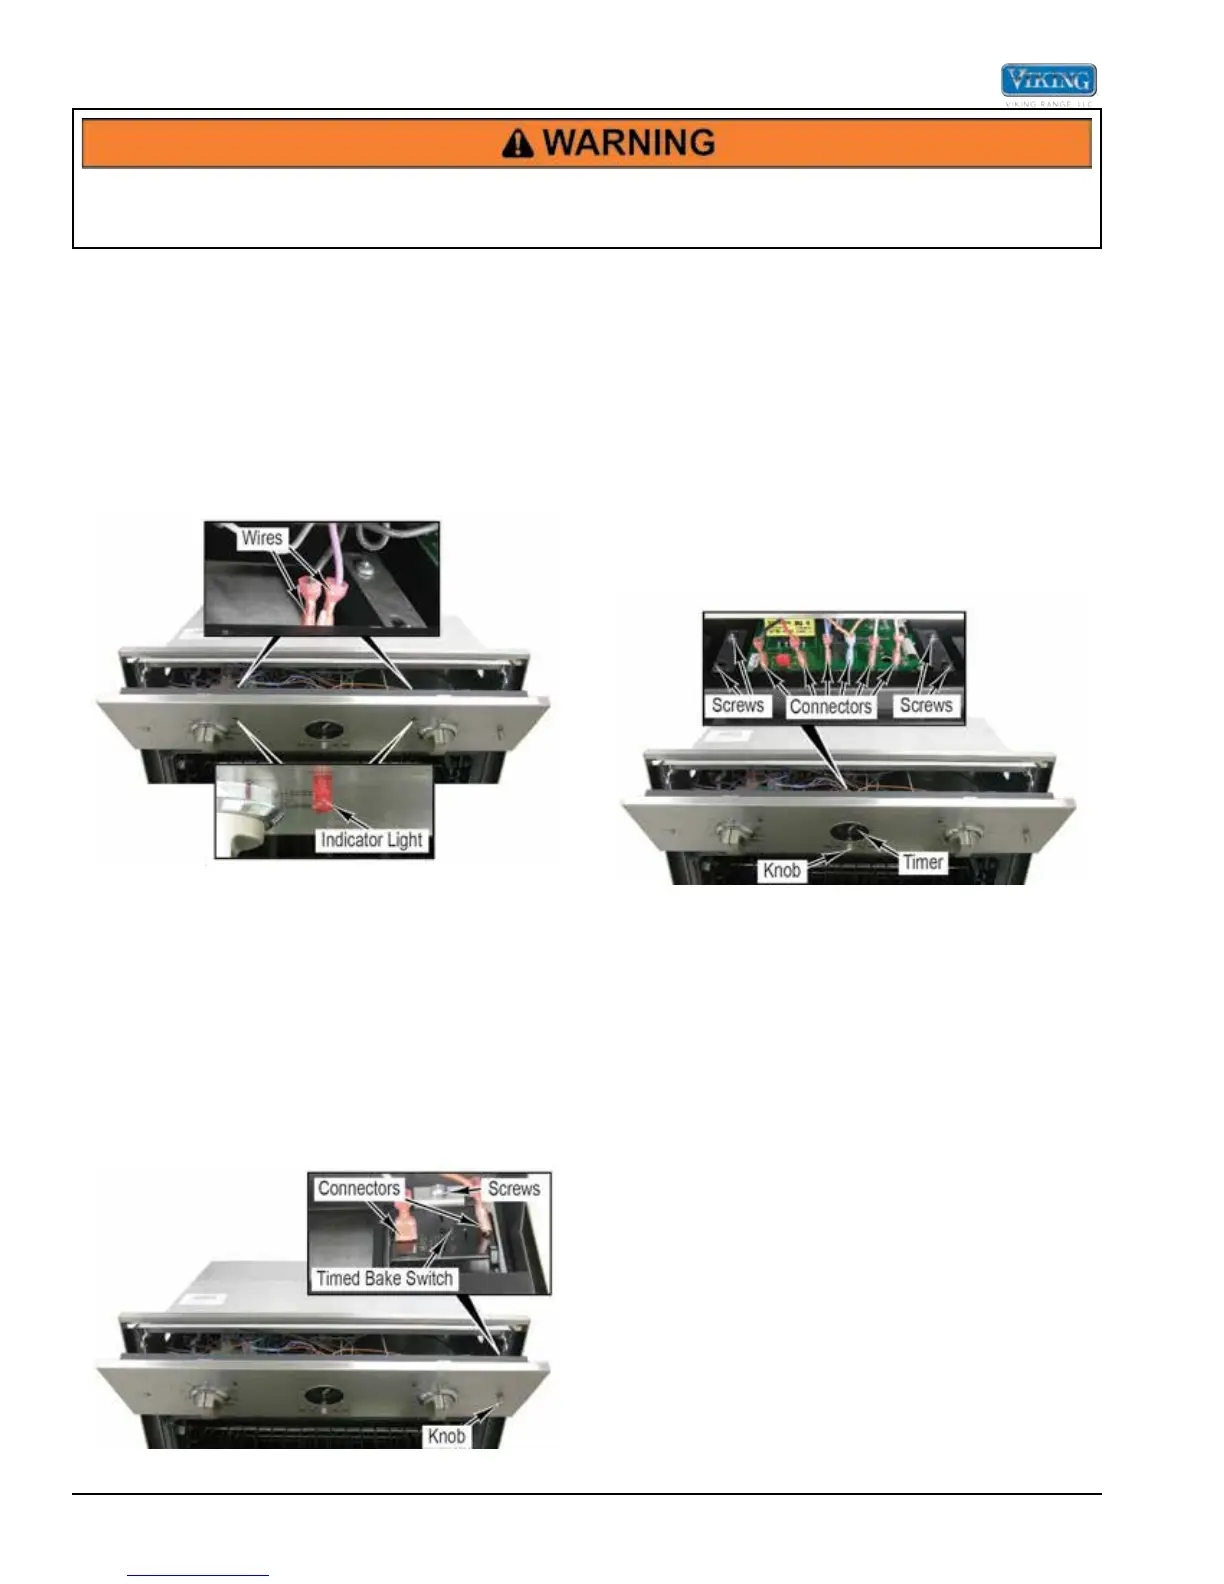
Oven Cycle/Clean Indicator Lights Removal
The Oven Cycle/Clean Indicator Lights are located on
the control panel. The Oven Cycle Indicator Light is
used to indicate when an oven element is on. The Clean
Indicator Light is on when the oven is in self-clean mode.
1. Access the control panel area (see Control Panel
Access).
2. Remove wires from indicator light.
3. Push indicator light through the front of the control
panel.
4. Reverse procedure for installation.
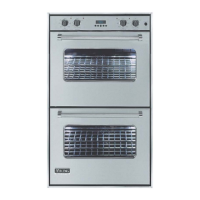
Timed Bake Switch Removal
The Timed Bake Switch is used to select how the oven
timer will be used.
1. Access the control panel area (see Control Panel
Access).
2. Remove knob from timed bake switch.
3. Disconnect the connectors from the timed bake
switch.
4. Remove screws and timed bake switch from control
panel.
5. Reverse procedure for installation.
Oven Timer/Clock Removal
The Oven Timer/Clock is located on the control panel.
It is used to control the meat probe, bake time, and
automatic bake functions. The digital and analog styles
are replaced using the same procedures.
1. Access the control panel area (see Control Panel
Access).
2. Pull to remove one knob from the analog timer.
3. Disconnect connectors from the timer. The number
of connectors will vary depending on the number of
ovens and features available.
4. Remove four screws and the timer from the control
panel assembly.
5. Reverse procedure for installation.