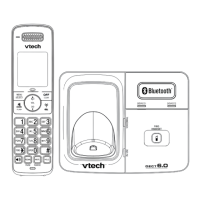
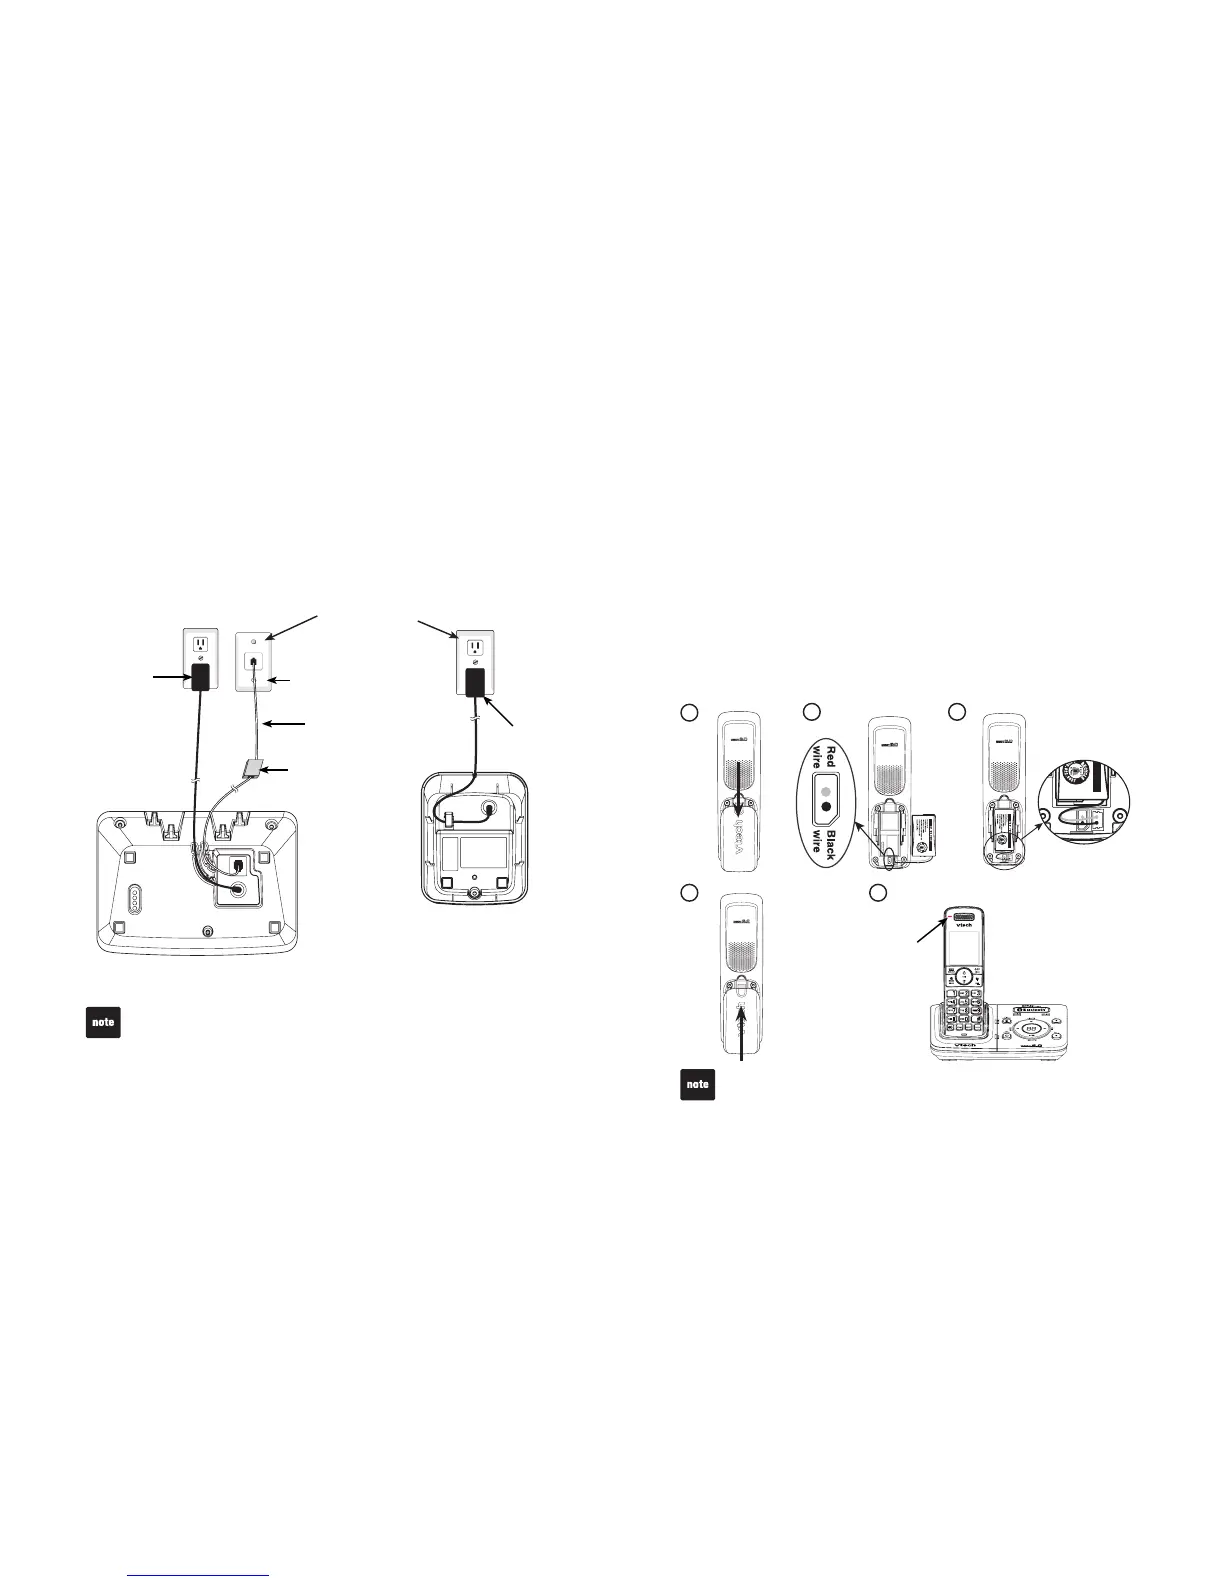
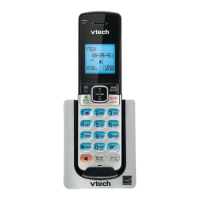
Telephone base and charger installation
Install the telephone base and charger(s) as shown below.
Make sure that the electrical outlet is not controlled by a wall switch.
If you subscribe to digital subscriber line (DSL) high-speed Internet service
through your telephone line, you must install a &5.ſNVGTDGVYGGPVJG
VGNGRJQPGNKPGEQTFCPFVJGVGNGRJQPGYCNNLCEM6JGſNVGTRTGXGPVUPQKUGCPF
caller ID problems caused by DSL interference. Contact your DSL service
RTQXKFGTHQTOQTGKPHQTOCVKQPCDQWV&5.ſNVGTU
Use only the power adapters supplied with this product. To order a
replacement, visit our website at www.vtechphones.com or
call 1 (800) 595-9511.
The power adapters are intended to be correctly oriented in a vertical or
ƀQQTOQWPVRQUKVKQP6JGRTQPIUCTGPQVFGUKIPGFVQJQNFVJGRNWIKPRNCEGKH
it is plugged into a ceiling, under-the-table or cabinet outlet.
•
•
Telephone line cord
DSL filter (not
included) is required
if you have DSL
high speed Internet
service
Telephone
base power
adapter
Electrical outlet
not controlled
by a wall switch
Telephone wall jack
Telephone base
Power
adapter
Charger
4
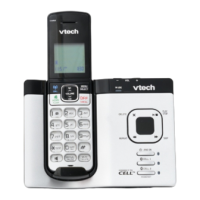
Getting started
If the handset will not be used for a long time, disconnect and remove the
battery to prevent possible leakage.
To purchase a replacement battery, visit our website at www.vtechphones.
com or call 1 (800) 595-9511.
•
•
Battery installation
Install the battery as shown below.
If the battery compartment cover is on the handset, press the indentation
and slide the cover to remove.
Plug the battery connector securely into the socket inside the handset
battery compartment, matching the color-coded label.
Place the battery with the label THIS SIDE UP facing up and the wires
inside the battery compartment.
#NKIPVJGEQXGTƀCVCICKPUVVJGDCVVGT[EQORCTVOGPVVJGPUNKFGKVVQYCTFU
the center of the handset until it clicks into place.
Charge the handset by placing it in the telephone base. The CHARGE
light is on when the handset charges.
1.
2.
3.
4.
5.
1
3
2
4
5
CHARGE light