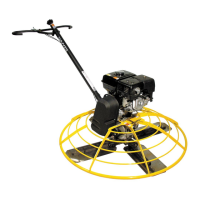
Guide Handle CT Repair
wc_tx000551gb.fm 62
5.5 Replacing the Upper Handle
See Graphic: wc_gr003360
Disassembly:
5.5.1 Remove the throttle lever (a) and the throttle cable from the upper
handle. See section Replacing the Throttle Cable.
5.5.2 Disconnect and remove the stop switch (b). See section Replacing the
Stop Switch.
5.5.3 Disconnect the handle ground wire if equipped on your machine.
5.5.4 Remove the lock nut (c) from the end of the pitch control cable (d). Pull
the pitch control cable from the yoke (e) and slide it from the pulley (f)
of the lower handle (g).
5.5.5 Remove the two screws (h) holding the upper handle to the lower
handle. Carefully pull the upper handle and the pitch control cable
away from the lower handle.
5.5.6 Remove the pitch control device (i) (twist pitch or Pro-Shift
®
) and the
pitch control cable from the upper handle.
Assembly:
5.5.7 Thread the pitch control cable through the upper handle. Attach the
pitch control device (i) (twist pitch or Pro-Shift
®
) to the upper handle.
On models with twist-pitch control, turn the knob counterclockwise as
far as possible. On models with Pro-Shift
®
control, position the lever
towards the operator.
5.5.8 Position the upper handle near the lower handle (g) so that you can
thread the pitch control cable (d) through the lower handle and around
the pulley (f) of the lower handle. Then, slide the upper handle into the
lower handle.
5.5.9 Secure the upper handle to the lower handle with two screws (h) and
lock nuts.
5.5.10 Thread the pitch control cable into the yoke (e) and connect the lock
nut (c). Adjust the lock nut so that the cable is snug with the trowel
blades flat (0° pitch).
5.5.11 Attach (by threading) the stop switch (b) to the upper handle. See
sections Engine Wiring and Replacing the Stop Switch.
5.5.12 Connect the handle ground wire if equipped on your machine.
5.5.13 Attach the throttle lever (a) and throttle cable. See section Replacing
the Throttle Cable.
 Loading...