Clutch CT Repair
wc_tx000552gb.fm 72
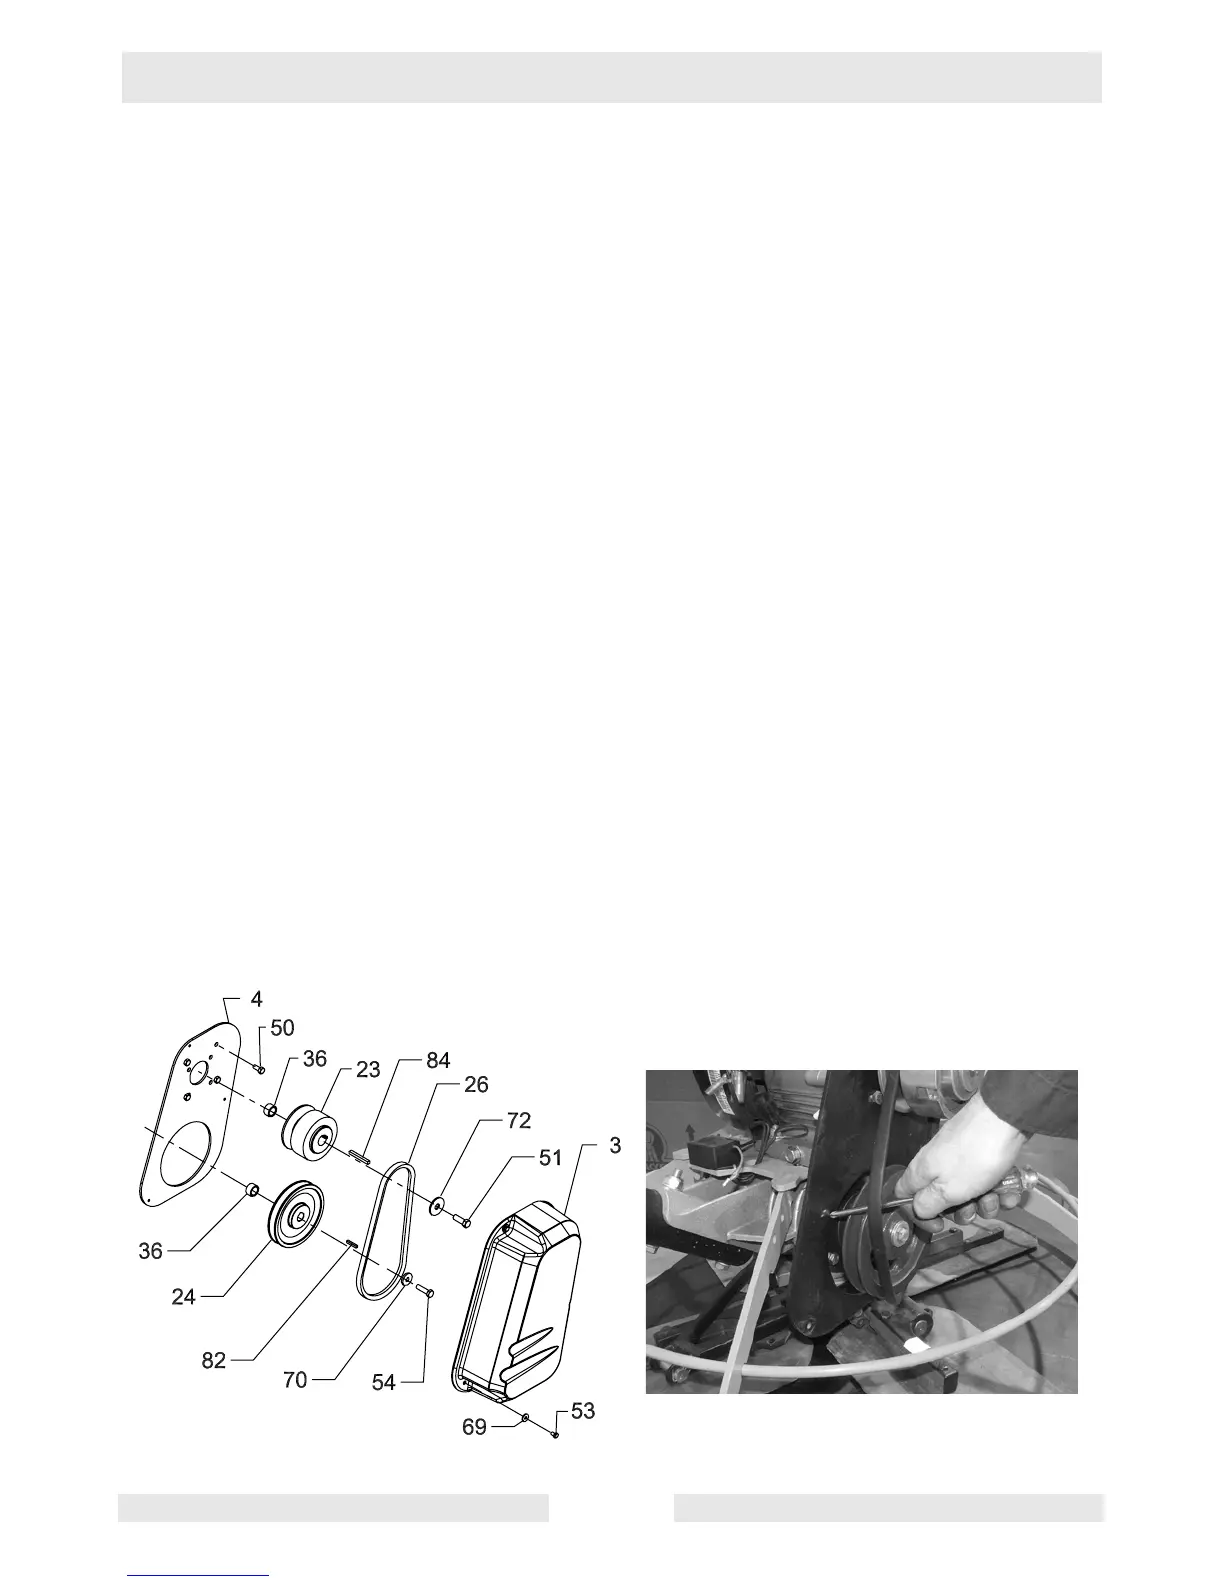
6.4 Replacing the Standard Clutch
See Graphic: wc_gr003153, wc_gr002068
Removal:
6.4.1 Remove the drive belt as described in section Replacing the Drive Belt.
6.4.2 Remove the screw (51) and the washer (72) that secure the clutch
assembly (23) to the crankshaft.
6.4.3 Loosen the setscrew(s) (2) on the clutch assembly. Pull the clutch
assembly from the crankshaft. If a three-jaw puller is used, thread in
the screw (51) removed in step two 4–6 turns to protect the threads in
the crankshaft. Push against the bolt head rather than directly against
the threads of the crankshaft.
6.4.4 Remove the spacer (36) and the key (84) from the crankshaft. Inspect
the key and the keyways for signs of shearing. Replace the key if it is
deformed or if its edges are rounded.
Installation:
6.4.5 Coat the engine crankshaft with an anti-seize compound and reinstall
the spacer (36).
6.4.6 Install the key (84) in the keyway and slide the clutch assembly over
the crankshaft. Tap the key with a rubber mallet if necessary. Tighten
the setscrew.
6.4.7 Replace the washer (72) and the screw (51). Torque the screw to 25
Nm (18 ft.lbs.).
6.4.8 Reinstall the drive belt as described in Replacing the Drive Belt.
wc_gr003153
 Loading...