41
PC 1025 PRO
EN
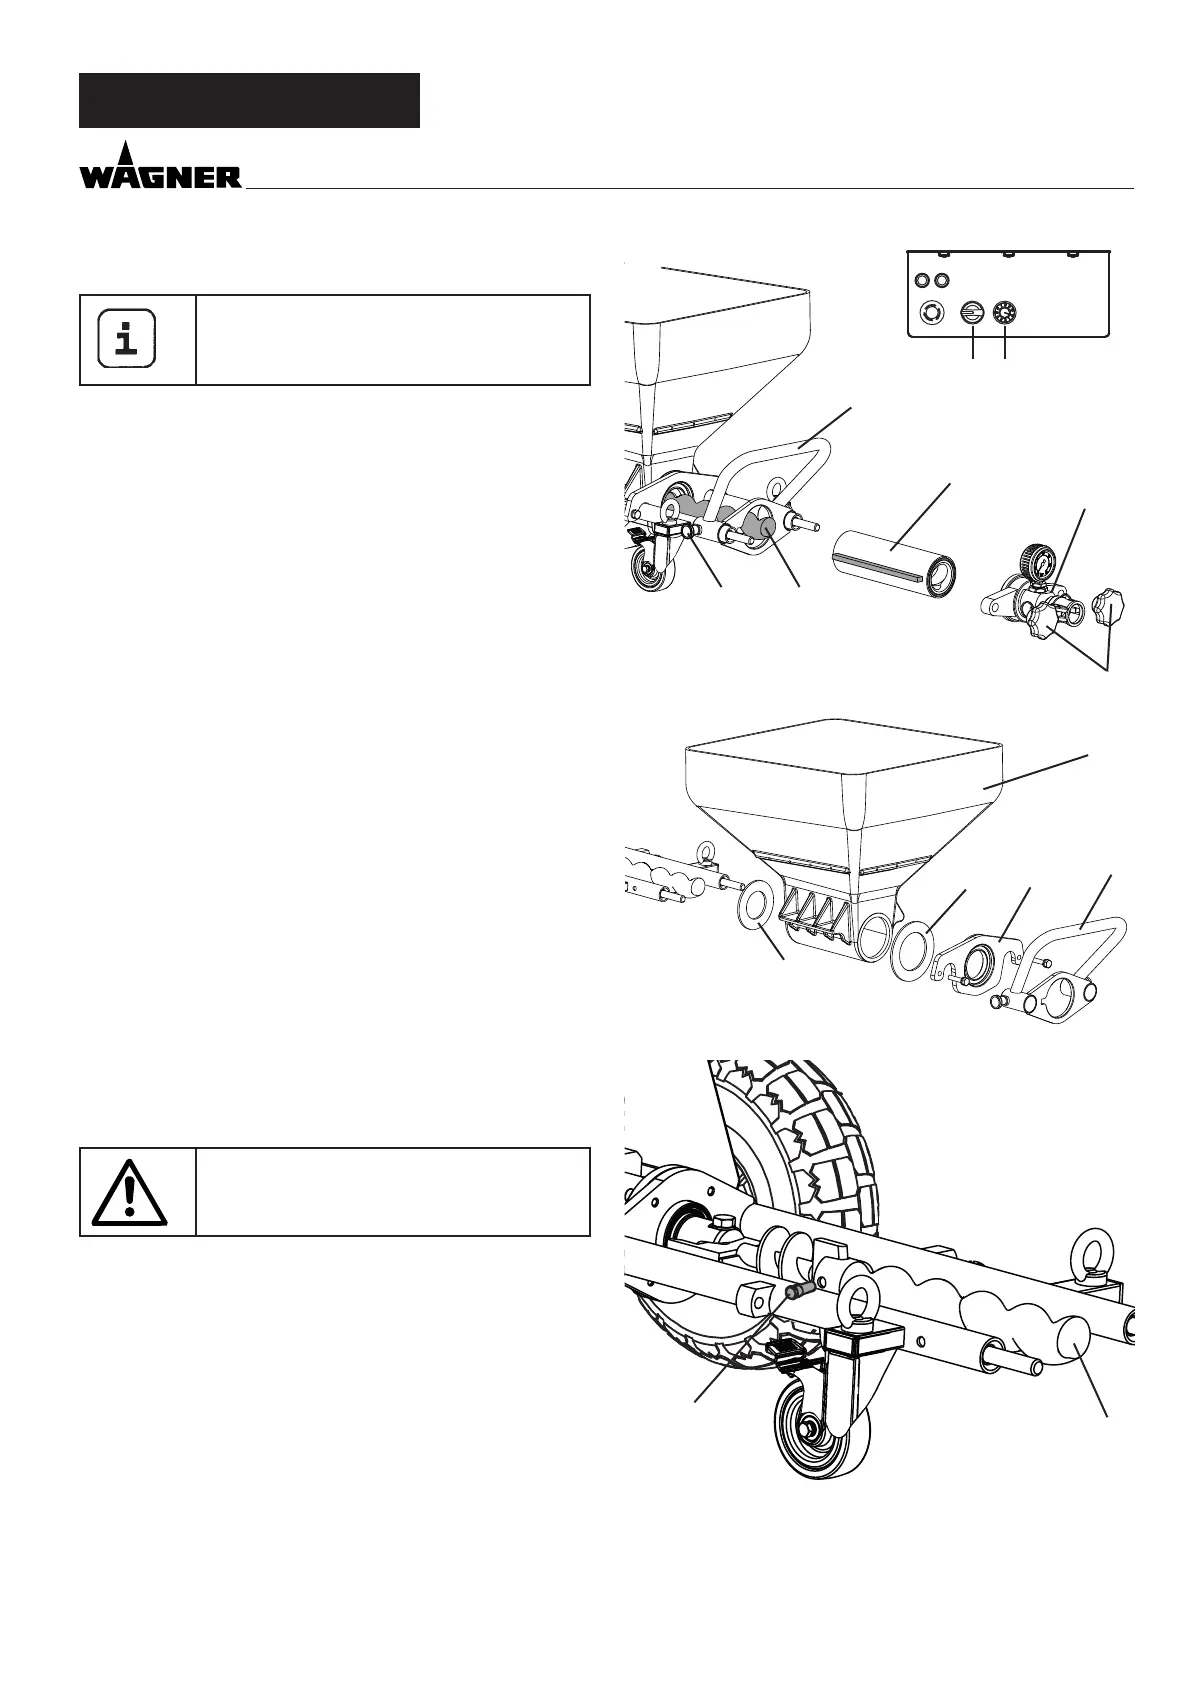
9.5 SEALS
Check the seals on the PC 1025Pro every
month.
• Move selector switch (g. 15, 1) to “A” and set delivery vol-
ume controller (2) to „0“.
• Disconnect mains plug.
• Loosen the ring bolts (3) and remove the outlet unit (4).
• Set delivery volume controller (2) to 1 or 2.
• Connect mains plug to mains power supply.
• Move the selector switch (1) to position „F“. As soon as the
stator (5) is released from the rotor (6), set the selector
switch to „A“.
• Remove the stator (5) completely.
• Disconnect mains plug.
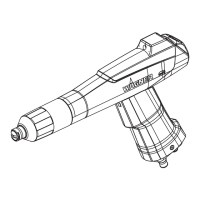
• Pull out the two locking pins (7) and remove the anti-twist
lock (8).
• Remove the ange (9) with a 17-wrench.
• Remove the container (10).
• Check the seal (11,12) and replace if necessary.
• Check the rotor (6) and replace if necessary (see chapter
9.6).
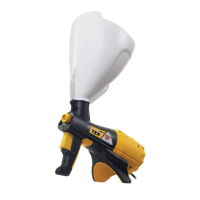
9.6 ROTOR REPLACEMENT FIG. 16
• Loosen xing screw (1) and remove old rotor (6).
• Fit new rotor with new xing screw.
• Glue xing screw with Loctite 243.
Note: use Loctite 243 only.
POWER
ERROR
SPEED
R
A
F
2
1
4
3
o
3
6
5
7
8
8
9
10
11
12
1
6
p