43
VERSION 05/2019
ORDER NUMBER DOC2326960
PEM-X1 CG
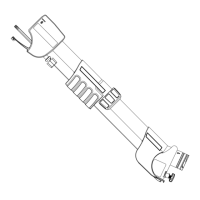
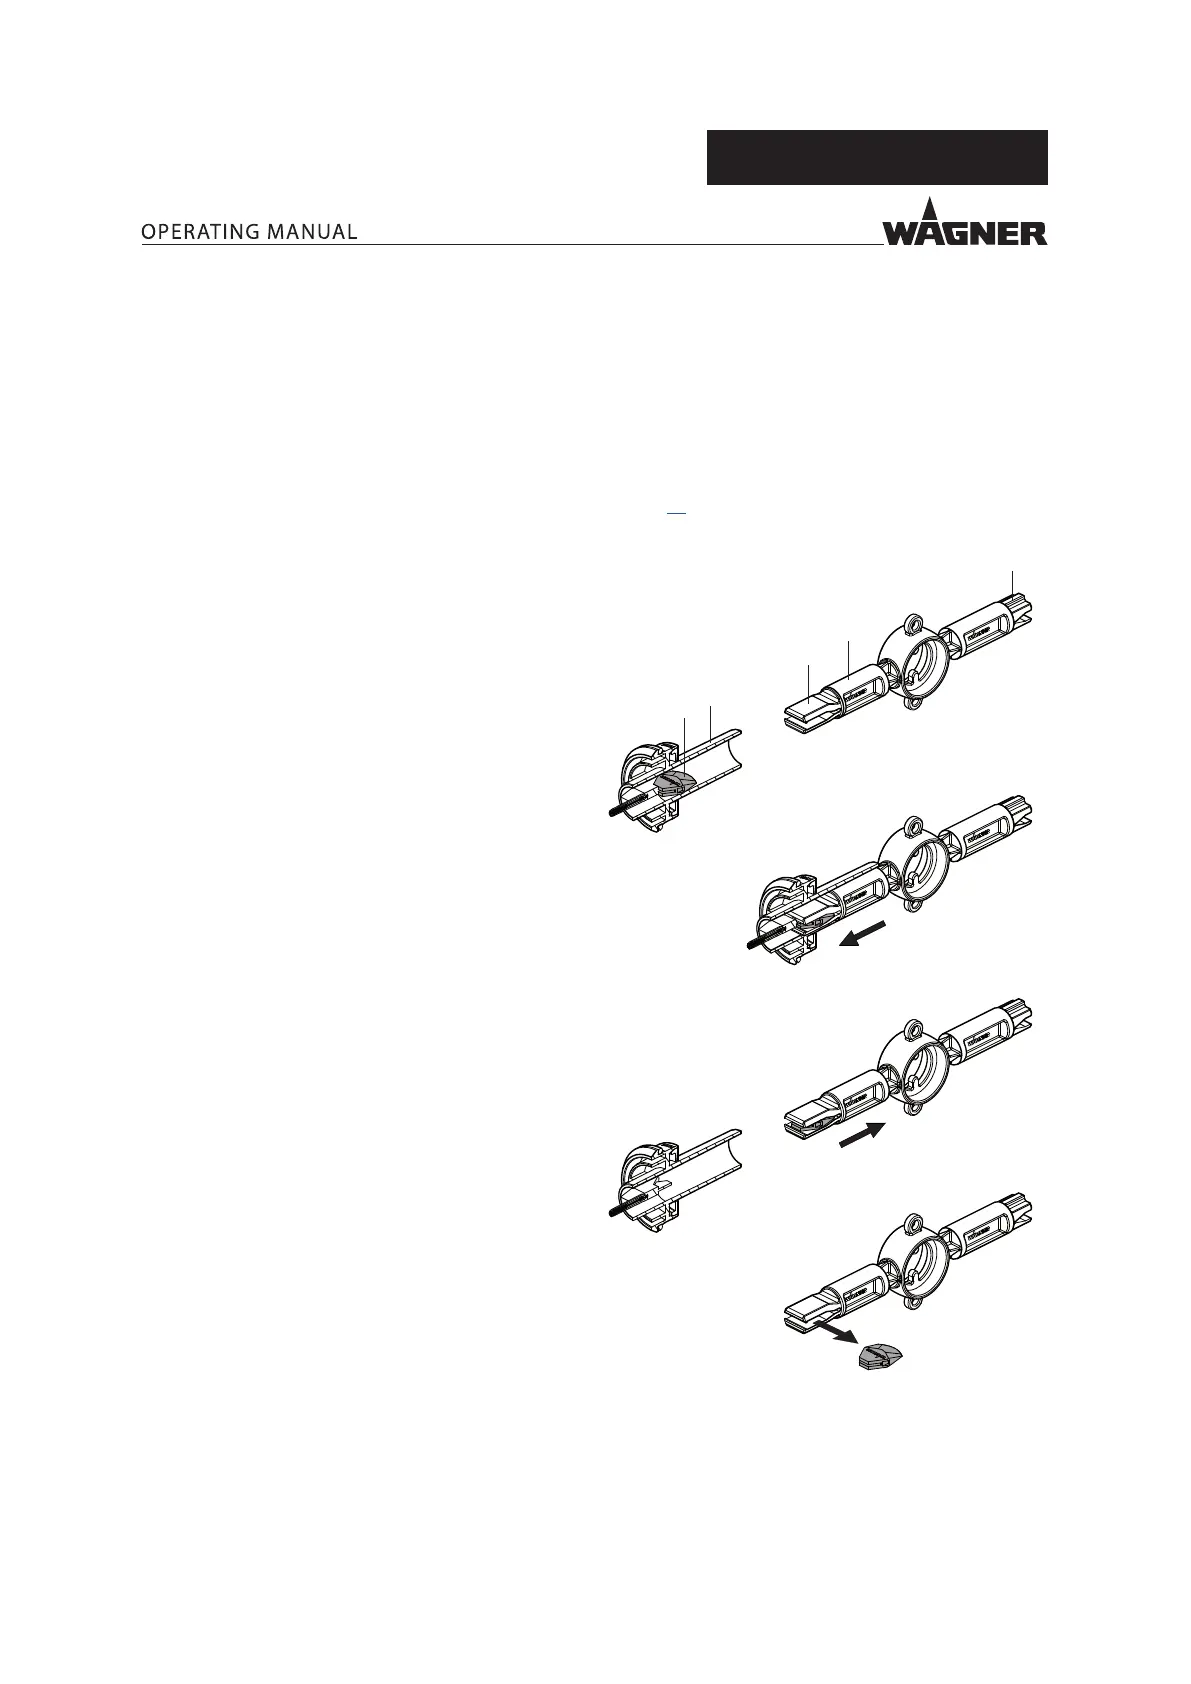
8.6 REPLACING THE PROTECTIVE WEDGE
8.6.1 REMOVING THE PROTECTIVE WEDGE
Note:
A wedge tool is available to prevent the protective wedge from being damaged when
dismantling and inserting.
The wedge tool has a removal side (E) and an attachment side (A). Use the right side for the
corresponding procedure!
You will nd the necessary wearing parts and spare parts in Chapter 13 of this operating manual.
1 Wedge tool
P_01675
2.
1.
3.
2
3
1
E
A
2 Electrode holder (shown with a cut-away view
to improve comprehension)
3 Protective wedge (when positioned)
Procedure:
1. Guide wedge tool 1 into electrode holder 2 up
to stop.
2. Pull protective wedge 3 out of electrode holder 2
using wedge tool 1.
3. Press protective wedge 3 sideways out of wedge
tool 1 manually (without tool).

 Loading...