44
VERSION 05/2019
ORDER NUMBER DOC2326960
PEM-X1 CG
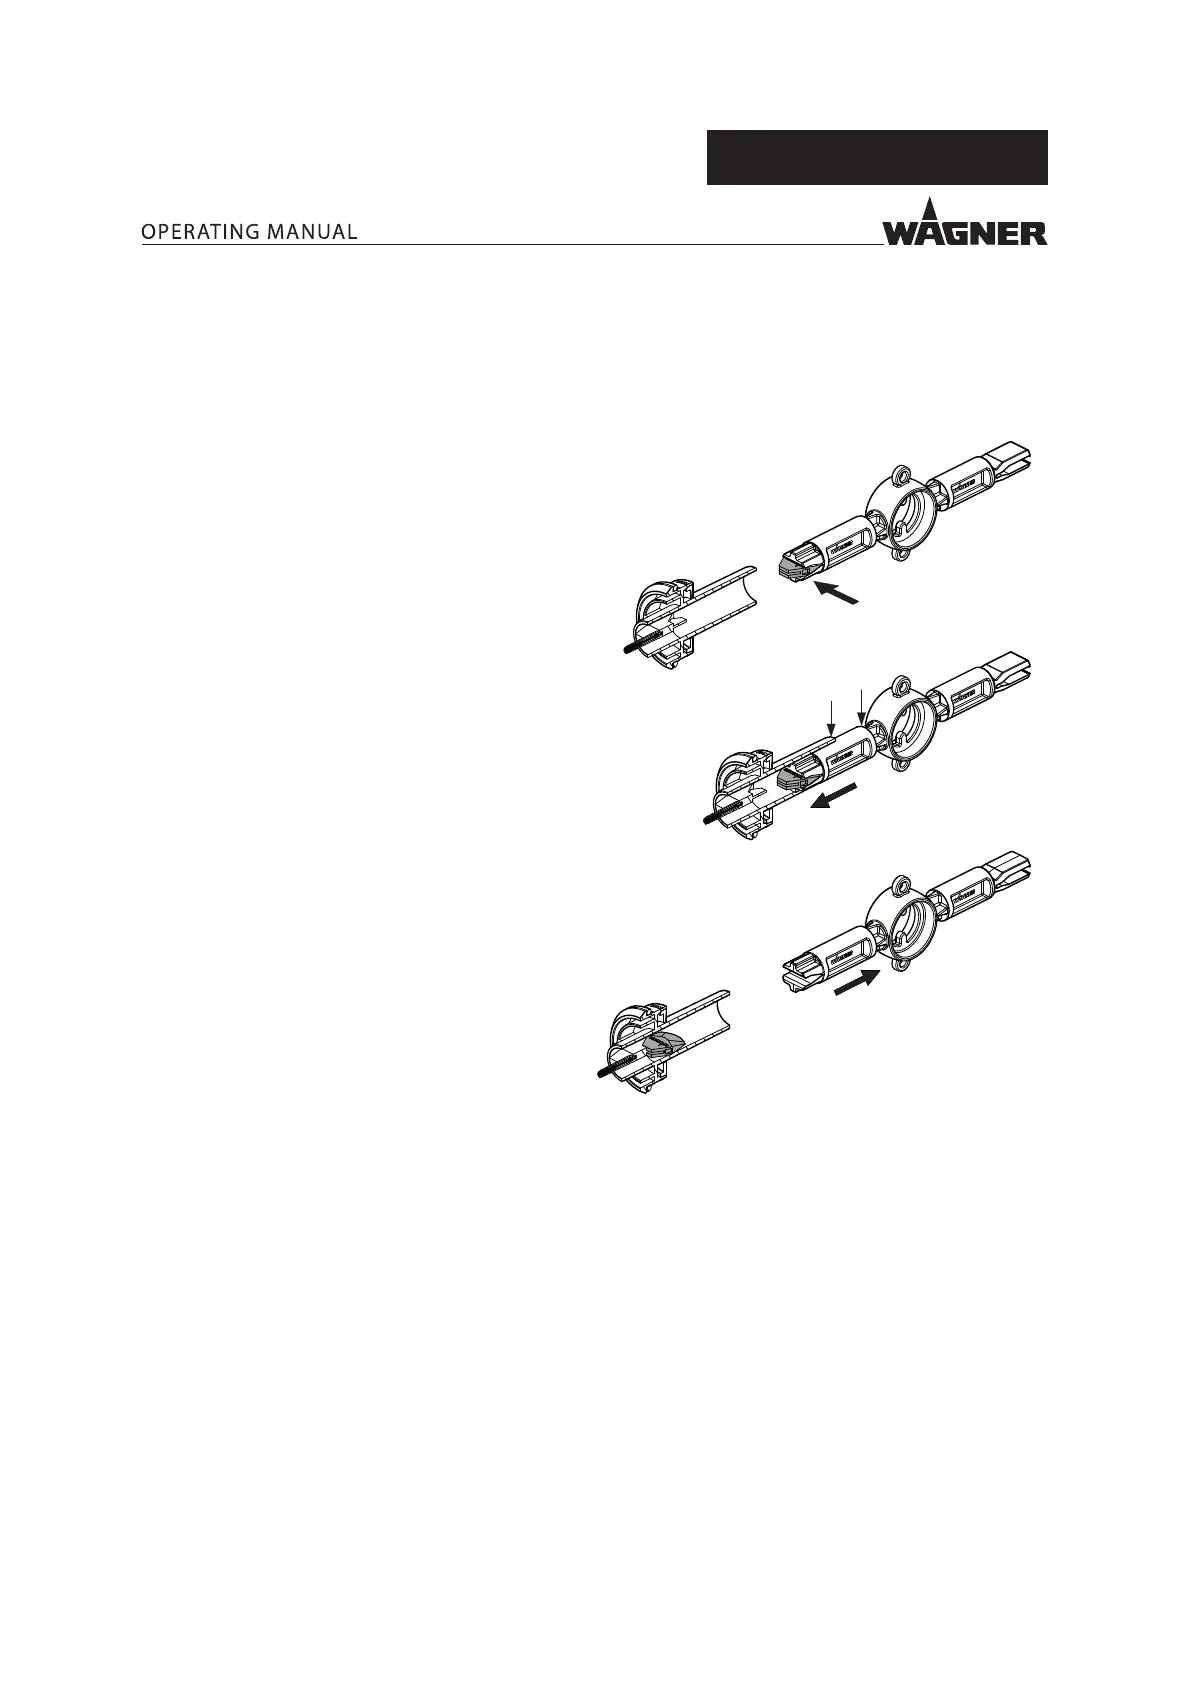
8.6.2 INSTALLING THE PROTECTIVE WEDGE
Note:
The same wedge tool is used to insert the protective wedge.
Procedure:
1. Guide protective wedge into wedge tool.
Y
X
P_01676
3.
1.
2.
2. Insert both parts into opening on electrode
holder up to stop.
If it is not possible to push the wedge tool in as
far as the X mark, rotate the wedge tool a little
until it can be pushed up to the mark.
The mark X must be ush with the Y end of the
electrode holder.
3. The protective wedge is now correctly assembled
and the wedge tool can be pulled out of the
electrode holder.
4. The protective wedge remains inserted in the
electrode holder.
Prior to re-tting, check whether the contact
points on electrode holder and in gun housing
have been thoroughly cleaned so that the
electrode tip is electrically connected to the
high-voltage generator.
5. Mount fan or round jet nozzle with the
corresponding electrode holder.

 Loading...