Load Abrasive
After homing, WAZER Pro will prompt you to check the Abrasive Level. You must first remove the
Abrasive Drop Tube Insert before carrying on. You must refill the Abrasive Hopper before
running every Cut. The WAZER Pro Abrasive Hopper will hold approximately 35lbs (16kg) of
abrasive when full.
WAZER Pro will pause after one hour of run-time to allow you to fill the Abrasive
Hopper and to empty the Used Abrasive Buckets. Failing to fill the Abrasive Hopper sufficiently will
result in a Failed Cut. WAZER Pro does not have a sensor to read the Abrasive Level, so it assumes
that it is filled prior to the start of every Cut. If this is done correctly, WAZER Pro will pause the Cut
before the Abrasive runs low, then prompt you to refill the Abrasive Hopper and continue cutting.
Using an Abrasive that is not specified by WAZER may lead to poor quality and
damage to your machine. WAZER Pro is calibrated to run with the 80 mesh alluvial garnet available
for purchase at www.wazer.com. You must use the Abrasive suggested on the WAZER website.
To load Abrasive:
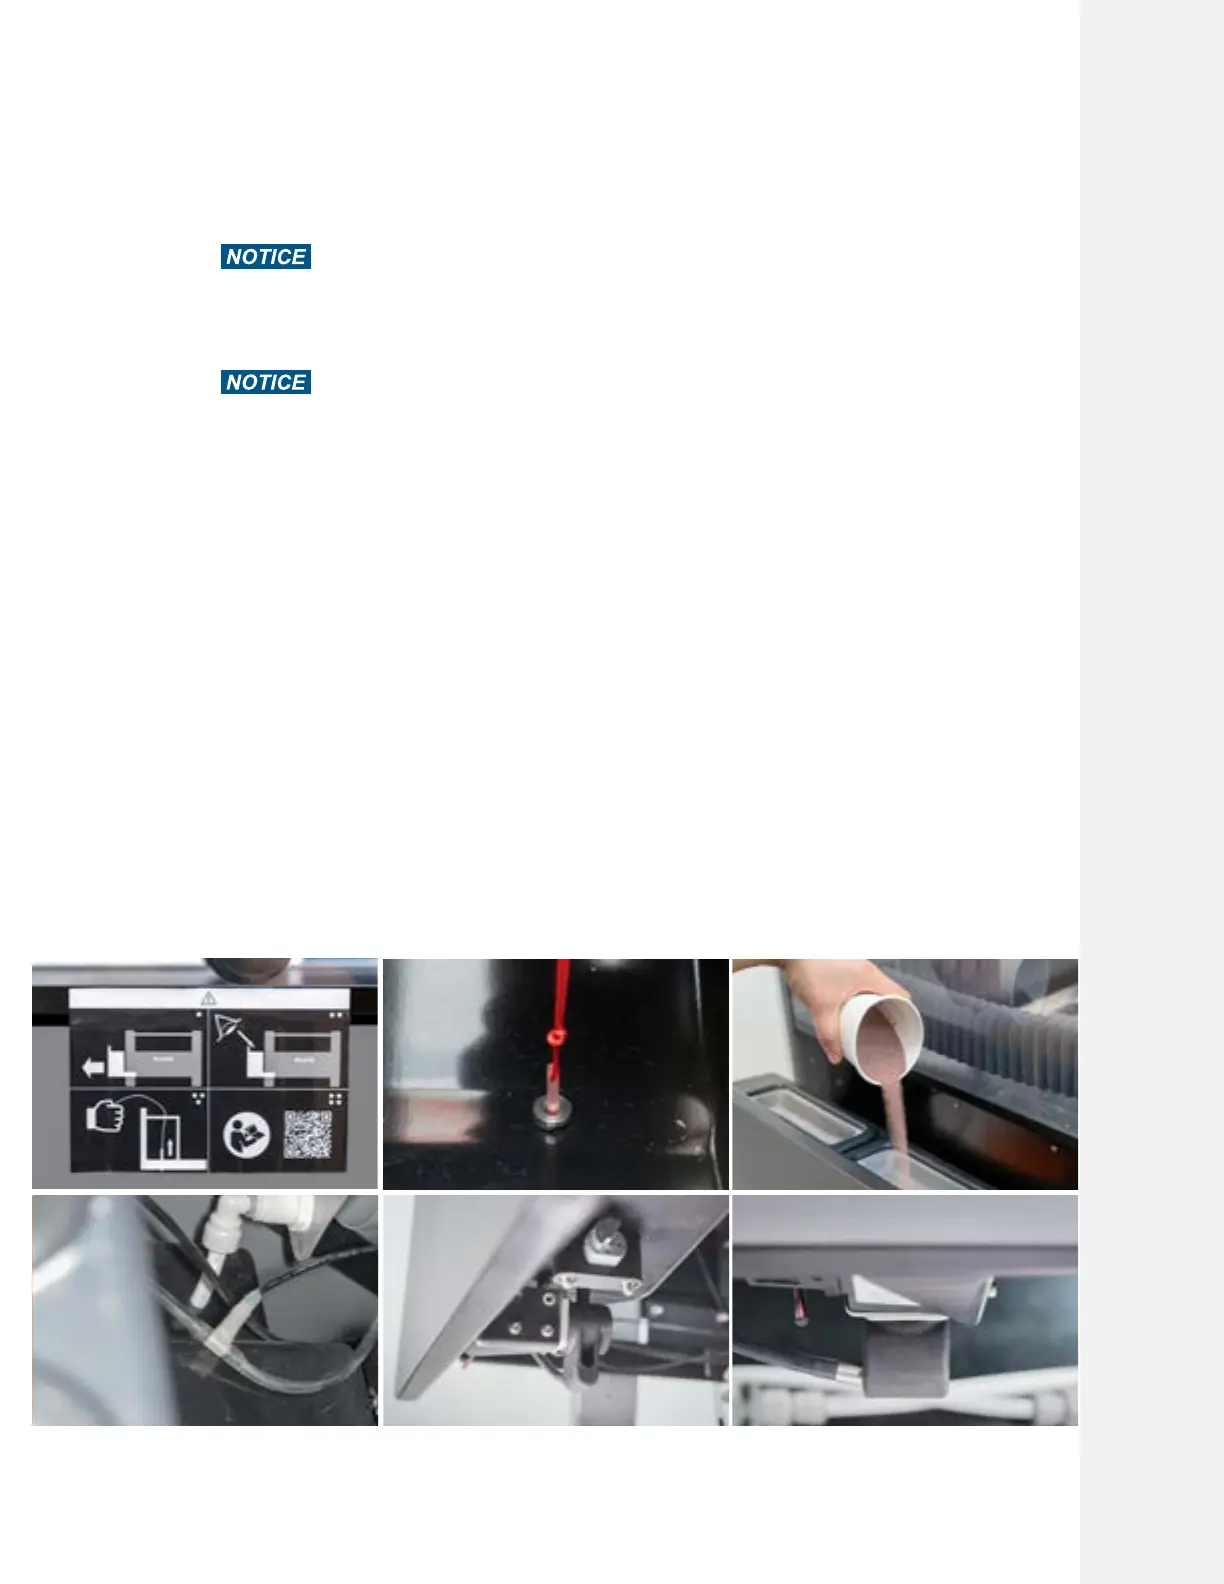
• Pull out the Abrasive Hopper, located on the left side of WAZER Pro.
• Remove the Drop Tube Insert if this is your first time running WAZER Pro.
• Pour the Abrasive through the two screens until the Abrasive Hopper is full. It is critical that you
pour the Abrasive through the screens. If anything other than new and dry Abrasive falls into the
Abrasive Hopper, it can ruin your Cut and require time-intensive maintenance.
• Fill the Abrasive Hopper until you see some Abrasive above the level of the screen on both
sides. Please visually check under the abrasive hopper.
• Conduct a quick abrasive flow check by pressing the plunger on the pinch valve. Make sure the
abrasive hose, abrasive rubber catcher, pinch valve and backflow sensor are in the correct
order
• Close the Abrasive Hopper and confirm task completion by selecting OK on the Control Panel.
Cutting With WAZER Pro |
SECTION 5
49