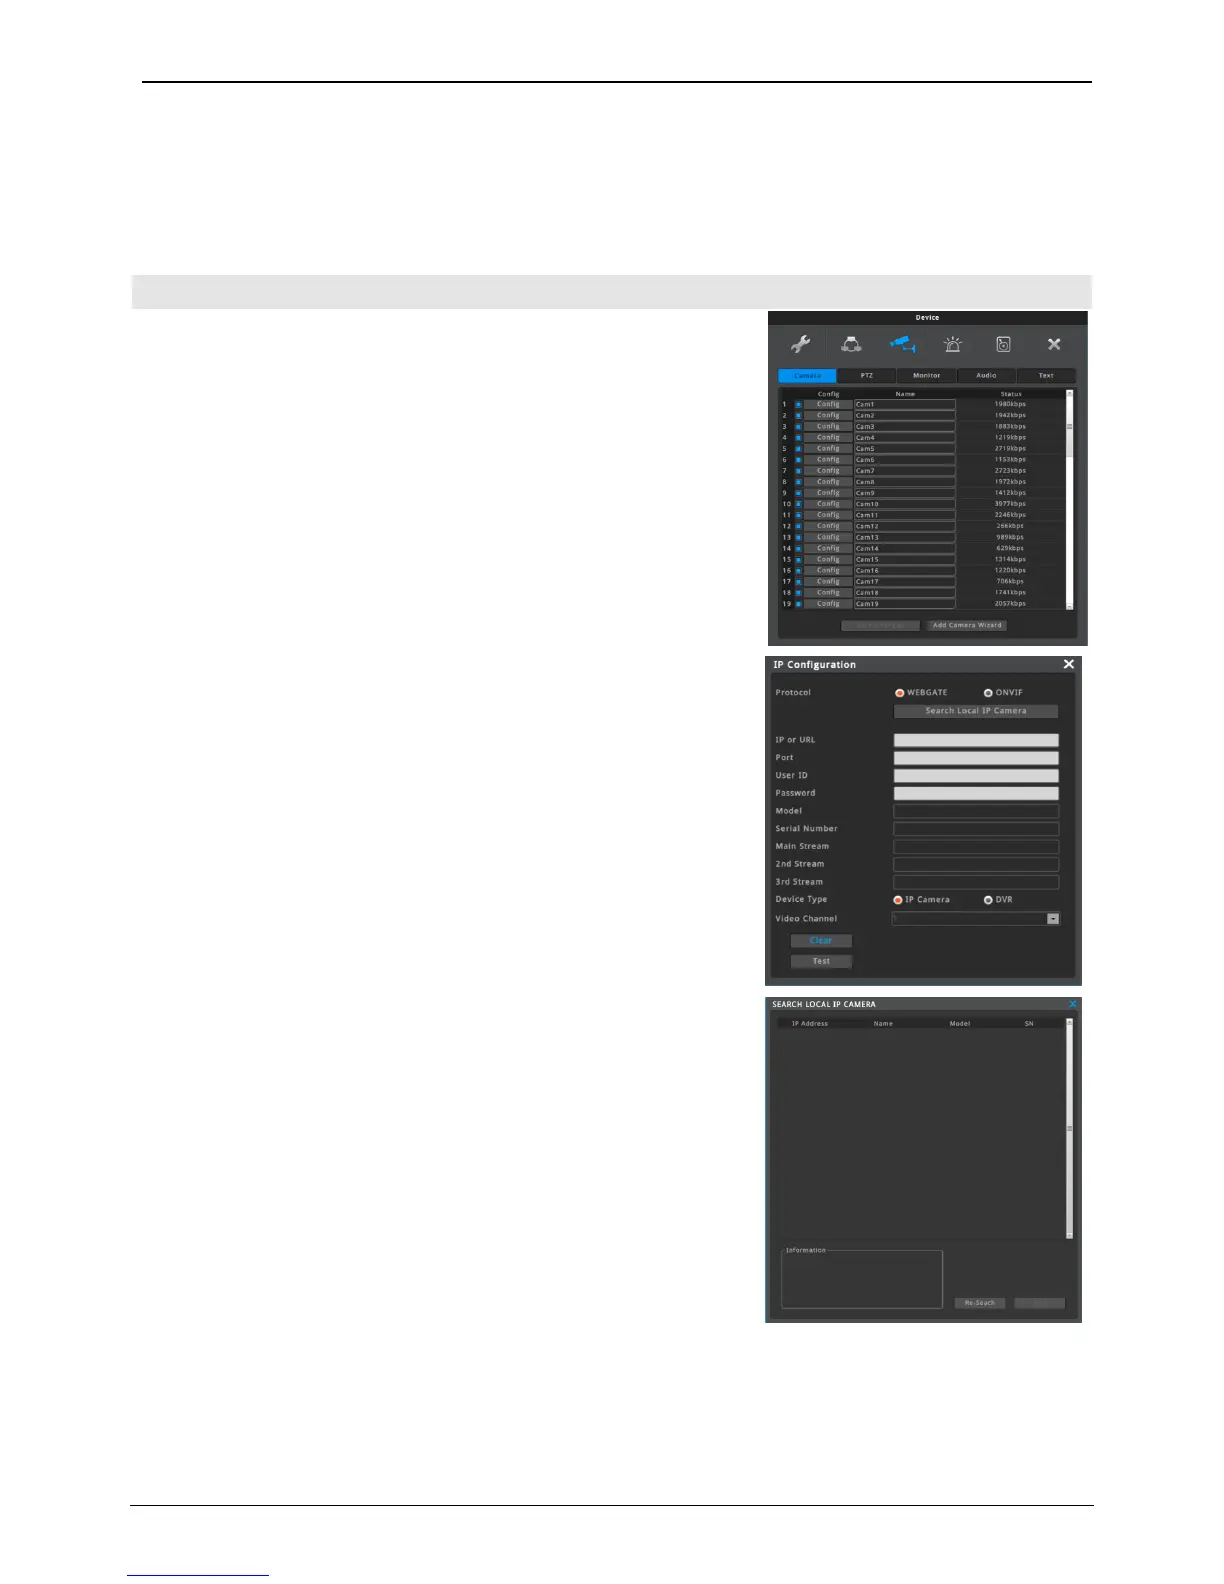
In Device setup, user can configure camera, monitor, audio, text, serial which are connected to NVR.
Conditions on IP camera connected to NVR can be set.
Each channel’s config and name can be configurued, and IP camera’s
connection status is shown.
<Note>
1. Please use Category 6 or above for LAN cable.
2. If IP camera is connected to PoE port of NVR, please set the IP
camera’s IP address be in the same subnet with IP Address2(PoE) of
NVR.
3. It is highly recommended that shield cable must be used for PoE
port.
IP Configuration
IP camera or other DVR’s channel can be configured by clicking
[Config] menu.
To register IP camera:
1. Select Protocol.
2. Click “Search Local IP Camera” button. It will show the list of IP
camera and NVR connected in the same network.
3. Click the searched unit and click the “Insert” button. Or user can
configure the IP address, port number, user ID and password
manually.
4. Click the “Test” button to check login.
- Model name, serial number, stream information are displayed.
- If failed, please check the configurations.
5. If login succeed, close the window.
6. Click “Save Changes” button to apply.
* “Clear” button can erase all configurations at once.
<Note>
1. IP camera registration
1) Webgate’s IP camera: select WESP
2) IP camera supporting Onvif: select Onvif
2. DVR’s channel Registration
1) Supporting FW
(1) Lower than FW 8.2 – max 10 channels when no user is connected.
(2) FW 8.2 and above version – All channels of DVR
2) Only WESP can be selected.
3) Frame rate can be decreased by the number of connected users.