14.4
M6 Bolt x 40mm Long
Ensure Bolt Passes Through The
Clevis Block, The Shouldered Rod End
Bushes & The Rod End Before Being
Secured with A Washer and Nyloc Nut
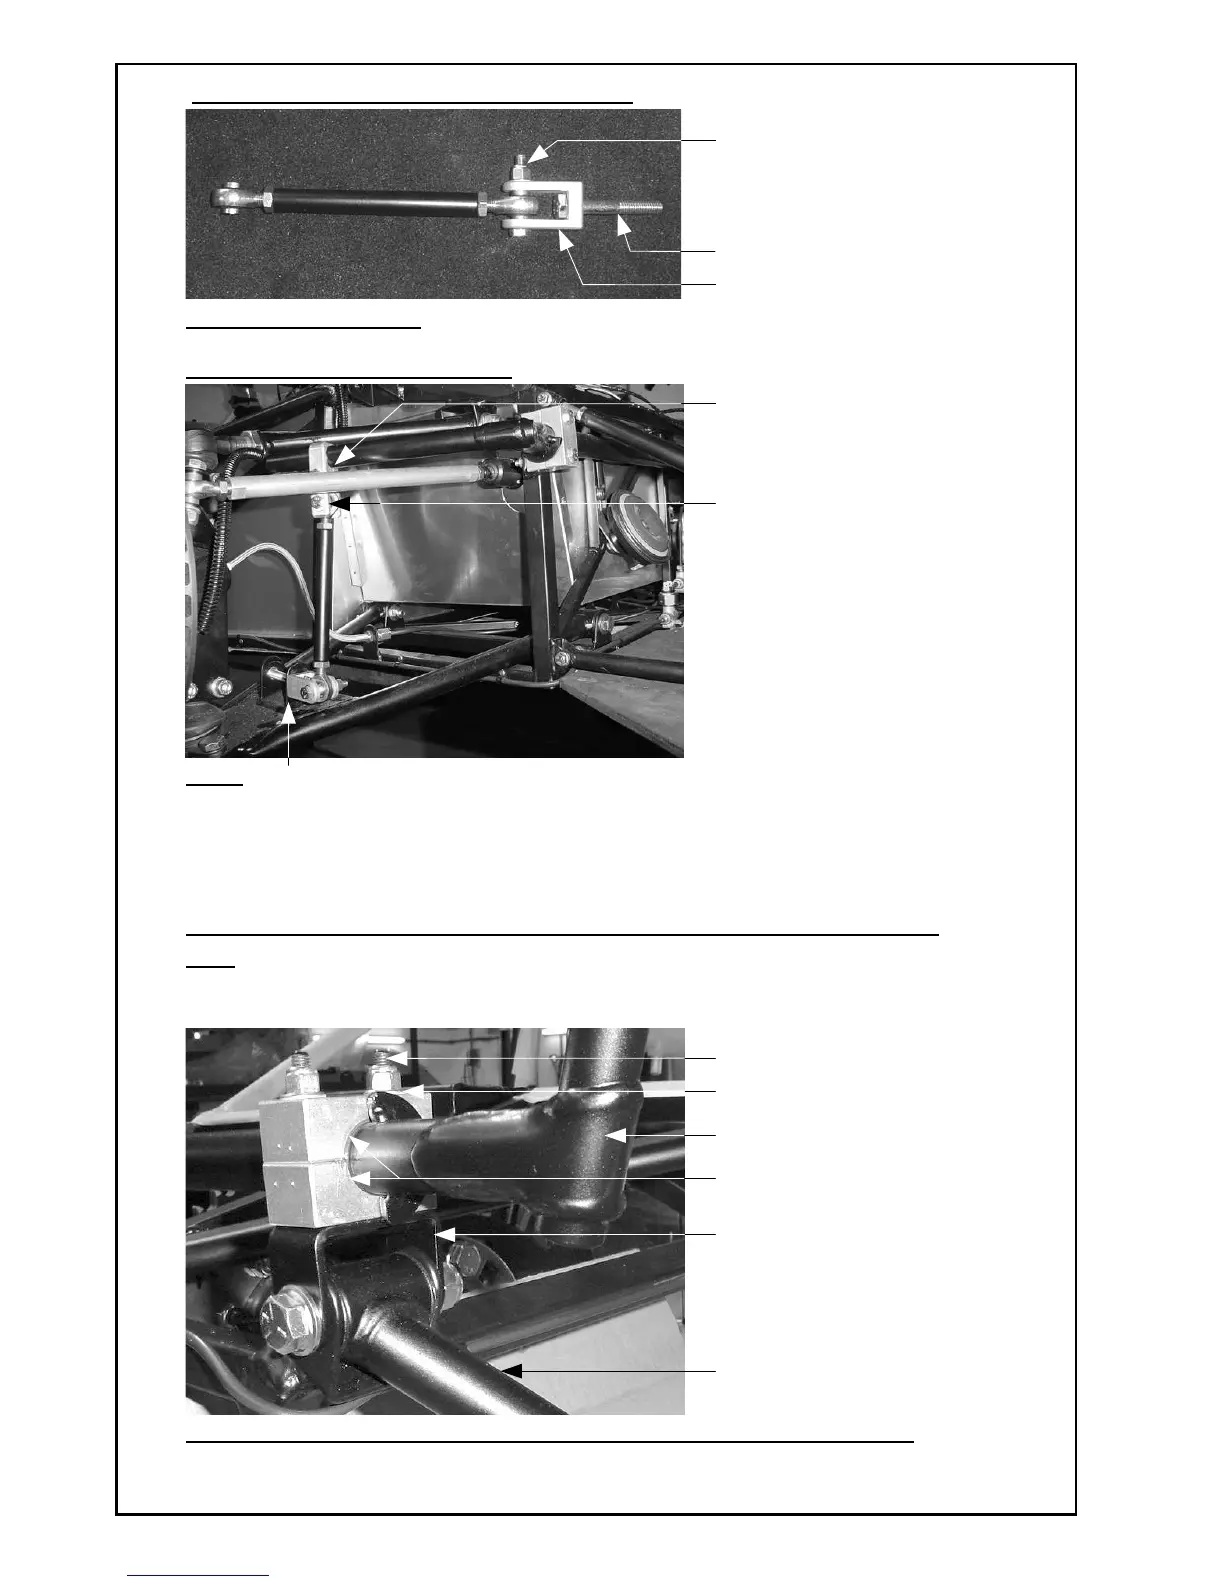
Step 3: Assemble Lower Front Clevis Block
Assemble 1 Pair For Front
Step 4: Install Front Drop Links
NOTE
: DO NOT fit the Lower Bolt Into the Lower Suspension Mounting Bracket At This Stage.
(The Picture Above is to show how the Lower Front Clevis Block will fit later.)
DO NOT fully tighten any of the Nuts at this Stage as everything will be finally adjusted
during the Car Set-Up Stage.
Step 5: Assemble Rear Anti Roll Bar Mounting Bracket To Blocks And Bar
Note
The Rear Anti-Roll Bar Assembly Can Be Completed On or Off The Car.
However, the Anti Roll Bar Itself Cannot Be Fitted To The Car Until The Rear
Upper Wishbones Have Been Installed As Shown In Section 15 - Step 2.
View Showing Fitting Of Roll Bar After Rear Upper Wishbone Has Been Installed
Fit 2 x M6 Bolts x 40mm Long
Through Upper Clevis Block
Ensure That The Lower Bolt Passes
hrough The Upper Clevis Block, The
Shouldered Rod End Bushes and The
Rod End Before Being Secured with