PROCEDURE
1 Isolate the defective cylinder from the cooling water system.
2 Make sure that there is no air spring air pressure.
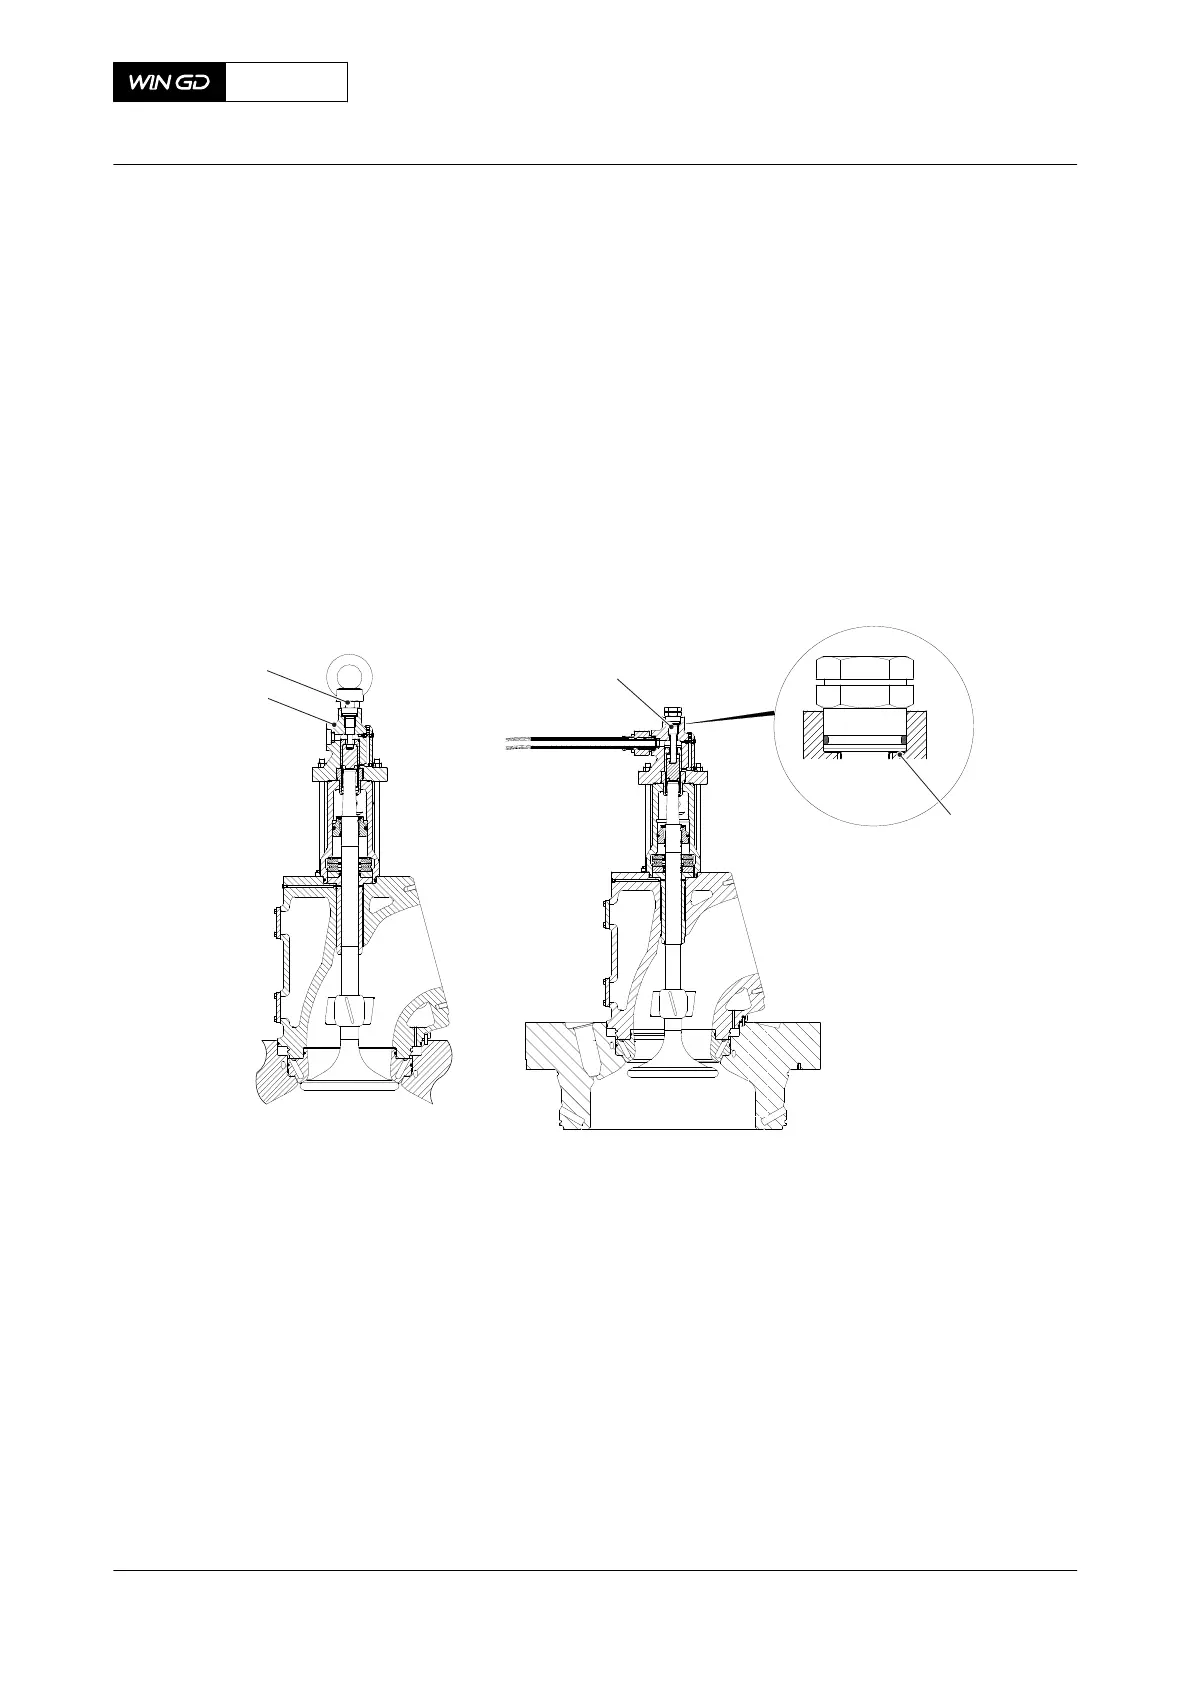
3 Lock the exhaust valve in the open position as follows:
3.1 Remove the damper (002, Figure 10-4) from the top housing (001).
3.2 Make sure that you do not lose the shim(s) (004).
NOTE: The shim(s) must stay in position when the pressure element is installed.
3.3 Apply a thin layer of oil to the thread of the pressure element (003).
3.4 Install the pressure element (003).
Fig 10-4 Exhaust valve with pressure element
Legend
001 Top housing 003 Pressure element
002 Damper 004 Shim
4 Cut out the defective cylinder from the injection, refer to section 10.8 Temporary cut out a
defective injection valve.
5 Disconnect the electrical connection to the related exhaust valve control unit (VCU).
6 Disconnect the control signal connection from the related starting air valve.
7 Repair the fault as soon as possible, refer to the Maintenance Manual.
X92-B
AA00-0000-00AAA-662B-A
Operation Manual Temporary isolate a cylinder with cooling water leakage
Winterthur Gas & Diesel Ltd.
- 359 - Issue 002 2021-11
 Loading...