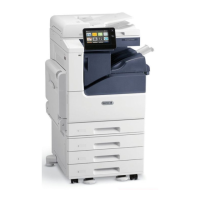
2. To select a finishing option, click the arrow to the right of the Finishing field, then select an option.
3. To select the output tray, click the arrow to the right of the Output Destination field, then select an option.
• AAuuttoommaattiicc: This option determines the output destination based on the number of sets and the stapling
option selected. The printer sends multiple sets or stapled sets to the finisher output tray.
• CCeenntteerr TTrraayy: This option selects the output tray in the middle of the Offset Catch Tray, the Office Finisher,
or the Business Ready Finisher.
• CCeenntteerr BBoottttoomm TTrraayy: This option selects the output tray on the bottom of the Offset Catch Tray.
• FFiinniisshheerr TTrraayy: This option selects the output tray on the Integrated Office Finisher.
• LLeefftt TTrraayy: This option selects the output tray on the left side of the printer.
• RRiigghhtt TTrraayy: This option selects the output tray on top of the Office Finisher.
• RRiigghhtt TToopp TTrraayy: This option selects the output tray on top of the Business Ready Finisher.
• RRiigghhtt MMiiddddllee TTrraayy: This option selects the output tray that is in the middle of the Business Ready Booklet
Maker Finisher.
• RRiigghhtt BBoottttoomm TTrraayy: This option selects the output tray that is on the bottom of the Business Ready
Finisher when the optional Booklet Maker is not installed.
4. To send the job to the printer, click PPrriinntt.
Saving a Set of Commonly Used Printing Options for Macintosh
You can define and save a set of options, so that you can apply them to future print jobs.
To save a set of printing options:
1. With the document open in your application, click FFiillee >> PPrriinntt.
2. Select your printer from the Printers list.
3. Select the required printing options from the lists in the Print dialog box.
Note: To see all printing options, click SShhooww DDeettaaiillss.
4. Click PPrreesseettss >> SSaavvee CCuurrrreenntt SSeettttiinnggss aass PPrreesseett.
5. Type a name for the printing options. To save the set of options in the Presets list, click OOKK.
6. To print using these options, select the name from the Presets list.
UNIX, LINUX, AND AS/400 PRINTING
To provide printer spooling and network print server functionality, UNIX-based printing uses LPD/LPR port 515 or lp
to port 9100. Xerox printers can communicate using either protocol.
Xerox
®
Printer Manager
Xerox
®
Printer Manager is an application that allows you to manage and print to multiple printers in UNIX and
Linux environments.
Xerox
®
Printer Manager allows you to:
Xerox
®
EC8036/EC8056 Color Multifunction Printer User Guide 149
Printing
 Loading...


