TCP/IP
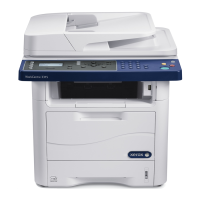
Xerox WorkCentre 3315DN/3325DN/3325DNI
System Administrator Guide
28
TCP/IP
These instructions show you how to configure the following via Internet Services:
• TCP/IP v4 and v6
• Domain Name
• DNS
• Zero Configuration Networking
The machine supports TCP/IP versions 4 and 6. IPv6 can be used instead of or in addition to IPv4.
IPv4 and IPv6 settings can be configured directly at the machine user interface, or remotely, via a web
browser using Internet Services. To configure TCP/IP settings using Internet Services, refer to Configure
TCP/IP Settings using Internet Services on page 30.
Configure Static IPv4 Addressing using the Machine User Interface
Information Checklist
Before starting please ensure that the following items are available and/or the tasks have been
performed:
• Existing operational network utilizing the TCP/IP protocol.
• Ensure that the machine is connected to the network.
• Static IP Address for the machine.
• Subnet Mask Address for the machine.
• Gateway Address for the machine.
• Host Name for the machine.
Procedure
Enter a Static IP Address:
1. Press the Machine Status button on the control panel.
2. Press the Up/Down arrow buttons to highlight Network Settings; press OK.
3. Enter the Administrator Password using the alphanumerical keypad. The default is 1111. Refer to
Administrator Access on page 19.
4. Press the OK button; the Network Settings menu displays.
5. Press the Up/Down arrow buttons to highlight TCP/IP(IPv4); press OK.
6. Press the Up/Down arrow buttons to highlight Static; press OK.
7. Press the Up/Down arrow buttons to highlight IPv4 Address; press OK.
8. Enter the IP Address using the alphanumerical keypad; press OK.
9. Enter details for Subnet Mask using the alphanumerical keypad; press OK.
10. Enter details for Gateway using the alphanumerical keypad; press OK.
11. The Saved screen will display and return to the Network Settings menu.

 Loading...


